[Disclaimer: This post contains affiliate links. Purchasing products through these links does not cost you any extra. Thank you for supporting my blog through your patronage and through affiliate links!]
{My sweet boy at the tender age of 1}
Here's what you'll need:
- Blank T-shirt
- Felt
- Thread
- HTV & Silhouette
- Scissors and a Needle
- Paper & Pencil
Here's how to make it:
I didn't take step by step photos since I made this a couple years ago but it's so easy you wont need them.
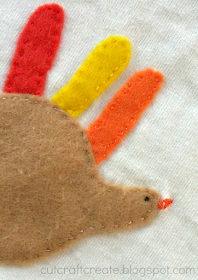
[Step 1] Trace your child's hand on the piece of paper. Cut around the outside of the design and then cut the "fingers" off (keep them in order so you remember which is which!)
[Step 2] Using the paper hand/fingers that you just cut as a pattern, cut a hand from brown felt and fingers from the colored felt. This will be the body & feathers of the turkey.
[Step 3] Hand stitch the turkey parts onto your shirt. This takes a little longer but I like the look of it over machine stitching for this craft. I recommend using thread that matches the felt for each piece. I do not recommend using heat-n- bond or fabric glue (non sewing alternatives) with felt.
[Step 4] Using thread, make legs, a beak and an eye.
[Step 5] Using your Silhouette machine, cut out your child's name and the year (or age) out of HTV. Don't forget to mirror it before you cut when working with HTV! If you don't have a cutting machine, iron-on letters (link in 'materials') will work just fine!
That's it!
Every time I see this shirt I think back to the first year he was able to enjoy a Thanksgiving feast and how much fun he was to watch! Those little hands have grown but he'll always be my baby and I'm so glad I have this memento to keep forever.


No comments:
Post a Comment