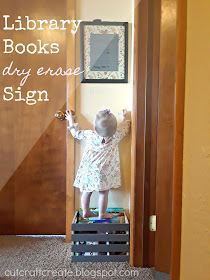
Because we have books in every corner of our house, car and lives I needed a place to keep library books organized and separated. This has become especially true since I've started hitting up the library's book sales. Even though I black out the labels, I still occasionally try to return a book that I bought from them! I've made my own picture frame dry erase board before and I thought I'd take the same concept and make myself a little library books reminder board!
I already had this frame because it's such a nice size and shape I was saving it for something! Head to your local thrift store to find a big frame for cheap. It doesn't matter what is on the mat or photo area because it'll be covered anyways!
Here's what you'll need:
It's so easy to make!
First, remove the mat from the frame and use it as a pattern on the wrapping paper. When cutting, make sure to give an extra half inch on each side to allow the wrapping paper to fold around the mat after it's cut.
Cut it out.
Glue down the outside edges of the wrapping paper to the mat. For this type of project, stick glue works just fine. Cut a large "X" out of the middle and trim the wrapping paper down so that you have just enough to fold around the mat on the inside as well.
Glue it down.
Next, you need to make the actual sign. I would have printed up something a little nicer but my printer was out of commission (as is often the case) and I wanted it done NOW so I wrote it out by hand. It looks pretty good for handwritten and it gets the job done. If you have easy access to a printer though, you might want to type something up.
Glue it down centered in the hole of the mat. (add tape if you want it extra secure)
Put the back of the frame back on and that's it! My son had fun drawing on it immediately. Luckily I went to erase it shortly after because I didn't realize that he was drawing with a sharpie. Oops! Note: Permanent marker is not easily erasable! Use dry erase ones for daily use!
I wish I would have made my writing in black instead of grey. I thought it'd be better in making the dry erase marker stand out but its hard to see in pictures. (It's visible in person). Otherwise, I LOVE how this project turned out. We use it every week! Bonus- my kids love it too!


Such a cute and for me, necessary idea! Love it!
ReplyDeleteThank you! It definitely helped us be more organized at our house too!
DeleteSo cute! Love the idea of keeping track of the books and great that you did a bit of craft to create a pretty way to record it!
ReplyDeleteThank you! Why just be organized when it can be pretty too ;)
DeleteThis is such a fun and practical idea—love the creativity with the dry erase frame for tracking library books! If your love for children's books ever inspires you to write one, you should check out professional book writing services in UK to bring your story to life.
ReplyDelete