Saturday, August 16, 2014

Big News + Giveaway!

Hello! Hello!  It's my first time back in a while and I wanted to do some explaining as to why I have been gone.  Sure, life is busy (isn't it always?) but there has been a lot bigger stuff going on lately...


Yep... I'm pregnant!  This picture was taken a few weeks ago but I'm a little over 30 weeks now.  Needless to say, my husband and I have been busy working hard to prepare for this new addition.  In our house, that not only means picking out a crib and painting a room. Ooooh no, it meant clearing out an entire room that has served as our "catch all" for everything we own that didn't quite have a place since we moved into the house.  It also meant cleaning and organizing (and attempting to develop a "be better at cleaning and organizing in the future" plan) every other room in the house so that we wouldn't fall into this messy trap again.

It's been busy.  But, it's been good.  We're finally getting things wrapped out nursery wise and I've been going through all the baby stuff that has been given to us already.  I have also gotten started on making some of the baby items that I knew I was able to make and prefer to just make myself.

That's why...

I'm doing a giveaway! 

While I'm over here making baby goods I might as well give some away to share some of this baby love that is just oozing all over the place.


I've been making burp cloths for years but just got started on these pacifier clips.  I'm also going to throw in a top-secret "surprise" gift as well!

Here's what you stand to win:

1. A burp cloth in the fabric of your choice.  My BC's are made with snuggle flannel (super soft), terry cloth (super absorbent) and are cushioned with a thin layer of batting in the middle.  They are finished with a top stitch along the edge and come in a variety of adorable fabrics!

2. A pacifier clip in the fabric of your choice.  These come with a standard mitten clip end and stretch cord elastic to attach to your baby's pacifier.

3. Surprise gift!  If you win, just let me know a few facts about the baby who will be receiving these gifts such as gender (if you know... we're not finding out with ours!) name, nursery theme or other color/patterns that will be common in the nursery.

{Patterns of burp cloth}
I have a variety of snuggle flannel at home that you can choose from if you win.  Here are a few "themes" I have already made:

 
 Seriously, how cute are these little foxes?  Although this is not our theme, I think we have registered for at least half a dozen fox themed items so far.  Plus- they're wearing scarves... adorable!


My husband coaches track and helps out with cross country as well.  Although I'm only a runner if some wild animal is chasing me for food (seriously... no running here), I thought it would be cute for baby S. to sport some runner love while we hang out at meets with daddy.


There's also fun prints (check out the fun colors in this science-y print!) and classic beauty prints.  I love that creme with gold dots so much I bought several yards of it.  I plan to make a blanket for the baby out of it- simple and perfect.

Here's a few more prints that I have that you can choose from as well:

 Some nature love, puppy love or the ever-classic dinosaur!

...ooooor any of these.  We've got woodland critters, bugs in jars, all boy, purple chevron, under the sea, sketch animals, blue and green dino, animal friends and brown animal party.

Each burp cloth has a terry cloth backing.  Depending on the snuggle flannel you choose, the back color may vary.  If you specifically want white over a brighter color (like pink, blue, green, etc), please let me know.


{What about the pacifier clip?}

If you are interested in one of the above snuggle flannel prints, I would be happy to make a pacifier clip out of any of them, just keep in mind that the large prints will be too big to see!  Otherwise, let me know a color or pattern that you like and I will do my best to find a correlating fabric.


Loving that orange leaf fabric? It's the same fabric my mom used when she made some adorable booties for our "pregnancy reveal" photo! Since we don't know the gender and our baby is born in the fall, what better than some orange, creme and brown leaves?!


Excuse the color difference. The reveal photo above was edited with a filter on it. Thanks again mom!

{Enter to WIN!}
Enough of my talking, let's get to the giveaway! Use the widget below to enter the contest. Remember that for every task completed you earn and extra (or 2 extra) entries, so complete them all for the best chance of winning!  A few of the options can be done EACH DAY so don't forget to come back every day this week. Contest ends on Sunday, August 24, 2014 at 12:00 AM EST. The winner will be chosen on Sunday, August 24, 2014 at 5:00 pm EST by the random generator at Rafflecopter.com. I will attempt to contact the winner within 24 hours to claim their prize. If no response is found, a new winner will be chosen on Wednesday August 27, 2014. No purchase necessary and the contest is open to anyone. Personal information will not be sold or shared.


a Rafflecopter giveaway Happy Crafting,
Kelsie Ann
 

Saturday, June 28, 2014

My First Ever Quilting Experience

Okay, so here's the deal:  I don't quilt.  I sew.  I sew outfits, I sew decorative items, I sew burp cloths and other baby items, but... I do not quilt.  When I found out my cousin (who is practically a sister, let's admit) was going to have a baby, I knew I had to learn how to- you guessed it- quilt.


I had hoped that this baby quilt would be the start of my new found love for quilting.  After all, my husband loves those quilted comforters for the bed and I think all the ones in the store are u-g-l-y.  Maybe a new hobby could result in a win-win situation for us.  I will let you in on a secret- it didn't.  This quilt took me around a year to finish, not because it was difficult but because I did not focus on it and just GET IT DONE.  I'm proud to say that it is done now, in the hands of my little "nephew" Ethan and that he will know his aunt Kelsie must really love him because he owns the only quilt she will ever make.

Don't let me deter you from quilting, everyone has their "things".  Did you know I also have some amazing scrapbook pages but crash and fail when I try to make cards?  Funny, isn't it?  Oddly enough, the part I struggled with the most in making this quilt was not the actual top quilting but just sewing the pieces together.  This pattern is perfect for a beginner quilter because it only uses square and rectangle shapes and a very basic quilting design.  I even left off the binding and finished the edges myself.

Aaaanyways, let's get on to the pictures!


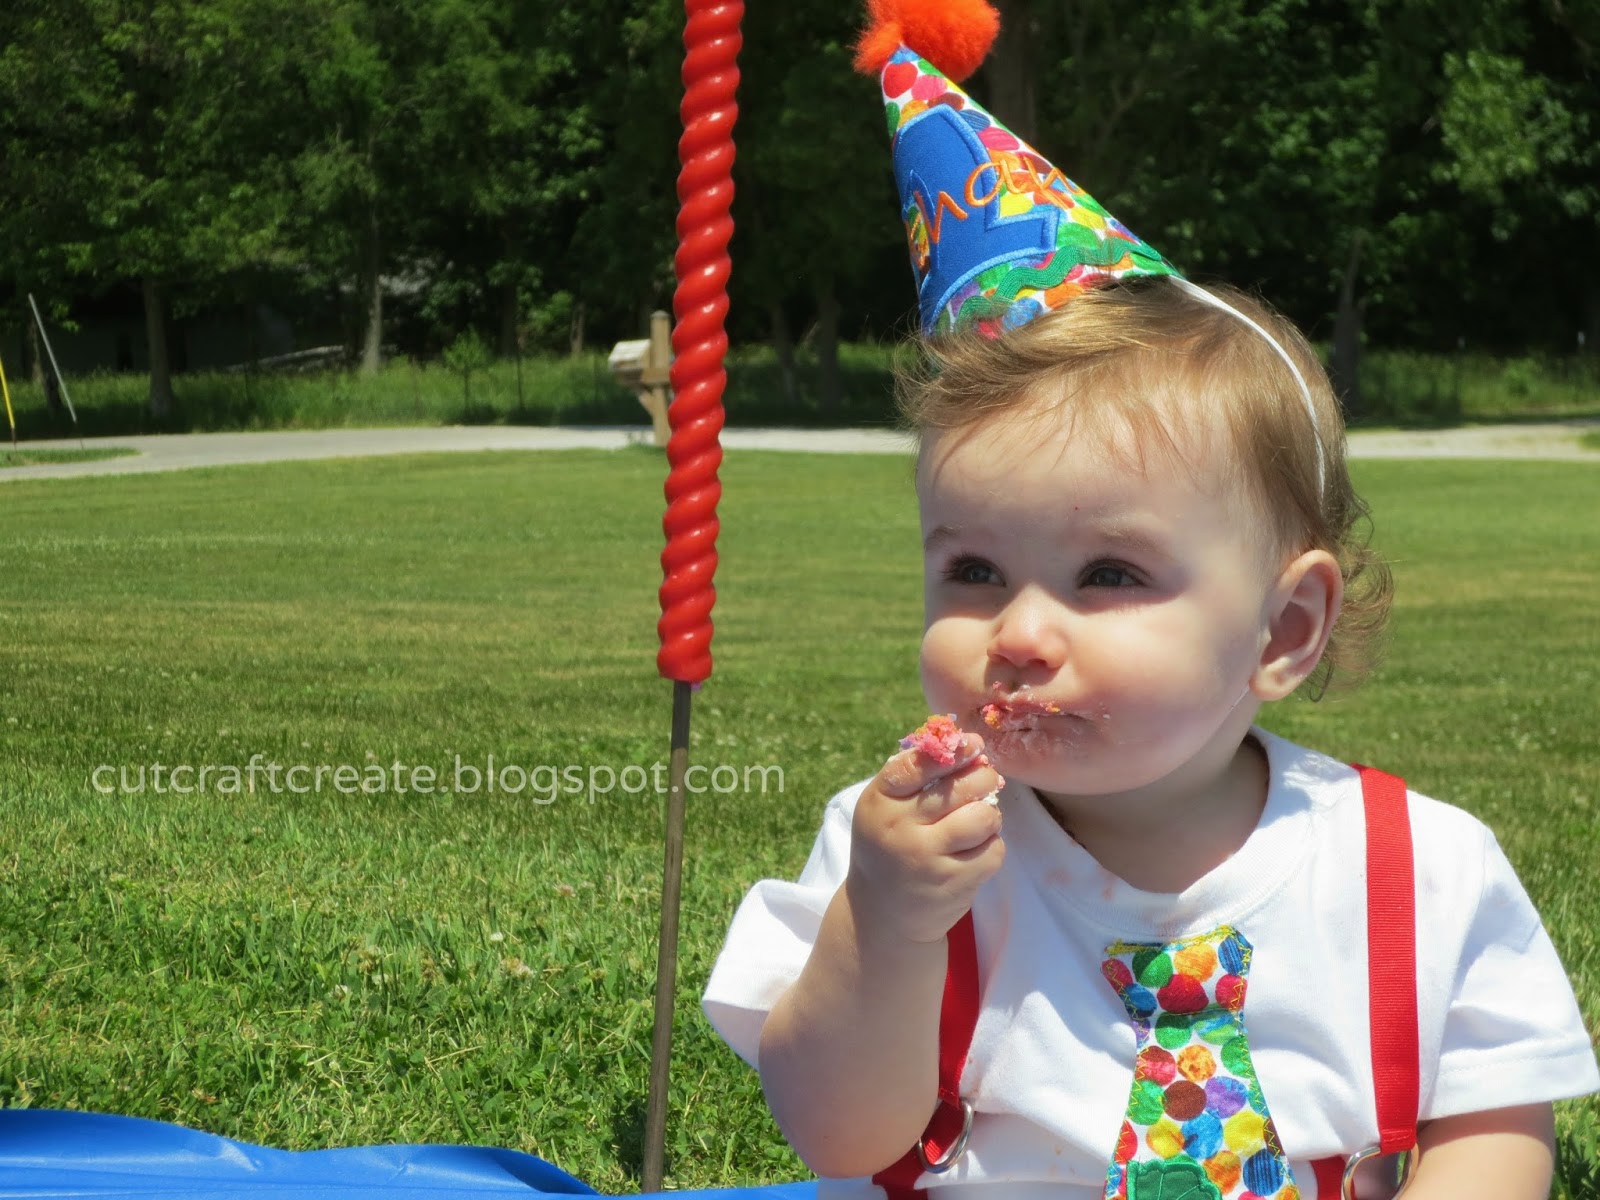
This is my nephew Ethan just a few weeks ago as he celebrated his first birthday.  Handsome little guy, isn't he?

As you can see, the quilt has basic square and rectangle shapes for the piecing.  The whole quilt was somewhere around 36-48 inches (sorry, forgot to measure again before giving it away).


Ethan's nursery is jungle themed so I went with browns, greens and jungle animal print.  The details are what really makes this quilt stand out.


Firstly, I found some blue gingham that matched the gingham on the elephant's ears perfectly!  I was so excited that I was able to work in this added little touch.


Secondly, I added his name to make it personalized.  Don't worry, this is entirely NO SEW.  I cut my shapes out from the same fabric used throughout the quilt.  The fabric was backed with an iron-on stabilizer (like Heat -n- Bond) and was cut using the Silhouette cutting machine.  It cut beautifully and all I had to do was iron each piece on the quilt!  Make sure to use a permanent hold iron-on so that you don't have to sew around each letter.

Instead of messing with quilt binding I simply ran a top stitch along the entire quilt edge.  It gives it that finished look and takes half the time!


For the "quilting" on top, I picked simple shapes again- going with squares and rectangles.  To do this use disappearing ink markers or make your own "pattern pieces" that you can stitch around.  I cut squares and rectangles out of tissue paper, pinned them on the quilt and sewed along the edges of the tissue paper before removing.


I also thought basic shapes might be fun for Ethan to recognize as he gets older.  The entire backing is made with a fabric used in the front that ties in every color.  Plus, more basic shapes to recognize... the fabric is covered in circles!


Randomly place shapes across the quilt space to help tack it down.  I machine stitched my quilting (because it already took me far too long!) but did so with a regular sewing machine.  No expensive quilting machine required.

{That's it!}
So folks, that's it- my first quilt.  It's not perfect and I didn't find a new "passion" in quilting but I love to think of my little nephew using something that was made just for him.  I also hope that this basic pattern inspires some of you to try quilting for the first time.  Maybe you will find a new passion for it- I sure hope so!

Here's a picture of Ethan's mom {Amanda}, Ethan and myself when he was around 6 months old.  Love that naked baby belly!

Happy Crafting,
Kelsie Ann

Saturday, March 29, 2014

DIY Felt Dress-Up Doll

Sometimes crafting is more than a hobby, more than just "something to do" or even more than a personal business.  Sometimes crafting brings joy to someone who needs it, someone who is going through much tougher issues than breaking a needle or running out of glue.  Today I want to share with you a craft that I made for a very tough little girl, Emily.  You see, Emily is a friend of mine's daughter and she was diagnosed with a rare childhood cancer- Rhabdomyosarcoma. Scary stuff.  She has been participating in chemo and radiation for several weeks and some of us have been wanting to help as much as we could.  One thing I did was make a personalized felt dress-up doll set for Emily that she could carry with her on her many car rides, while at the hospital or at home.  It's not much but as a young girl, I remember finding great joy in my felt dress up doll.


Felt dolls are super easy to make.  All you need is:

- Felt (plus any additional fabric you might add)
- Glue (if adding embellishments)
- Fabric Scissors
- DMC Thread & Needle

A very talented blogger named Rachel shared a template for felt dolls on her blog Smile and Wave. Please do not use her template for profit... bloggers work hard to make these wonderful free things for us, don't mistreat that.  You can find the free template here.  Just print and cut.

{What I Made}
Instead of creating a standing board, I wanted to make a folding felt book that Emily could use to not only transport the doll and outfits but also use as the felt backdrop.  Using some fun felt, I also cut out her name to make it extra special:


I hand-stitched the edges with a contrasting color for a extra fun appearance.  Then, I added some ribbon and a button so that the book could be closed up.  Don't forget the heart above the "i"... why?  Because as a little girl, I added hearts to everything!  Since the entire book is made of felt, it can be rolled up as well.


When it's opened up, there are flaps so that the clothes all fit without having to stack on top of each other.  I made several outfits so I had to add a few of these flaps!


And here is just a few of the outfits that I made...


Some are formal, some are casual and some are just plan fun!  That "superhero" outfit you see was made especially for Emily- since she is our little hero!  Emily has been loosing her hair and I wanted to make sure that her doll would be able to have hair or not- depending on what Emily wanted.


For the doll's face, I simply hand stitched a mouth and made some knots for the eyes out of DMC thread.  This only takes a few minutes.

I also cut out a variety of hair styles that could be swapped out (or she can go bald and embrace her superhero self!).  Here is what the back looks like so that it can slide over the head:


If you want to cut it straight across for visual reasons, go ahead.  I think the triangle piece helps it stay in place well.

{Ready for some DETAILS?!}
It's all about the details!  Maybe it's some Sequin, or tulle or just an extra special something... any way to add a special touch shows that some thought went into the project.

1. Fabric (Felt) Prints- There are some VERY CUTE felts in the stores now!  I purchased some fun prints from Jo-Ann Fabrics and they only cost a few cents more than the plain colors.  Worth every penny.


2. Matching Accessories- Again, this is only one example of the many ways that an accessory can be added.  Love the matching hair pieces!


3. Hand Stitching- Whether it's a knot in the middle of a flower or adding some detail to a set of fairy wings, hand stitching adds a little special something.


4. Outfit-Specific Details- Speaking of the fairy outfit, don't forget the details like the little balls on the tops of the shoes!


5. Unexpected Accessories- Add a purse, sunglasses or a scarf to dress up any outfit!


6. Beading/Sequin Pieces- Take any spare craft material to make a felt outfit look a little more like something we might wear!


7. Extra Special Hair Accessories- Sure, flowers are cute but what is more fun than a princess tiara or a feathered headdress?


{Your Turn!}
I hope this post inspired you not only to create a fun little craft but to find meaning in what you are making.  If you want to read more about Emily's journey, follow the website they set up here.  If you wish to help the family along their way by offering prayers, words of encouragement or monetary gifts, please visit here.

Happy Crafting,
Kelsie Ann


Tuesday, March 18, 2014

The Sunshine Award

Recently, I was selected to participate in a "blog interview" called The Sunshine Award.  Megan from The Adventures of Noble and Pond nominated me for my bright and "spring like" post on Decorating Your Office Space.  This was my first time visiting her blog and I LOVE it.  Seriously, head on over to her blog and you will be hooked!  To read her interview, head over here.


I love connecting to other bloggers in new ways and I love how fun this little interview is!  I hope this helps those of you who are new to this blog to get to know me a little better.

The rules to the Sunshine Blogger Award are:
1. Post 11 random facts about yourself.
2. Answer the 11 questions asked by the nominating blogger.
3. Nominate 11 bloggers you think bring sunshine into the world.
4. Come up with your own 11 questions to ask them!


11 Random Facts About Me:


1. I have a dog who we have lovingly named "Captain Ernie" after our boat captain on an Alaskan fishing trip.

2. I prefer the mountains to the beach any day.

3. I've been a vegetarian for over a decade but still prefer "kid" foods like cheese pizza, (fake) chicken nuggets and boxed mac -n- cheese.

4. I think Dr. Seuss' "Oh, the Places You'll Go" is one of the best books ever written.

5. I have traveled to 44 states in the US, 39 of them with my husband (plus a few more this summer!)

6. I have more dresses than pants (of any kind) at least 5 to 1.

7. My favorite vacation/trip was driving Historic Route 66 from Illinois to California.

8. I am extremely emotional.  I cry at the end of a movie I have seen 100 times (like I've never seen it before), at stories I read, weddings, songs and sometimes just because.

9. I always said that I would never "sell" for a company (because I'm much too "non aggressive" for that) but after hearing about Origami Owl jewelry on another blog, I signed up that same day to join because I believed in it so much.

10. I was anti-smart phone because I knew I would just be on Facebook all the time.  For the record, I am.

11. I might be addicted to Tervis cups.  Most days, I carry two different sizes of them to work!


Megan's Questions for Me:

1. What's your guilty pleasure?
Probably coffee.  I love everything about it, any time of day, in any situation.

2. Favorite movie?
"It's a Wonderful Life"

3. Favorite book?
Tricky.  Anything Nicholas Sparks but I love the classics too, especially the smell of them.

4. If you could be any animal, what would you be and why?
Elephant for sure.  Beautiful, Intelligent and the largest land mammal yet still an herbivore.  I've got to respect that.

5.  Android or Apple?
Android.  I love my HTC first phone and I'm pretty sure I couldn't figure out an Apple anyways.

6.  Paris, Rome or London?
Rome.  I'm sort of a history nerd, especially religious history.

7. What is your favorite store?
Charlotte Russe.  It's full of lace outfits, adorable jewelry and high heeled shoes.

8. #1 accessory you can't live without?
It's probably a tie between earrings and necklaces.

9. #1 make up item you can't live without?
Umm... my hairbrush?  I only wear make-up to important events where I don't want to look 16.

10. Book or e-reader?
Book, 100%

11. What is your biggest regret?
Nothing.  Although there are choices I probably shouldn't have made and times in my life that would have been "nice" to have not experienced; I wouldn't be who I am or where I am today if I had not made them.


Who I Tag (and Why!)
A Subtle Revelry (Her typography cake makes any cake sweeter!)
Crafty Sisters (I love Easter decor and their jelly bean tree is ADORABLE)
The House of Smiths (Okay, I love Independence Day too.  What perfect decor!)
Beyond The Picket Fence (I love decor made from wood and I love seeing encouraging words from the Bible lighting up people's day)
The Stitch Pattern (I cannot crochet/knit/etc and have tremendous respect for those who can make things that are so stinkin' adorable!)
See Kate Sew (As a fellow seamstress, I appreciate those who create beautiful things from fabric)
Love U Madly (I remember making lip gloss in Elementary school.  She gives an awesome "grown up" recipe for lip gloss using Crystal Light!)
Mod Podge Rocks (Because I'm addicted to Mod Podge... and this website always makes me happy.)


My Questions:
1. What is the best vacation you've ever taken?
2. Do you prefer the snow or the beach? (or the Mountains like me!)
3. If you could meet anyone dead of alive, who would it be?
4. What is one thing that you couldn't live without (excluding people)?
5. Tennis shoes or Heels (or Boots)?
6. Coffee or Tea?
7. Why did you start blogging?
8. What is your favorite craft?
9. Are you a dog or cat person?
10. Do you enjoy staying in your pajamas all day or do you prefer to get dressed for the day?
11.  Favorite holiday?


This was super fun- what a great way to "shake up" the normal routine of blogging.  I hope everyone enjoyed getting to know me a little better and is excited to play along.  Remember, just because you aren't one of the 11 that were tagged, doesn't mean you can't play as well!

Happy Crafting,
Kelsie Ann

Saturday, February 22, 2014

Decorate Your Office Space {Part 1}

Remember the days of decorating your locker?  I wish I could find an old picture of mine- covered in pretty papers, magnets and don't forget... pictures.  I've always been a big fan of pictures.  Just because I am an adult now, doesn't mean that I don't still want to "decorate my locker" so to speak.  That's why I want to share with you a little work-space inspiration...


This "Decorate Your Office Space" post will be featured in two parts.  Today is the desk (drawers and computer) and next week will be the walls!  Next week may include some freebies, so don't forget to check back!

I love my job.  I love what I do and I love my co-workers.  I don't however, love the boring space! I've been meaning to dress up my space for a few months now and just haven't gotten around to it.  Once I put my mind to it, this overhaul took no time at all!


Sure the desk serves a purpose, but who doesn't love a little color?  What about those drab walls?  Yes, there are some flowers up on the wall but there is nothing personal about it (they will probably come down).  See those fuzzy slippers under the desk?  Those aren't part of the overhaul, they are just a good thing to have if you don't wear boots in the wintertime and your feet are cold under the desk!  The day I brought those in, my co-workers asked if I was "moving in"!

Here's what I did:

Materials:
-Wrapping Paper
-Tape & Scissors
-Glittery Ribbon
-Scrapbook embellishments (optional)

For the desk drawers:

STEP ONE:  Cut the wrapping paper to just larger than the desk drawer.  The paper will need to wrap around to the back of the drawer front.


When you open a finished drawer, the paper should wrap around, as seen above.


STEP TWO:  Holding the paper up to the drawer, draw a line where the handles (or other holes) are.  Cut these spaces out and slide your large cut piece back over the drawer.


Try to cut the hole as close as possible so that none of the wood or metal shows through.


STEP THREE:  Tape the paper onto the desk drawer!  Wrapping paper is thin enough that regular scotch tape works fine.  I taped the top, then each side and then the bottom, making sure that it laid flat as I went.

STEP FOUR:  Fill in the empty spaces.  Some holes (like the ones for the handles) will create a bare spot.  Simply fill this by cutting a rectangle to fit and taping it in.


On the printed paper, the tape doesn't show up unless someone is inspecting it.

The solid paper however, shows the tape much easier.  For the most obvious tape spots, I simply attached a scrapbook embellishment to cover it up.  Looking back, I would have used all prints or attached the paper with some double sided tape instead.


STEP FIVE: Finish off the desk drawers by adding any other embellishments that you like.  I LOVE Heidi Grace Designs, she is seriously the BEST scrapbook embellishment designer (they have fabric too!) I've ever seen.  I have a lot of her stuff.  All the embellishments seen here are from an old collection of hers (honestly, these pieces are my least favorite in the collection and still cute!).  The rest of the collection features her signature "heart" and tons of "wood" pieces- perfect for my rustic wedding scrapbook!  Anyways... add them where you like.


That's it!  The computer is even easier.


STEP ONE: Cut the glittery ribbon to just larger than the length (and/or width) of the computer screen.

STEP TWO:  Add tape to each end.

STEP THREE:  Tape the ends around the back of the computer, making sure that the ribbon lies flat against the edges of the computer.


Seriously, it's that easy.  Who knew such a big update could be done this quickly?

Want to see something unexpectedly fun?  As I was taping the flower print onto a desk drawer, I looked up and saw that my Tervis cup (I'm addicted to these!) had the EXACT. SAME. PRINT.  Really.  The colors, the flowers and everything.  If I held the cup "just right the lid actually matched up with the solid color on the other desk drawers.


I guess the person who bought me this cup really knows my style well!


I am loving this new fun desk!  If you are still in school, you can use the same technique to decorate your locker as well!


Since everything is taped, it is easy to take down and causes no damage to the company's property.  I hope this inspired a few of you to "Dress Up Your Desk"!

Happy Crafting,
Kelsie Ann