Showing posts with label Travel. Show all posts

Thursday, October 25, 2012

DIY Hard Shell Travel Case

Happy Thursday!  I know I say this every week, but boy do the days fly by!  At least the weather is nice... or at least it is where I live.  Anywho- today I want to share with you a project I have been meaning to get working on for quite some time now.

Let me explain:  In high school and college, I spent a low enough amount of money that I could keep track of all my spending in my head and by frequently checking online.  Well, now that I am married, it is harder to keep track of all the money going in, going out, from his card, from mine- it's a lot!  My husband keeps track of expenses using a computer tool, but we have to keep receipts to enter them in manually.  So... for the first time in my life I have to save my receipts.

Thus far, I haven't been doing so well.  Because of that, I decided to take my own spin on the travel baby wipe cases and make myself something to hold receipts as soon as I get into the car.  Clever, right?  I (and my husband) are hoping it works.

{I love how "adult" it looks- no baby wipes here}

{How to Make it}
Gather your materials and a hot glue gun.  From start to finish this took me less than 20 minutes!

I wont go into too much detail, since this basic idea can be found on "how to decorate baby wipe cases" tutorials.  I will however; give you a few hints on things I learned along the way that might help.

First, cut 2 pieces of fabric slightly larger than the case front and back.  Proceed to glue them directly to the case.

This is where mine is different:  Most of the tutorials you see have a piece of ribbon running along the edge to hide the end of the fabric.  I did not want that look, so I made my fabric long enough to fold into the inside of the case.  Before doing this, make sure your fabric is thin enough that the case will close!

{I let the fabric pieces overlap where the front and back meet *just a little* so that no plastic could be seen}

Second,  Finish gluing down all of the edges.  After I had already glued mine on, I wished that I had given myself more fabric to work around the closure clasps.


Third,  Attach any ribbons, buttons or other embellishments that you desire.  As I have mentioned a time or two: I love lace!  So, that is what I used.  It is entirely up to you.


Finish it off by cutting any loose threads or in my case, actually cutting the fabric off of the clasps.  I tested to see that it would close (because of thickness) but did not check the clasp part- oops!  Oh well, it was an easy fix.


{That's it!}
Really.  Quick and easy and really cute (at least, I think so!)  I am using mine to hold receipts so that they don't get lost in my purse, the bag or my backseat but you can use it for anything!  For some really neat ideas check out a post from Tip Junkie.  She has 12 awesome ideas including my favorite, a travel earring case!  I guess these cases aren't just for babies anymore.

P.S.  Are you loving the fabric I used?  Check out this post to see another project I did using fabrics from the same set.  I can't get enough of them!

Happy Crafting,
Kelsie Ann

LINK LOVE!  Linked up to: Every Day is an Occasion

Tuesday, July 31, 2012

Fabric Luggage Tag Tutorial

I love to travel.  Seeing new places and relaxing with loved ones is about as perfect as life can get.  Very soon, I get to visit ALASKA for the first time ever!  I am trying to keep myself busy so that I don't spend all day every day reading about random Alaska facts (I'll let my husband continue to be that guy).

So what do I do instead?  Make crafts that relate to my traveling!  Today I made a luggage tag for my brand new suitcase.


This suitcase technically has a spot for this but it's inside of the zipper area, so that's no help when I'm trying to figure out which bag is mine. {because there are SO many bright green suitcases out there!}


I searched the internet for ideas on how to construct this tag, but found nothing that I loved. Finally, I decided to just make my own using my husband's luggage tag as a guide.


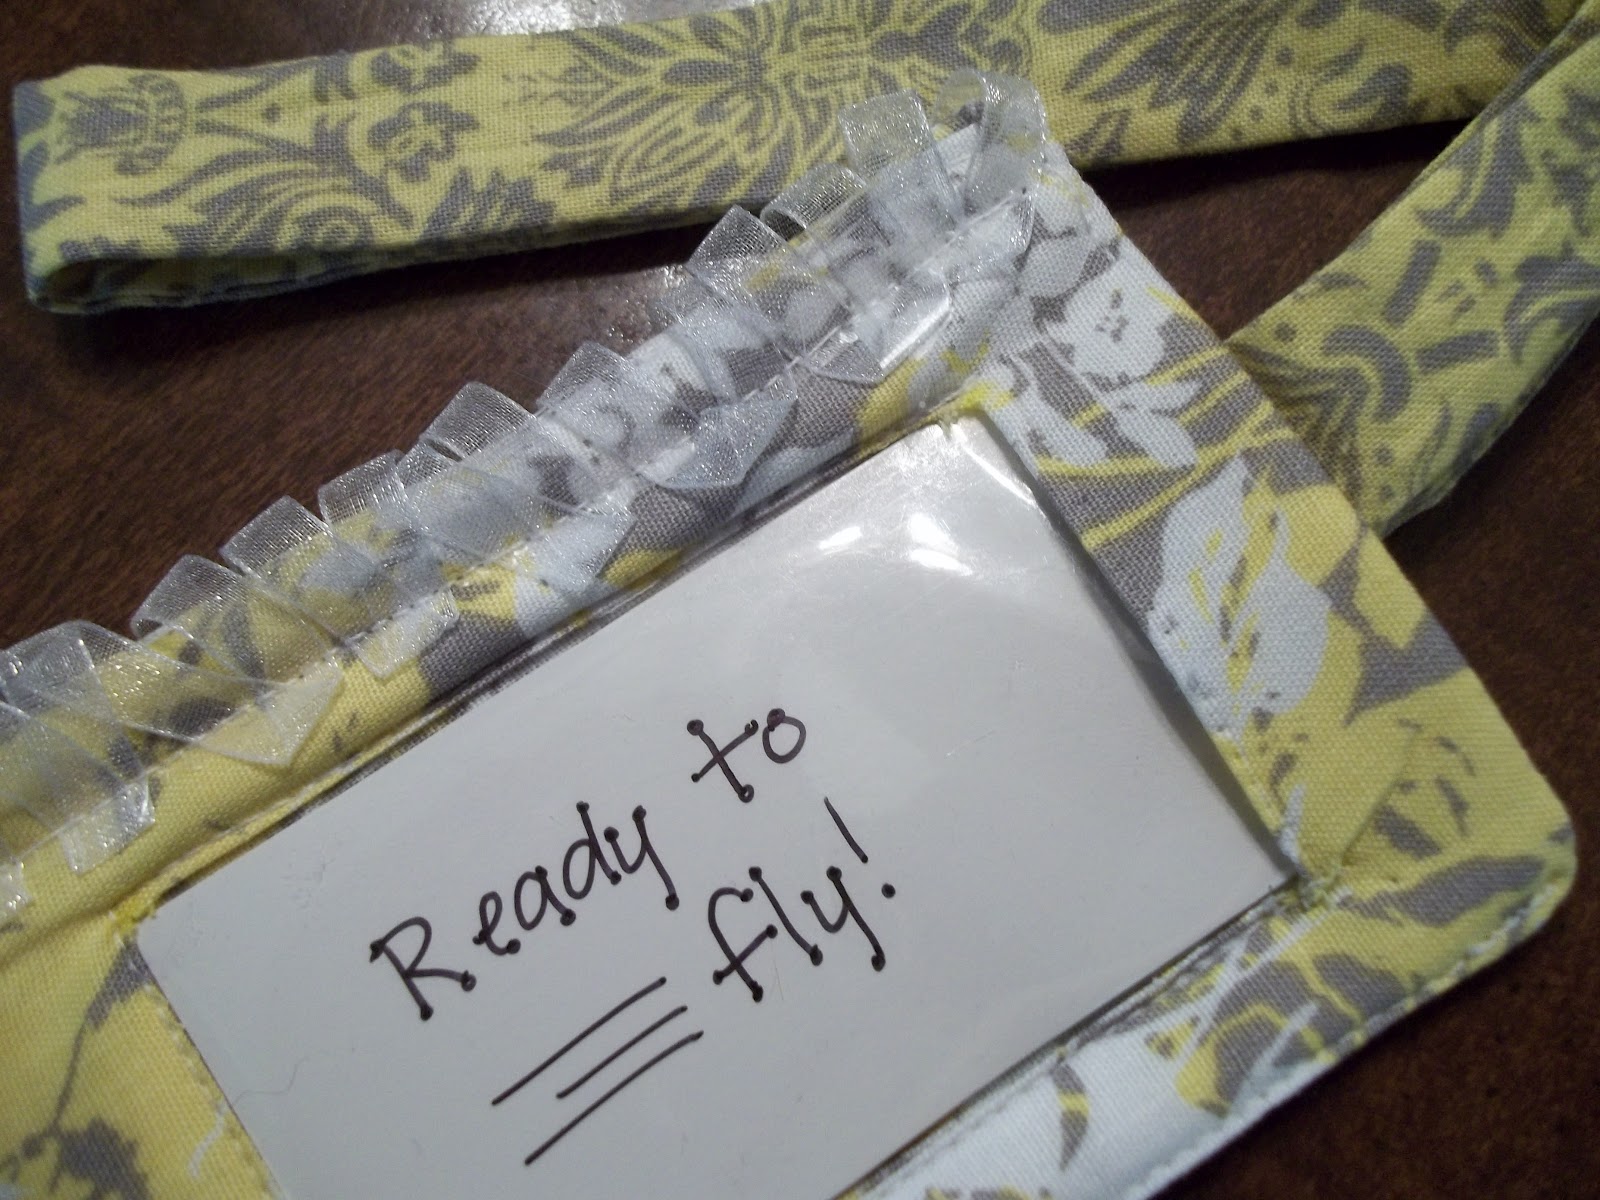
I wanted the sort of "double layered" look and for the clear plastic to be entirely on the inside. The only part I left out was the flap that covers it.

How I made it:

{1} I cut out 2 rectangles in the size that I wanted the end product to be (allowing extra for my seam) and sewed it on three sides. Don't forget: When you sew, right sides together!


{2} Cut a piece of cardboard (I just cut up an old box from some jelly mason jars) that fits inside the opening. Flip your fabric, so that right sides are out and slide the cardboard into the fabric.


{3} Make a strap either by cutting a long strip of material, folding it in half longways and sewing it. (Again, right sides together when you sew, then pull it through the opening to reverse it.) or by adding a piece of ribbon, leather or other strap material.

{4} At the opening, fold in the fabric as it would be if you had sewn it and slide the strap into the center. Sew along the edge to close it up and to keep the strap from moving.


{5} For the top piece, cut 2 rectangles in the same size as you did the bottom pieces. Then cut an "X" in each piece (make sure they line up with each other). This will make a finished edge to the area where your information is written.

                                                      {I made the hole roughly the size of a business card}


{6} To give the front some stability, I suggest ironing some interfacing to the wrong side of the fabric.  At this time, also iron down the triangle pieces from the "X" and trimming them if need be.


{7} Sew the top 2 pieces together (leaving the same side open as the bottom).

{8} Cut a piece of clear plastic into a rectangle slightly bigger than the hole. I used one of those clear scrapbook covers. You may also use those clear bags that sheet sets come in or another similar material.

{9} Lay the entire thing over the bottom piece, lining the edges up. Hold the plastic in place or pin it (just make sure not to pin through the center, the pin hole wont go away!) and sew a top stitch through all layers.

*DON'T sew across the opening (the side where the strap is) or else you won't be able to slip a card in and out!

               {I also took some sheer ribbon and made a "frill" across the top side, stitching straight across}


                                        {The card slides in from the right side easily yet stays snug inside}


Love the colors; Love the design, Love the frills!

I can't wait to see all the places that this luggage tag will go with me. Alaska here we come!

Your Turn!

Would you add the "frills" to the top? What kind of fabric would you use? Show me your designs and let me know what you think!

With Love,
Kelsie Ann


{Linking this project to: Jaihart- Sundays Are Lovely #11 }