Monday, October 29, 2012

Fall Decorative Balls Made From Nature's Materials

It is Monday again- another week begins and we start to create our weekly to-do lists with starry eyes and hopeful intentions.  Monday brings a clean slate for our week, so we have got to make sure it is a good one. If you are still looking for some easy to do and inexpensive fall craft ideas to decorate your home, you have come to the right place.  Make a note of this for your week and in no time at all you can "check" it right off your list (after all, isn't that the best part of making the list?)


I want to pre-apologize for this post's pictures.  They turned out alright but I promise you, these decorative balls look MUCH better in person; especially the corn kernel one.  You will just have to trust me on this one long enough to make your own and see!

{Step One: Gather Materials}

For the materials in nature I tried three {3} different types: leaves (in greens, reds and yellows), indian corn kernels and some of those wild wheat sprays (I keep wanting to call them cat tails, but that's not right!).  Anyone know what these are called?

{Step Two: Glue on the Materials}

For the (oh, let's call them...) wheat sprays, I wrapped them around the ball in an angle but lined them up next to each other.  After finishing the first layer, I glued another layer on top of the previous one to help cover the bare spots.

For the corn kernels, I started by gluing them on in a straight line, then continued by filling in empty spots.  This was my favorite one to make!

For the leaves, I simply layered them around the ball and on top of each other.  Using a variety of leaf shapes and colors will create a unique design.

{Step Three: Place Around Your Home!}

These decorative balls can be used to fill up a basket, hang on the walls, or anything else you can imagine.  Since they are made from christmas balls, they already have a hook for hanging!


I love the ones covered in indian corn kernels, so I plan to make more of those for table decoration.  Imagine a variety of kernel shades all mixed together in a small basket or mini-milk crate!  How fall-esk!

{Your Turn}
I hope you have enjoyed this tutorial and are excited to make your own.  This craft is easy to make, takes no time at all, uses free materials AND is so perfect for fall!  Best of all, you can make them look however you want:  tighter leaf wrapping, brighter corn kernels, thicker "wheat sprays"... whatever your heart desires!

Happy Crafting,
Kelsie Ann

LINK LOVE!  Linked up to: Every Day is an Occasion

Thursday, October 25, 2012

DIY Hard Shell Travel Case

Happy Thursday!  I know I say this every week, but boy do the days fly by!  At least the weather is nice... or at least it is where I live.  Anywho- today I want to share with you a project I have been meaning to get working on for quite some time now.

Let me explain:  In high school and college, I spent a low enough amount of money that I could keep track of all my spending in my head and by frequently checking online.  Well, now that I am married, it is harder to keep track of all the money going in, going out, from his card, from mine- it's a lot!  My husband keeps track of expenses using a computer tool, but we have to keep receipts to enter them in manually.  So... for the first time in my life I have to save my receipts.

Thus far, I haven't been doing so well.  Because of that, I decided to take my own spin on the travel baby wipe cases and make myself something to hold receipts as soon as I get into the car.  Clever, right?  I (and my husband) are hoping it works.

{I love how "adult" it looks- no baby wipes here}

{How to Make it}
Gather your materials and a hot glue gun.  From start to finish this took me less than 20 minutes!

I wont go into too much detail, since this basic idea can be found on "how to decorate baby wipe cases" tutorials.  I will however; give you a few hints on things I learned along the way that might help.

First, cut 2 pieces of fabric slightly larger than the case front and back.  Proceed to glue them directly to the case.

This is where mine is different:  Most of the tutorials you see have a piece of ribbon running along the edge to hide the end of the fabric.  I did not want that look, so I made my fabric long enough to fold into the inside of the case.  Before doing this, make sure your fabric is thin enough that the case will close!

{I let the fabric pieces overlap where the front and back meet *just a little* so that no plastic could be seen}

Second,  Finish gluing down all of the edges.  After I had already glued mine on, I wished that I had given myself more fabric to work around the closure clasps.


Third,  Attach any ribbons, buttons or other embellishments that you desire.  As I have mentioned a time or two: I love lace!  So, that is what I used.  It is entirely up to you.


Finish it off by cutting any loose threads or in my case, actually cutting the fabric off of the clasps.  I tested to see that it would close (because of thickness) but did not check the clasp part- oops!  Oh well, it was an easy fix.


{That's it!}
Really.  Quick and easy and really cute (at least, I think so!)  I am using mine to hold receipts so that they don't get lost in my purse, the bag or my backseat but you can use it for anything!  For some really neat ideas check out a post from Tip Junkie.  She has 12 awesome ideas including my favorite, a travel earring case!  I guess these cases aren't just for babies anymore.

P.S.  Are you loving the fabric I used?  Check out this post to see another project I did using fabrics from the same set.  I can't get enough of them!

Happy Crafting,
Kelsie Ann

LINK LOVE!  Linked up to: Every Day is an Occasion

Monday, October 22, 2012

DIY Wooden Home Decor Blocks

Hello and a BIG thank you to those of you who came back to check out my real  Monday post.  You guys are the best!  I promised you that it was a good one and I even surprised myself with how well these turned out.  Even more exciting, I took pictures along the way so that you (yes YOU!) can make this at home!  Let's get started shall we?


{Materials}
- 3 wood blocks
- Paper designs (If you like my design, I've included free printables!)
- Paint & Paintbrushes
- Mod Podge
- Acrylic Spray Coating

{Step One: Sand the wood}
Sand the blocks so that they are smooth and easy to handle. I also like to sand down the edges and the corners to both round it out and give it that distressed feel.

 {Step Two: Paint the wood}

Paint the front of the block. There is no need to paint the middle since your paper will cover that. If you so choose, paint the sides of the block as well. I chose to partially paint it and create a sort of "smokey" look. These are, after all, going to be in the fireplace room! It is all a matter of personal preference here.

{Step Three: Sand it again!} 

If you want that distressed/rustic look, lightly sand the front edges again. Be careful not to take off all the paint! I have never been very good at distressing, but I LOVE the way these turned out.

{Step Four: Attach the paper}

Next, cover the back of your paper with Mod Podge and attach to the block. Start at one end and smooth as you lay it down, keeping any bubbles or bumps out of it.

Want this design? Here are some free printables for you!
Always be joyful
Never stop praying
Be thankful in all circumstances

If you're curious, this message comes from 1 Thessalonians 5:16-18 which says in full:
Be joyful always; pray continually; give thanks in all circumstances, for this is God's will for you in Christ Jesus.
   
{Step Five: Paint the paper edges}

We're almost done! Now, take a small paintbrush and add some paint to the edge of your paper (where it meets the wood). While it is still wet, smudge it with your finger, creating a distressed look. This is where it really starts to look neat!

{Step Six: Seal it up}

Using a clear acrylic coating spray, lightly spray the tops of the blocks. I don't know if this is necessary, but I chose to do it so that my ink and paint would not smear when I used Mod Podge. After letting that dry, cover the tops of the blocks entirely with Mod Podge to create a smooth and sealed up surface.


{Your Turn!}
I ended up LOVING this craft and am just tickled with how it turned out. I hope that I have given you inspiration to create your own at home! I would love to answer any questions that you have or to hear any feedback that you might have as well.

Happy Crafting,
Kelsie Ann

LINK LOVE!  Linked up with: Every Day is an Occasion and D.L. Art

Sunday, October 21, 2012

Worth the Wait...

Happy Monday my crafty friends!  Do you ever have those days where it feels like you have a million and one things to do?  That is the kind of week I have had.  Don't get me wrong- I sort of dig it, but it puts a damper on my crafting.  In addition to that, nearly all of my craft supplies are still at my mom's house (I just got married this summer and my craft room is not ready for the supply yet!) so I have to run over there to work on my projects.  Thank goodness she only lives 12 minutes away.


But don't you fret!  I've got a project for you!

It's just not here yet. But it will be- later today. For those of you who check out my blog early on Monday and Thursday mornings, you know that I have my posts up around 9 am. I wanted to let you know that I will be posting today and I ask that you please come back later to check it out. I feel terrible for not getting it to you on time, but I will let you in on a little hint: It can be for Thanksgiving or for anytime and.... it comes with FREE PRINTABLES!

I'm telling you: you don't want to miss this one, even if I am a total bum for making you wait.  You may now boo me and throw tomatoes at the computer.

Thank you for being patient with me and for being such awesome followers!

Happy Crafting,
Kelsie Ann

Thursday, October 18, 2012

Fall Pillow

Hello! Hello!  Happy Thursday everyone!  Today is a good day because my husband is off work for Fall Break (yippee!)  I love the fall and it is certanly in the air around here.  One of our trees outside has already turned entirely red and it is BEAUTIFUL!

 
{The tree on the right is just across the driveway from the one on the left.  Isn't it neat seeing the leaves actually changing from green to red?}

Now that we are all in a festive fall mood, let me share with you a fall pillow that I made:


I'll be honest, I actually made this pillow ages ago (sorry, no tutorial) but I can tell you how I made it.  It's simple really:

{How to Make it}
1. Gather desired fabrics.  I used three (the striped, the white and the brown used for the tree).
2. Sew the contrasting fabric pieces together, resulting in a "front" and a "back" of a pillow.  Keep separate for now.
3. Cut out a fall-looking tree.  This was made before I had my Silhouette cutting machine, so I just drew the image myself.
4. Attach the tree to the fabric.  Fabric glue should work just fine, but if you feel more comfortable sewing it on, go right ahead.
5. Attach ribbon to each piece (front and back), covering where the fabrics join.
6. Apply your message.  This can be embroidered, cut from fabric, whatever you choose.  Want to know a little secret?  Mine was made using a rub-on!  No special kind, just a regular scrapbooking rub-on.  I wouldn't suggest using this if you want to be able to wash the pillow; but it is a great option for wording and if you mess it up, you can just pick it off and start again!
7. Sew the front and back pieces together, leaving one end open.
8. Stuff the pillow and sew it shut!

{I love the bare tree, the colors, the stripes, the message!  All perfect for curling up with a cup of hot cocoa}
  
{Your Turn!}
I hope you have enjoyed this (sort-of) tutorial and are inspired to make your own fall pillow! As always, I love hearing your comments, so don't be shy! Now go off and enjoy this beautiful fall day.

Happy Crafting,
Kelsie Ann
  
LINK LOVE!  Linked up with:  Every Day is an Occasion and D.L Art

Monday, October 15, 2012

Stay Warm & Stay in Style

Happy Monday!  Is it just me or does anyone else feel like the weeks are flying by?  Can you believe that we are halfway through October already?  Although I am sort of a wuss when it comes to cold weather, I welcome the fall and winter with open arms!  I love everything about the crisp air, changing leaves and yes, in time... the snow.  It's all magnificent. 

What is just as exciting is finding cute "cold weather clothes" to sport during this time.  Today I am going to show you how to turn Dollar Store Gloves into stylish and affordable wear for the upcoming seasons.


{Classic Lace Gloves}
I am a sucker for the "classics":  Classic books, classic clothing, everything!  In my teenage years I bought a typewriter just because I loved the nostalgia of it so much.  The classic thing I think I love most?  Lace. (You should have seen my wedding dress!)  It is so delicate and beautiful that it makes whatever it touches look so... classy.

Materials:

Really, that's it.  Lightly glue the back of the lace pieces to the gloves, let dry and enjoy!


{Vintage Inspired Gloves}
You could have probably guessed this by now, but I love vintage buttons, broaches and pins!  My mom and I love going to garage sales, flea markets and the like to dig through piles of "junk" in order to find a few {real} vintage pieces.  We may have been known to buy sets of earrings just to take off the back and use them for something else. What's great is that now, vintage is IN!  That means that stores are selling pieces that look vintage but you can buy them in bulk. 

Materials:
 {I almost used pieces we had from an old pair of earrings until I found these buttons- aren't they just wonderful?  I love that shape}

How to do it:
{It should be a crime for this to be so easy}


{Red Nosed Reindeer Gloves}
I know I jumped straight to Christmas with this one, but you need to be prepared for wintertime too!  My favorite Christmas movies are It's a Wonderful Life and of course the 1964 Claymation Rudolph, The Red Nosed Reindeer.  So, instead of trying to make gloves with a tiny George Bailey on them, I opted for our favorite Red Nosed Reindeer.

Materials:
  {For the vinyl shape, I used "patterned baby deer" from the Silhouette store made by Alaa' K.  I removed the inside design for this craft}

How to do it:
 Simply follow iron-on instructions that came with your vinyl.  For the nose, I suggest gluing it down first (with fabric glue) and then stitching it on snugly.  That way, his nose wont fall off!


{Your Turn!}
I would love to see the designs that you came up with to keep warm and stay stylish this cold weather season.  And, as always I love to hear any feedback that you might have on my projects, the blog or anything!

Happy Crafting,
Kelsie Ann

Link Love!  Linked up to: Every Day is an Occasion and D.L Art

Wednesday, October 10, 2012

Guest Blogging + 5 Halloween Party Ideas + Free Printables!

Happy Thursday everyone!  Today I have TONS of stuff for you!  First things first:  I am guest blogging over at U-Create (my first EVER guest post!) and I would love for you to go check it out.  Then, stay a while and look around.  The girls over there are just too sweet and have a slew of awesome craft ideas.  You will just love them, I'm sure of it.

Secondly, I have another craft for you on here.  Actually it's over FIVE crafts!  I told you today was a biggie.  Still wondering what to do for your upcoming Halloween party?  Or, do you just want some fun ideas for your own family?  Check out these five easy and totally fun ideas for your Halloween gathering:


{"You'll DIE Laughing"}
An easy-to-make treat container that you can "unwrap" to expose a string of Halloween jokes!

This mummy is too cute to be spooky, plus he tells jokes!  Oh, and don't forget the treats hidden inside- it's almost too good to be true!  He's easy to make too:

-Take an old Oatmeal container and cover it with fabric.
-Cut strips of the same fabric and pull at the edges to fray them.
-Write jokes along the strips for people to "unwrap".  Example:  What is a mummy's favorite kind of music? WRAP!  Cheesy yes, but admit it: it's funny!
-Attach the strips together and glue to the container at the beginning.  Wrap the mummy up.
-Fill with candy and share!


{Messy Fun for Everyone}
Individual pumpkins for everyone with treats hidden inside.  Can be done clean or messy style!

For all the kids out there who were anything like me, this activity is fun and best of all.. MESSY!  Don't worry mom, it can be done mess-free as well!

-Get a small pumpkin.  This is a great way to give something personalized to each child without buying several large pumpkins.
-Carve it out and remove the insides just as you would normally.
-Fill it with Halloween treats (inside of ziplock bags)
-For messier fun, put the "goop" back inside on top of the treat bags so that kids have to dig through it to receive their candy.


{Pin the Head on the Skeleton}
A new spin on an old game, this magnetic "pin the head on the skeleton" is sure to be a crowd pleaser.

This game seems to always be fun for any age... and, it's easy to make!

-Draw (or sketch) a skeleton onto a large sheet on paper.
-Cut a head out of magnetic paper.
-Hang the large sheet of paper up on the fridge using magnets.
-Laugh at all the silly places the head ends up!


{Food for Thought}
What event is complete without food?  Here are a few dinner ideas to really spook your guests!

There are three separate things shown here, but they are all very easy to make.

Brain Pasta
-Make spaghetti and add a light coating of sauce (too dark will look less 'real').
-Put half of the desired amount into a ziplock bag, shaping it to look like half a brain.  Do the same with the other half.
-Freeze the pasta until the shape is formed.
-Before eating, remove from freezer and either thaw or microwave to eat.

Spider Web Utensils
-Get plastic forks, spoons and knives (if you will be using them).
-Paint the handles with black non-toxic paint.
-Using a hot glue gun, quickly run back and forth across the utensils.  Let the ends get stuck to the newspaper a little bit.  Give it a second to start drying and then lift off of the paper.  This will cause the strings to bunch up and look like spooky webs.

Creepy Crawly Jello
-Make Jello as instructed.
-Fill a container half way and let it stand in the fridge.
-Place a plastic spider (or other creepy crawly) on top of the layer.
-Top the spider with the remaining Jello.


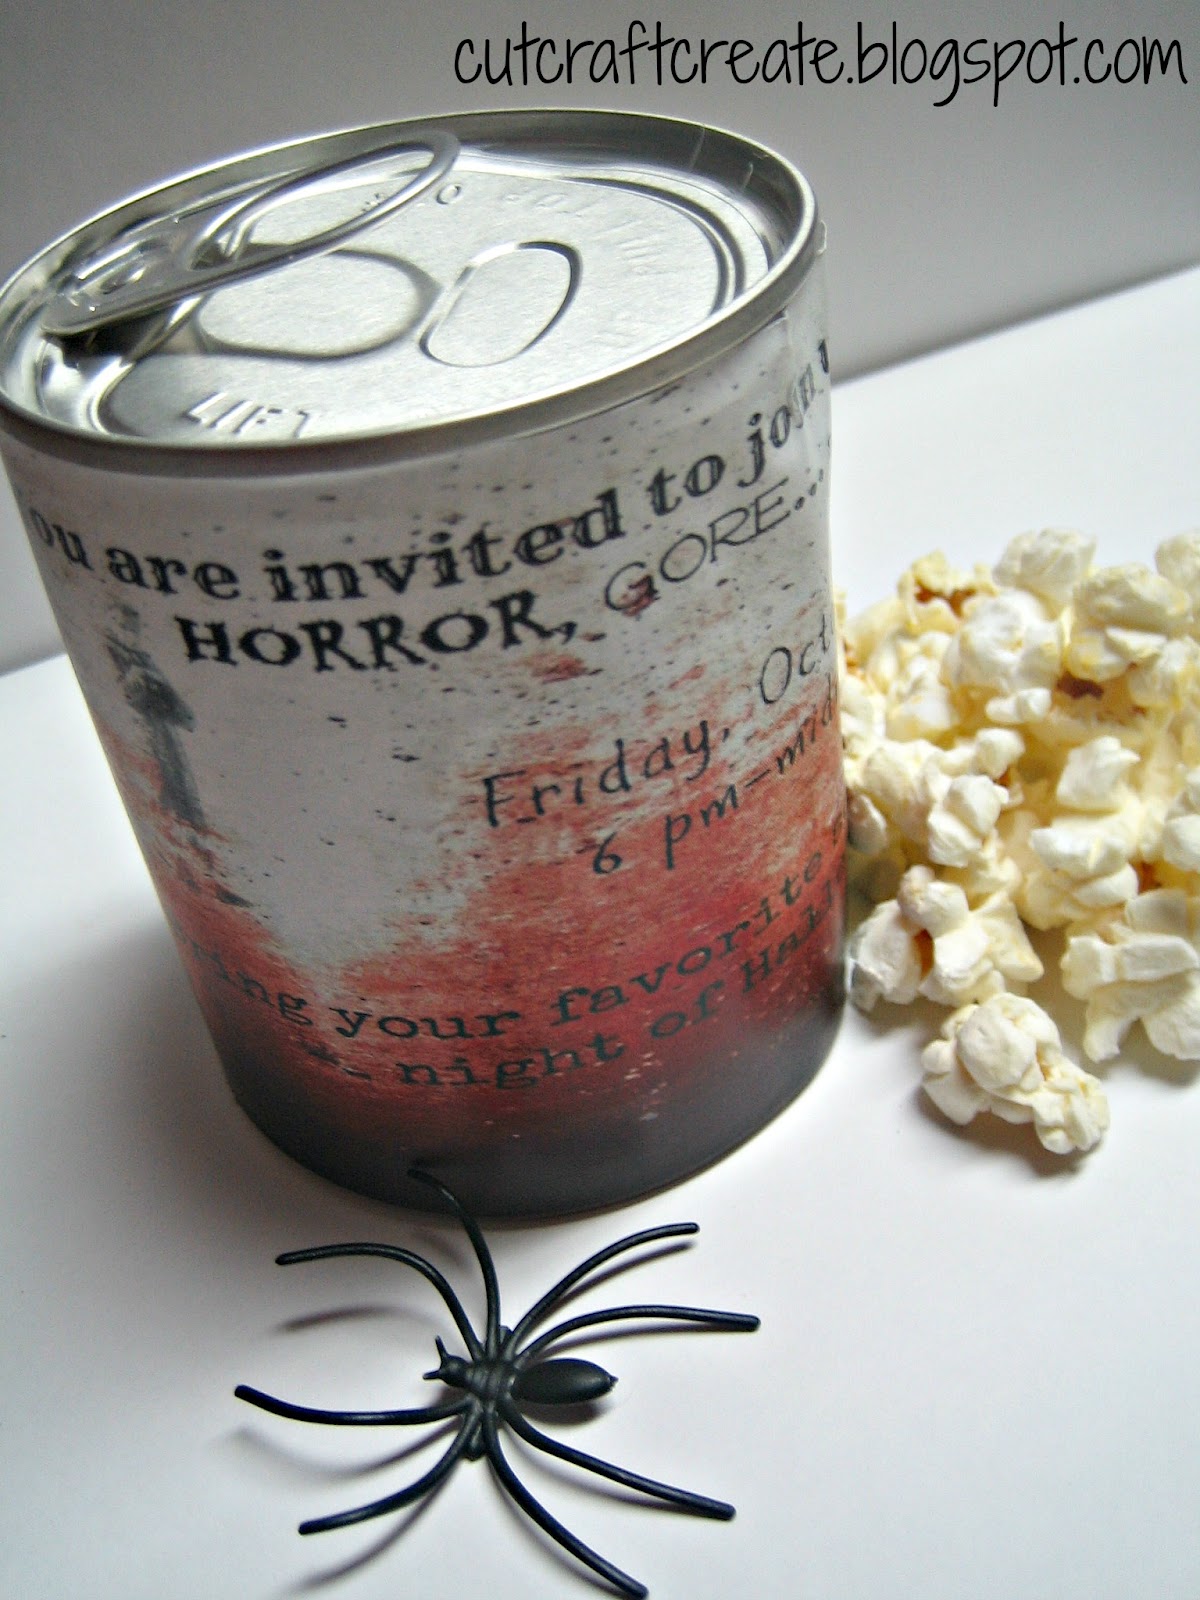
{What's Your Poison?}
What is scarier than going to choose your drink and finding that your options are "poison" "truth serum" "blood" and "monster guts"?

I made all of these printables myself and would be happy to share them with you:

1. Monster Guts
2. Poison
3. Truth Serum
4. Happy Halloween
5. Blood

{Your Turn!}
I hope you have enjoyed today's post and I hope you went to check out my guest post on U-Create as well!
I am so tickled that they allowed me to guest blog for them and I am also excited to share all these fun and easy Halloween ideas with you over here.  Let me know what you think and if you plan to use any of these ideas at your house.  I love Halloween and I love sharing the "holiday spirit"!  Thanks for stopping by.

Happy Crafting,
Kelsie Ann

Link Love! Linked up to: Every Day is an Occasion and D.L Art

Monday, October 8, 2012

Free Fall and Halloween Printables

Happy Monday!  Is everyone excited for the week ahead?  I know I am- I have some very exciting stuff happening on Thursday (oh the suspense).  Until that point I am working to learn some really neat new blog techniques.  They may be old hat to you or maybe it is brand spankin' new... either way, everyone loves a free printable right?

I have been wondering for quite some time how to make and link my own printables to this blog.  Then I found I Am Momma- Hear Me Roar and she told me everything I needed to know.  She told me all about PicMonkey and Design House Digital: my two new best friends.

Using those websites, I created a few Fall and Halloween printables for you.  Please enjoy them and share with me in the excitement of a new technique!  Here's to learning more everyday, right?!


{Favorite Fall Things}

{I think this one is my favorite.  The colors, the fonts.. it just makes me excited for FALL!}

Do you love it too?  Get it here!


{Cheesy Fall Lines}
{Okay, I am a major cheese when it comes to play on words.  I may or may not have something else already titled "FALLing in Love"... I can't help myself}

Are you a big cheese too?  Get this printable here!
(This one is sized smaller to fit a 5 x 7 frame.  Good things come in small packages, right?)


{The Definition of Halloween}
{I am also a bit of a sucker for definitions.  I don't know why but it seems to add a cuteness to everything it touches.  I would suggest bookmarking dictionary.reference.com right now for future craft use}

Are you a bit of a word nerd too?  Brighten your day with this free printable, found here!

{Your Turn!}
I am so excited to have learned how to make my own printables and I hope that someone has been inspired from this post as well!  Let me know what you like, what you don't, or anything else on your mind!  This is a learning process after all and we are all in this together.
Note: You no longer have to do the word verification to comment on this blog (yay!) If that was holding you back before, then you're free to comment now!  Thank you for your patience. 

Happy Crafting,
Kelsie Ann


Link Love!  Linked up to: Every Day is an Occasion and D.L Art 

Thursday, October 4, 2012

Jumping Spider Pull-Tab Can

I have been itching to try one of those pull-tab can crafts where you put goodies like candy or gifts inside.  Don't know what I'm talking about?  Check them out here, here, or here!  This time however, the can is filled with spiders (fake, of course) and when the tab is pulled, a spring causes the spiders to jump out!  How perfect is this for a Halloween party?


Materials
- 1 can with a pull-tab top
- Fake spiders
- 1 compression spring (I made my own using a slinky!)
- Cardboard


{Step One}
Peel the label from the can.  Then remove the bottom (the side without the pull tab) with a can opener.  I would suggest keeping one spot connected.  Remove everything inside and wash it out.


{Step Two}
Glue your label onto the can.  Remember that the open side will be the bottom when you're finished!

 {I designed this myself using picmonkey.  They have a GREAT selection of "Halloween" effects right now}


{Step Three}
Cut a piece of cardboard that is just slightly smaller than the can opening.  It needs to be able to move, yet not let the spiders fall through it.  Next, glue one end of the spring to the center of the cardboard.

 {If you can't find a good spring at the hardware store (I couldn't), pick up a mini-slinky and just twist it as you pull it apart.  This will create a loose compression that you can cut to any size.  Let us take a moment to thank my brilliant husband for saving this project with his idea!}


{Step Four}
Place the spiders in the bottom (really the TOP) of the can, face down.


{Step Five}
Glue the other end of the spring to the center of the open lid (the actual bottom of the can).


{Step Six)
Place the spring fully inside of the can, making sure that the cardboard lays right over the spiders.  CAUTION: Be careful not to twist the spring too much or it may not spring out correctly.  Then close the lid and glue all around the edges, sealing it up.

 {It is okay if the bottom looks messy.  No one will see it and it is more important that it stay closed}


That's it!
Now all that is left is to give it to a friend and watch them JUMP as the spiders fly out at them!  I think all the pull-tab crafts are great but this one is really neat for all of you Halloween Scare fans out there... and it goes perfectly for a scary movie invitation!

I apologize for not having a video/pictures of the spiders jumping out.  Our computer has been experiencing some problems and I am unable to open any video editing program and currently, even the video itself!  I promise though, it works and is super fun!

Your Turn!
What is your favorite scary movie?  Or... are you more of a Great Pumpkin Charlie Brown kind of person?  (I like both kinds!)

Happy Crafting,
Kelsie Ann

Link Love!  Linking to the Craftaholics Anonymous Fall Frenzy Link Party! Every Day is an Occasion and D.L. Art