Showing posts with label easy. Show all posts

Tuesday, May 24, 2016

DIY Reminder Board {Dry Erase} in minutes!

Show of hands- how many of you have things going on during the day that differs from the person living in the same house as you?  I'm guessing about everyone is raising their hand right now.  In our home we have events that everyone goes to (like small group or family gatherings) but we also have times when one of us is doing something without the other (my husband is a track coach and in the spring he often has meets that run past dinner time or even bedtime).  Being a busy mom- or just a busy human being in general- has scattered my brain and even if my husband says "I won't be home for supper" before leaving for work, I still have to send him an e-mail at 2 PM asking if I need to make supper.


Please tell me I'm not the only one here?  If you're scatterbrained like me, first- know that's it's okay and that I understand you.  We're in this together.  Second- I have a solution for you.  Better yet?  It's super fast, easy and cheap to make!


Here's what you need:


- Frame with glass (I opted for a larger frame because I wanted room to write extra "notes" but any size will do)  Check out the dollar store or Goodwill for cheap frames!

- Scrapbook paper

- (optional) stickers for titles, days or anything you want to always be on the board.

- Dry erase marker


It's so easy to make...


Remove any papers or photos that are inside of your frame.  Cut your scrapbook paper down to size so that it will fit inside the frame.

Add any stickers that you might have wanted to include.  If you have a cutting machine, you can also cut letters out "mirrored" so that they can stick directly to the inside of the glass instead of the paper.  To do this, simply type your text and then flip horizontally" before cutting.  I chose to do this for one reason only- I can swap out the paper quickly and easily whenever I want a fresh look!


{Font used here is bromello - one of my favorites!}


That's it!  
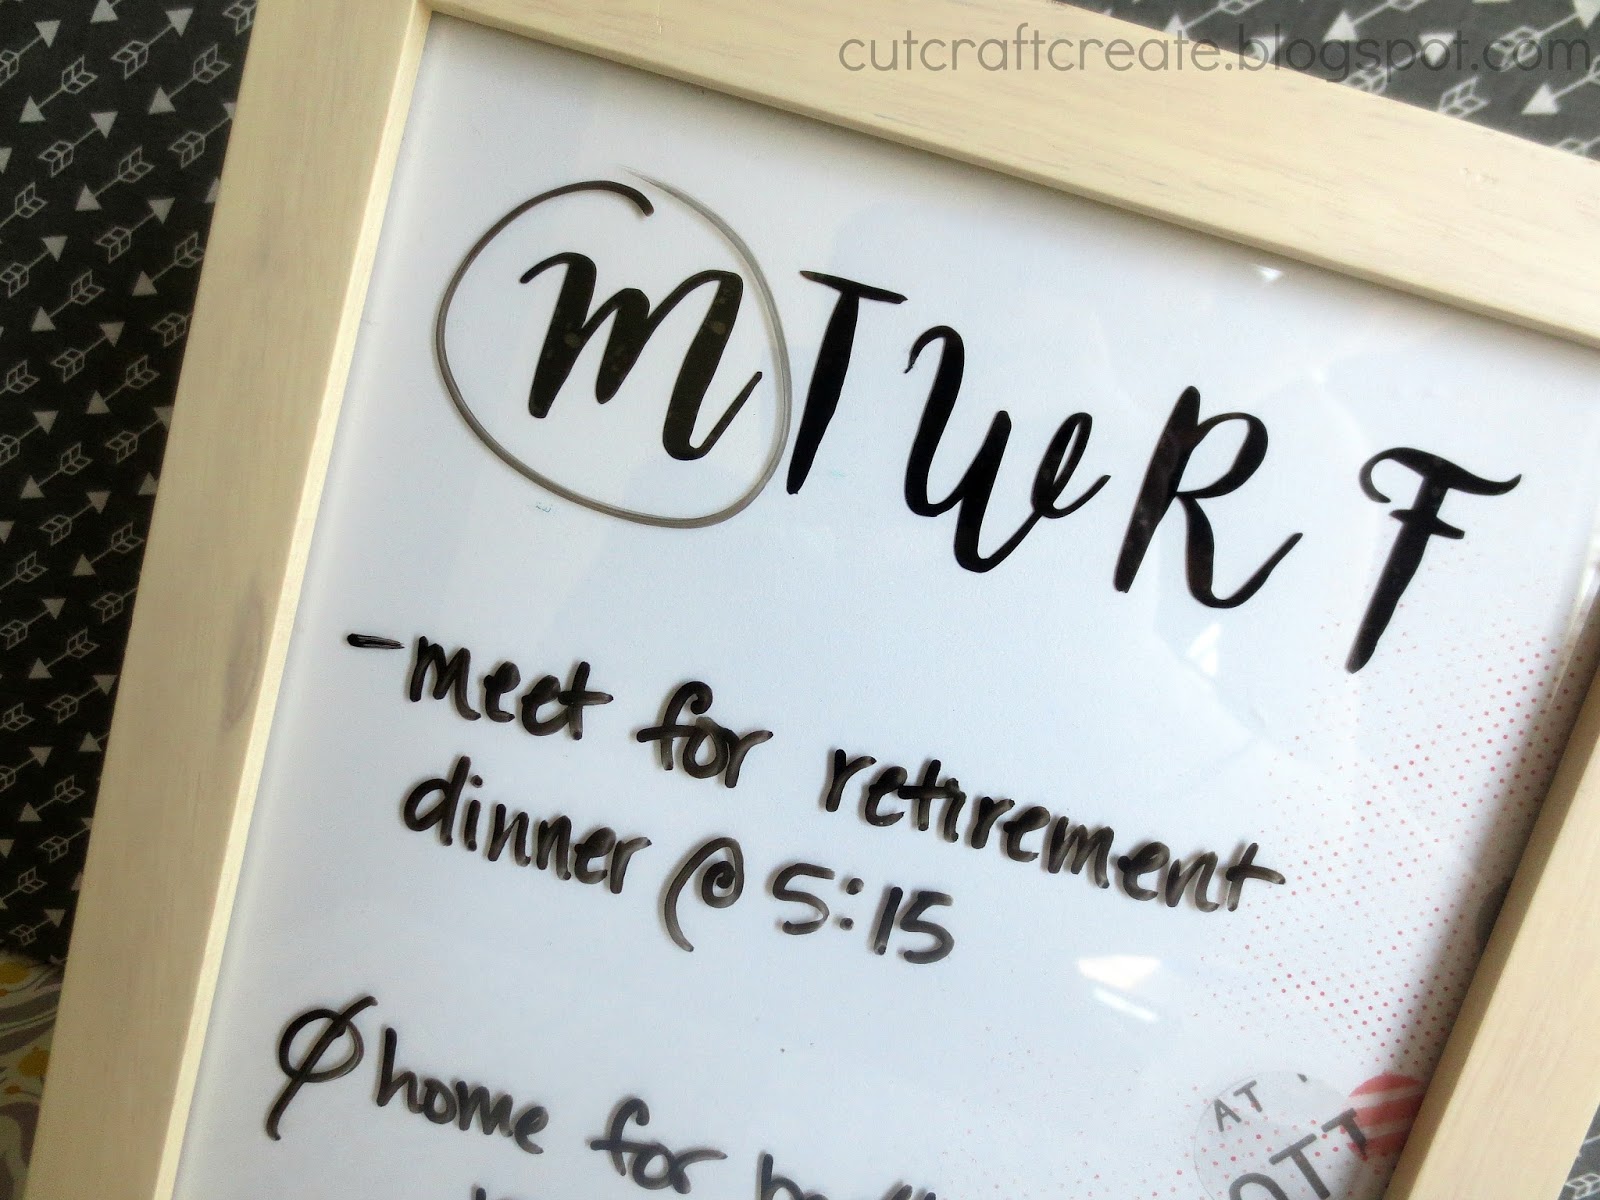
Put it together and write on it with your dry erase marker.  I made ours so that we can circle the day and then write our notes on it.  I don't really need to know what is going on, I just need to know if I'm responsible for family supper, if I need to be somewhere and if I need to hold off bedtime a few minutes so that my husband can say goodnight to our son.


The possibilities are endless!
Don't need a reminder board?  Use it to write quick notes to yourself or each other...


...or use it to plan out your meals for the day (I wish I was this organized.  More like "uhh what do we have in the refrigerator?"


Do you need one of these for your home?  It only takes a few minutes so don't wait- go make one now!

Happy Crafting,
Kelsie Ann

Tuesday, March 22, 2016

Turn old Leg Warmers into Pants in under 15 minutes!

I have been itching to do today's craft for a long time and just kept putting it off for other things.  I don't know why I did this though because the entire project took only 15 minutes- start to finish!  And honestly, that was with me stopping to take photos so it's probably even quicker than that.  I absolutely *love* the finished product.


So here's the story.  I had these amazingly adorable little leg warmers that I never wore (because I'm not cool enough to pull them off).  I couldn't bare to sell them and have kept them around FOR YEARS waiting to find some way to re-purpose them.  When my little guy came along I decided that I would use them to make lounge pants for him.  It was perfect!  Pants are basically just two legs, which is exactly what two leg warmers are (I know, that was such a smart statement- ha!)

Depending on the fabric of your leg warmers, the size may differ but with no extra cutting down my leg warmers made pants for my (on the short side) one and a half year old.  If you want a smaller size, use the same instructions just cut it down a little.

{Seriously though, those leg warmers are totes cute aren't they?}


All it takes is SIX easy steps.  This post includes a lot of photos to help you along the way but it's super easy.

Step 1: Measure your pants.


Using an existing pair of pants, figure out how long the leg needs to be.  Place a pin on the leg warmer at the same spot as the groin where the two legs meet.  I used two different pairs of pants just to double-check the fit.  Both pairs had the groin seam (is there a better name for this?) in the same spot which is always reassuring!

Repeat on both leg warmers.


Step 2: Cut your opening.


Going from the pin that you marked, cut a straight line all the way up to the top of the leg warmer.  If they had a string running through the top like mine did, remove the string and cut the leg warmers with the hole at the cut.  This isn't of top importance but when you go to fold it down and re-string it as pants you wont have a random hole on the inside giving you trouble.

Repeat with both leg warmers.


Step 3: Pin the two leg warmers together and sew!


Don't forget to turn your fabric inside out before pinning.  If you have a design that needs matched together, now is the time to carefully line those up.  If you look at photos later in this post you will see that I neglected to do that on the back of the pants (arg! so frustrating) and was able to correct it by the time I got to the front.


Use your judgement on whether or not your fabric needs more reinforcement.  I thought this would be the case for mine but one straight stitch at 1/2 inch held strong!


Step 4: Measure the top of the pants/Make a casing.


Once finished sewing, turn it right side out again.  Hey... they actually kind of look like pants now!

Next, bring in your previously owned pants and figure out where the waist needs to be in relation to the split at the legs.


Fold the fabric down into the inside of the pants.  Sew another straight stitch along the entire waist at roughly 1 inch below the fold (where the dotted white lines are above).  If you want to make it fancy with a double needle, that looks very professional but if you don't really care (like myself) one stitch will get the job done.

If you are folding down several inches, cut some off before sewing.  Just make sure you still have enough left for the stitching to "grab" both layers 1 inch down.  This is going to be the casing for your drawstring.


Step 5:  Cut a hole for the drawstring.

On each side of the center seam on the front side of the pants, cut a small hole for your drawstring to come through (1 on each side, 2 total).


Step 6: Insert the drawstring.

Depending on your fabric you might want to add some fabric fray to keep the holes from getting bigger after wearing/washing.


Yea, I forgot to do this before inserting my drawstring.  I could have just taken it out but the babe was awake and trying to "help" so I didn't have time to dawdle.  Learn from my mistakes.

Use a safety pin on the end of your drawstring to make running it through the casing easier.  I used the leftover string that I took out of the leg warmers but your local craft/fabric store will have some as well.  You may sew up the ends if you like or you can simply tie the ends in a knot.


That's it!  So easy and such a fast project.  I kind of wish I had kept more of my old legwarmers around (not like the kid needs any more clothes!)


Because leg warmers are made of a stretchy material, these pants can stretch over little one's bottom without having to angle your pieces at all!


...and since the bottoms of leg warmers are already finished, these pants have a crisp cuff at the ankle that we never even had to make!  Gotta love projects that practically do themselves.


I love them too buddy.  Thanks for helping me keep this adorable fabric around just a little longer.

Happy Crafting,
Kelsie Ann

Saturday, January 25, 2014

DIY Cell Phone Case Tutorial {to fit any phone!}

Raise your hand if like myself, you have cracked the screen on your phone.  Okay, put your hands down.  Now, how many of you cracked your screen because you did not have a case on your phone to protect it?  Yep... that's me too.  I don't know about you, but I put off buying a case because I could not commit to a design.  I wanted to find one that I loved or, buy a dozen of them so I could change my mind!  We can change our clothes, our shoes, even our accessories... why not our phone cases?

I also have a smart phone that is not an "i-phone" which makes the case selection much smaller.  I have an HTC first, but with this tutorial you will be able to make a case for ANY phone that you have!


These are super easy to make and take minutes per case.  It took me longer to pick out the paper (really!)

Materials:
- Scrapbook paper (thin paper works best, textured is too thick)
- Clear phone case (I got mine for a few bucks here on Amazon- HTC first)
- Pencil
- Scissors

STEP 1: Pick out your paper.


Repeated prints work best.  I chose some designs with a more neutral pallet, others with bright colors.  It's entirely up to you.  I would like to have found one with large flowers (that take up the whole case) but apparently I need to buy more paper for that (my husband commented that I don't need more paper!)

STEP 2: Trace around the case backing.


When I first started, I also traced around the camera hole in the back (as you can see above).  However, after cutting it out, I found that it is better to wait on this part so that the holes line up.  Right now, just trace the outside of the case.  Don't forget to trace into the outside "holes" (like your power, volume, etc buttons)

 {It's important to trace and cut around the notches so that there is not paper in the way of your buttons and plug ins... plus it looks so finished this way!}

STEP 3: Cut it out.


STEP 4: Press it into the back piece of the clear case.  Try to center it as best you can and line up the notches on the paper with the notches on the case.  The paper should fill most of the case.  This is why the thick paper (like the brown pictured above) does not work for it takes up too much space for the case to latch together.


{The paper should reach about halfway on the phone}

Doing this gives the paper a rounded shape so that the design curves around the phone (instead of just laying flat on the back)


STEP 5: Slide your phone into the case so it is snug, then trace the camera hole.


I found that it was best to do this step with the phone in the case so that the hole lines up.  Trust me, it is much more precise this way.

STEP 6: Pop the paper back out, cut out the camera hole that you just traced.

That's it!  Easy peasy and super quick!  I made several "cases" so that I can change them out when I am "feeling" something new.


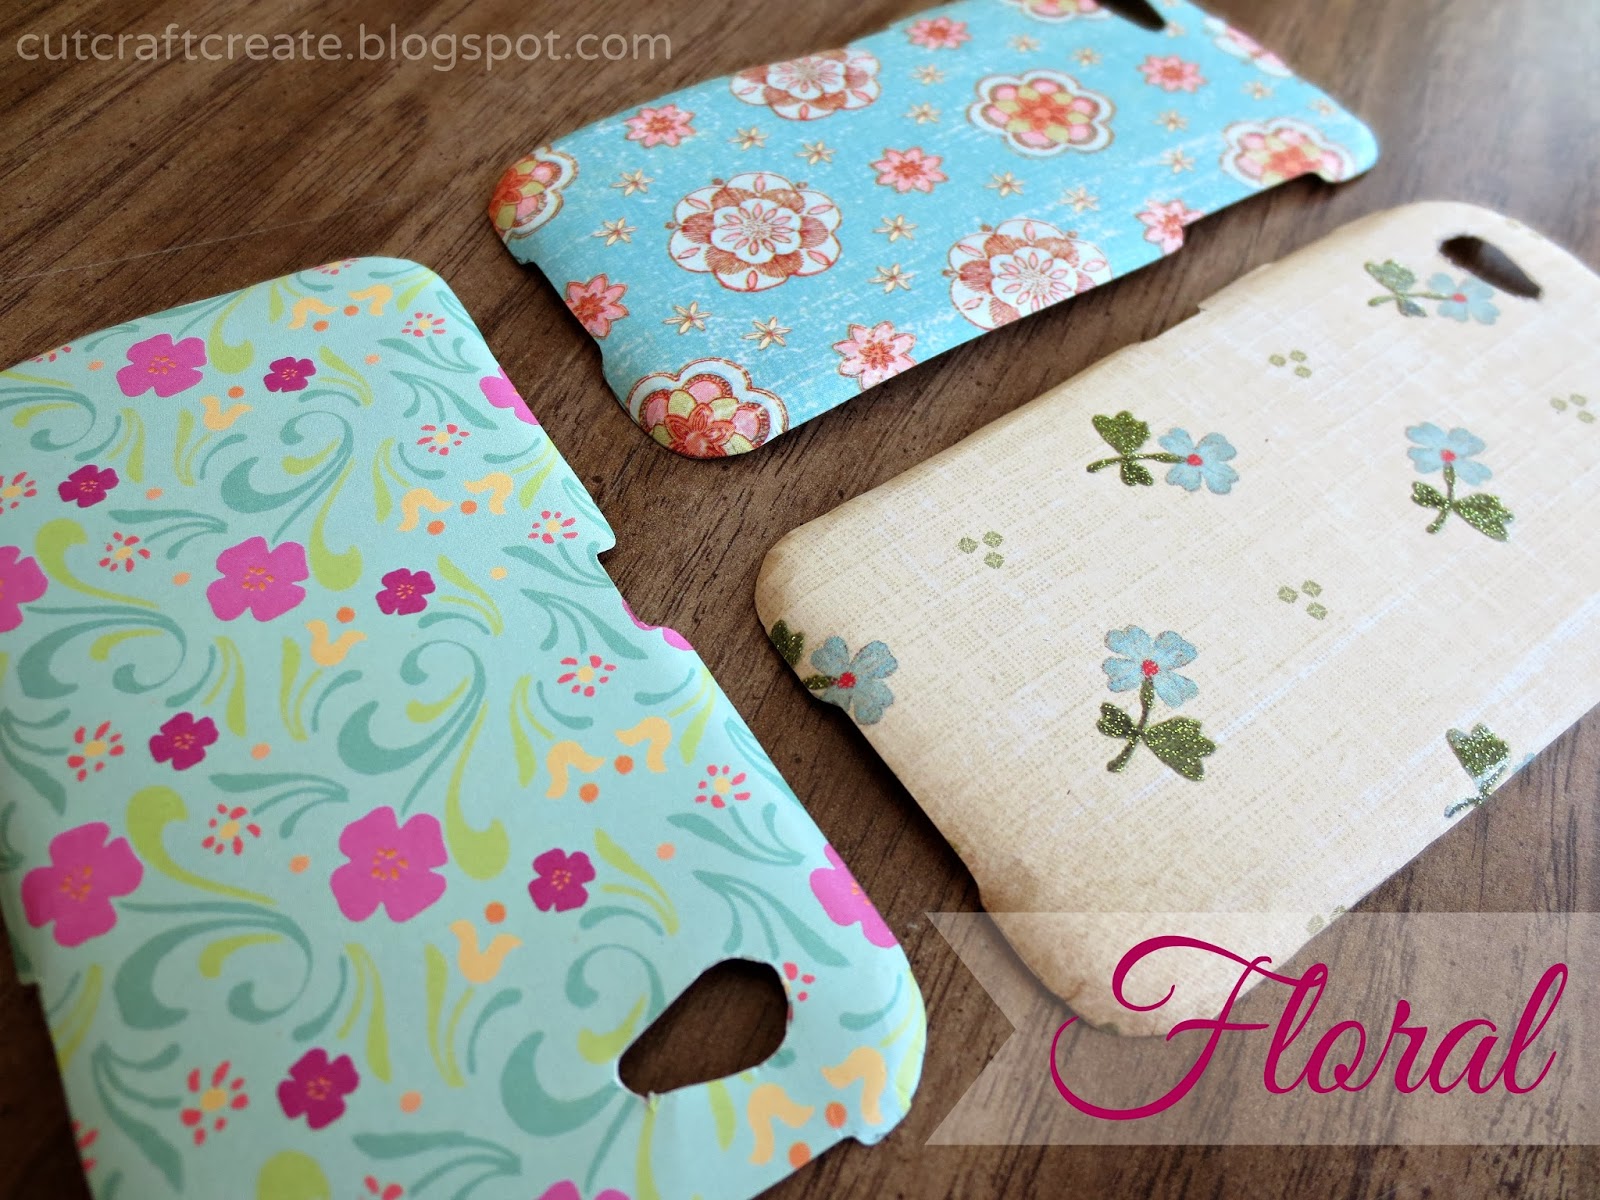
Here are my designs...

Floral:

{I didn't think I would like the blue with pink flowers but it's one of my favorites!}

Text & Collage

{I have a LOT of these papers, they are my favorite for scrapbooking!}

Color Sets:

{These came together in a pack and I love the colors so much I made three cases!}

You can also include additional pieces by placing them inside the case before inserting the paper.  Instant (and non permanent) change!  If you love it, glue it on the paper and keep it that way.


I would also recommend picking papers that match the color of your phone, since the base color will show through in the "holes" and on the front.  My phone is a pale blue, so I picked designs with blue in them.

{Sorry about the "selfie" in the phone reflection!  See the cracked screen I was talking about?}

Hope you have enjoyed this tutorial and I apologize for the crazy amount of pictures!  If I get enough comments (here or on facebook) I will create phone cover printables in a variety of designs and post them next week.  Let me know what kind of design you would like to have!


Happy Crafting,
Kelsie Ann

Friday, October 4, 2013

{Tutorial} I upcycled my shoes into a bracelet!

This weekend I am finally getting around to having a garage sale at my house.  I have way too much stuff and absolutely no reason to keep it.  Anyone else like that?  It was hard to let a few things go (like my Beatles Posters) but I have decided that it is time to move forward with my life and get rid of everything I don't use.  One thing that I was planning on selling were these darling shoes that sort of looked like moccasins... with heels!  They hurt my feet anymore to wear them but I just couldn't let go of the fabric that was on them.

I had a choice to make: sell these shoes for 50 cents or...

Make a bracelet out of them!


I know, I know... but I love jewelry and I couldn't bear the thought of getting rid of these shoes entirely.

Here's what they looked like before:


They were super easy to make and took just a few minutes...

 The shape of the fabric was perfect for this project.

First, I cut all the brown straps off of the shoe and pulled them out of the eyelets.  Then I cut the two pieces on each shoe apart from each other.


To make the fabric piece fit comfortable around my wrist, I got it wet and placed it around a gift wrapping tube that was roughly the size of my wrist. To hold it down, use a rubber band or a piece of ribbon.  Let dry before removing.


Next, I took the wider piece and hot glued (that's right, you don't have to sew it if you don't want to!) Braiding Cord onto each end.  I chose to put two cords on each side, but that is personal preference.  Make sure to allow room to go around your wrist and to tie.

I finished it with a small piece of spandex fabric so that it was smooth against my wrist and was less likely to come apart.

To tie the ends, I made a slip knot.  I don't think I have ever made them the proper way, but it seems to always work out!  


Trim off any excess cording and voila!  I can't believe how cute this bracelet turned out.  I am so happy that I did not sell these shoes at the garage sale.


Your Turn!
Is there anything lying around your house that could use a new look?  Consider turning it into a new piece of jewelry in just a few minutes.  What do you think about this sort of upcycling?

Happy Crafting,
Kelsie Ann