
But... I LOVE those shadow boxes that are filled with ornaments or jingle bells (see some here, here, and here) The problem is, making one would break my rule about taking up counter space. So here is what I came up with instead...
It's a "shadow box" using a window in your house!

If you've got ornaments lying around for your Christmas tree you are ready to go- it's that easy!
Step One: Pick a window.

Step outside and find a window that is close enough to the ground that visitors will be able to see it when they walk up (no upstairs attic windows please!) This window is about 4.5 feet off the ground and is easily spotted when pulling up to the house.
(Yes, there are still plant holders that I really should have taken inside a few months ago- oops!)
Step Two: Clean the window!

It seems silly, but this is an important step. This decoration will draw more attention to your window than ever before! If you're anything like me, the window probably needed a good cleaning anyways.
Open the front part of the window and clean both sides. Keep it open for the next few steps.
Step Three: Build a base

Depending on how tall the sill on your window is, it probably doesn't matter what ornaments you put here. Their purpose is to act as a base to stack the visible ornaments onto.
Make sure to put a "stopper" at the end. Nothing fancy, just something to keep them from rolling to the other side of the window. I used a tiny Purdue anvil that my husband made years ago in one of his classes!
Step Four: Build your ornaments!

You may either try to stack them before shutting the window or (what I found was easiest) go about two layers up and then shut the window just enough to hold them into place. Slide your arm inside and just drop the ornaments into place. (caution! I used plastic ornaments, if using glass, be careful when dropping!) The window will allow them to fall into place, creating some dimension but without falling over.
Ernie tried to eat and play with my ornaments before I could even get stacking! Those colored balls were just too temping for him.

Step Five (optional): Add a message
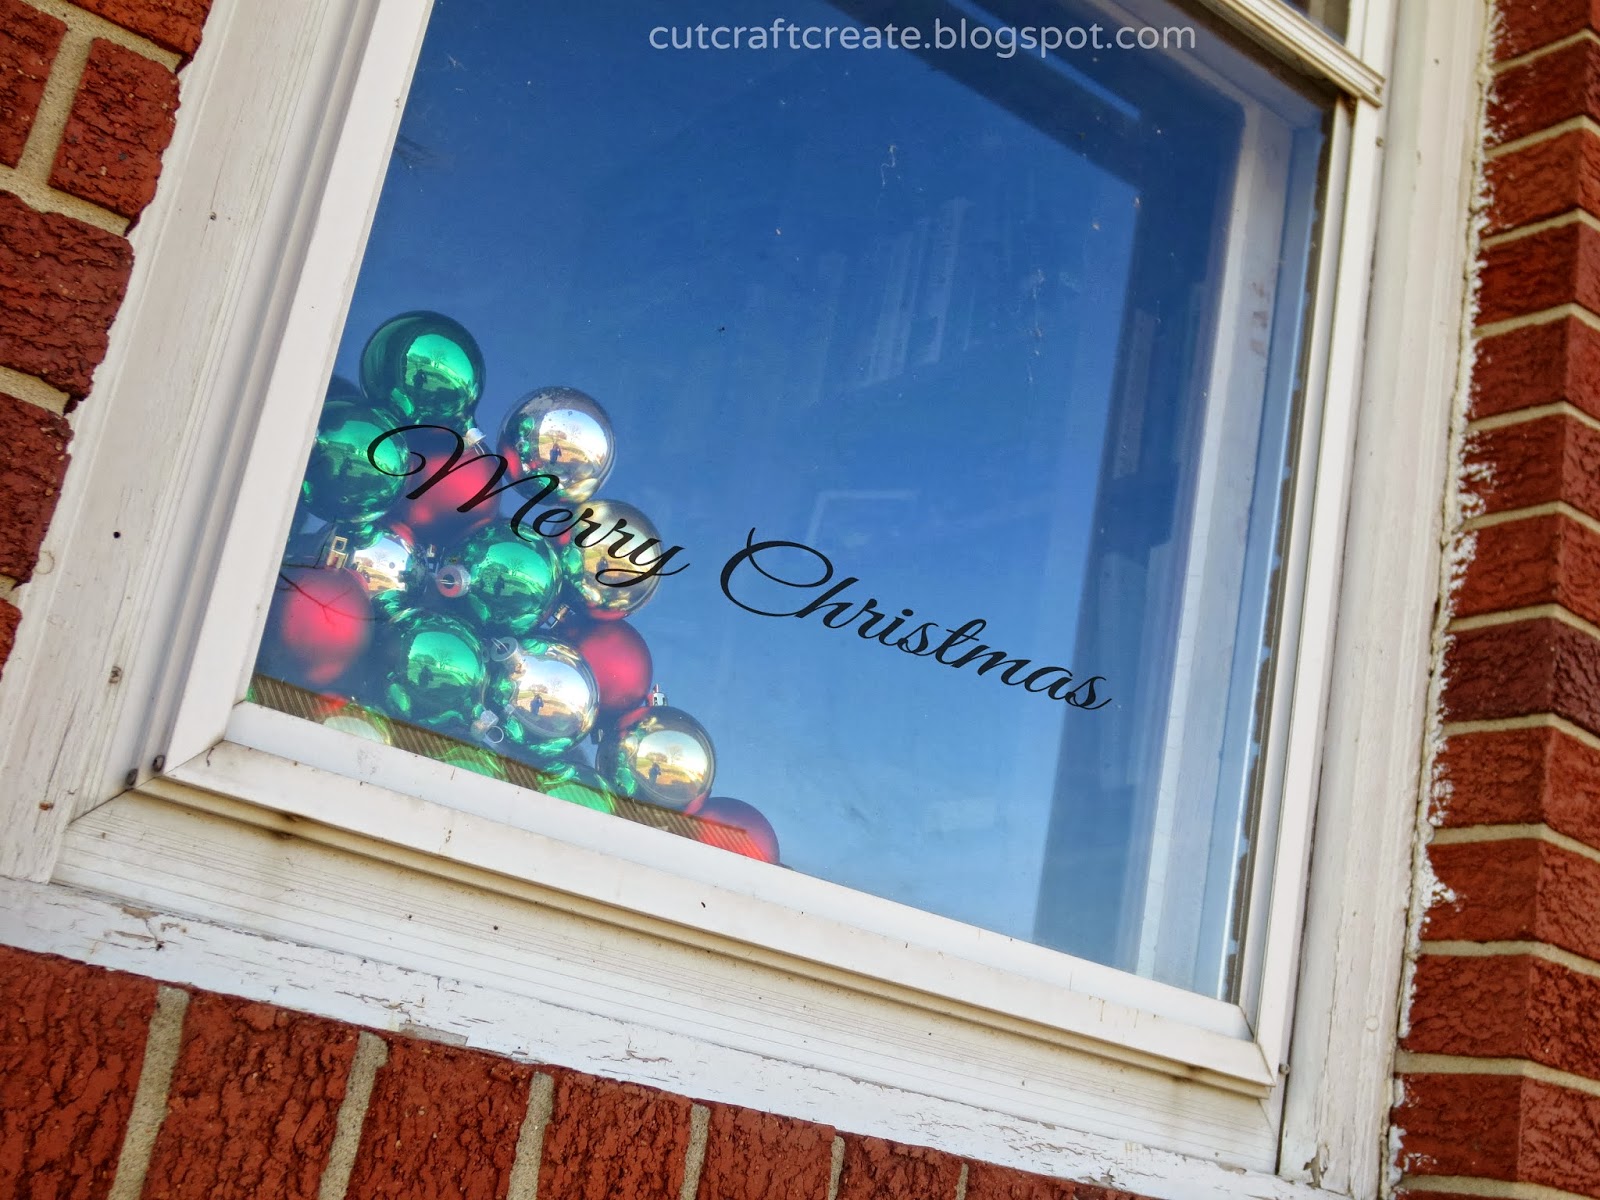
Just like the shadow boxes, a nice message written in vinyl is a beautiful finish to this project. Make sure that you are using outdoor vinyl if you are sticking it to the outside window.
That's it! It's a super easy craft and a fun new spin on those adorable shadow boxes!

If you like that wreath, check out the tutorial here. It is one of my most pinned projects and is super easy to make as well!

Merry Christmas & Happy Holidays from our family to yours. Come back next week for another Christmas project that doesn't take up shelf space!
Happy Crafting,
Kelsie Ann