Showing posts with label Fabric. Show all posts

Monday, October 2, 2017

Thanksgiving DIY Hand Print Shirt

With Thanksgiving quickly approaching, I want to share one of my favorite holiday DIY's with you.  I love the idea of preserving my child's sweet little hand print for years to come but it seems that paper crafts get stuck in the memory box never to be seen again.  They are also less likely to hold up over time- that's why I love working with fabric! Although my son can't wear this shirt year after year, I know that for years it will be as perfect as the day he wore it and when he gets older and I have a t-shirt quilt made for him, I get to include this shirt on it.


[Disclaimer: This post contains affiliate links. Purchasing products through these links does not cost you any extra.  Thank you for supporting my blog through your patronage and through affiliate links!]


{My sweet boy at the tender age of 1}


Here's what you'll need:


Blank T-shirt (I personally like this brand. They also have a variety of colors and short & long sleeves options)

- Felt (This is a great price for a bundle. You can also buy individual sheets at a craft store)

- Thread (If you don't already sew, buying a  assorted collection like this is much cheaper if you need multiple colors)

- HTV & Silhouette or Iron on Letters

- Scissors and a Needle

- Paper & Pencil


Here's how to make it:
I didn't take step by step photos since I made this a couple years ago but it's so easy you wont need them.

[Step 1] Trace your child's hand on the piece of paper.  Cut around the outside of the design and then cut the "fingers" off (keep them in order so you remember which is which!)

[Step 2] Using the paper hand/fingers that you just cut as a pattern, cut a hand from brown felt and fingers from the colored felt.  This will be the body & feathers of the turkey.

[Step 3] Hand stitch the turkey parts onto your shirt.  This takes a little longer but I like the look of it over machine stitching for this craft.  I recommend using thread that matches the felt for each piece.  I do not recommend using heat-n- bond or fabric glue (non sewing alternatives) with felt.


[Step 4] Using thread, make legs, a beak and an eye.

[Step 5] Using your Silhouette machine, cut out your child's name and the year (or age) out of HTV.  Don't forget to mirror it before you cut when working with HTV!  If you don't have a cutting machine, iron-on letters (link in 'materials') will work just fine!


That's it!
Every time I see this shirt I think back to the first year he was able to enjoy a Thanksgiving feast and how much fun he was to watch! Those little hands have grown but he'll always be my baby and I'm so glad I have this memento to keep forever.


Tuesday, March 22, 2016

Turn old Leg Warmers into Pants in under 15 minutes!

I have been itching to do today's craft for a long time and just kept putting it off for other things.  I don't know why I did this though because the entire project took only 15 minutes- start to finish!  And honestly, that was with me stopping to take photos so it's probably even quicker than that.  I absolutely *love* the finished product.


So here's the story.  I had these amazingly adorable little leg warmers that I never wore (because I'm not cool enough to pull them off).  I couldn't bare to sell them and have kept them around FOR YEARS waiting to find some way to re-purpose them.  When my little guy came along I decided that I would use them to make lounge pants for him.  It was perfect!  Pants are basically just two legs, which is exactly what two leg warmers are (I know, that was such a smart statement- ha!)

Depending on the fabric of your leg warmers, the size may differ but with no extra cutting down my leg warmers made pants for my (on the short side) one and a half year old.  If you want a smaller size, use the same instructions just cut it down a little.

{Seriously though, those leg warmers are totes cute aren't they?}


All it takes is SIX easy steps.  This post includes a lot of photos to help you along the way but it's super easy.

Step 1: Measure your pants.


Using an existing pair of pants, figure out how long the leg needs to be.  Place a pin on the leg warmer at the same spot as the groin where the two legs meet.  I used two different pairs of pants just to double-check the fit.  Both pairs had the groin seam (is there a better name for this?) in the same spot which is always reassuring!

Repeat on both leg warmers.


Step 2: Cut your opening.


Going from the pin that you marked, cut a straight line all the way up to the top of the leg warmer.  If they had a string running through the top like mine did, remove the string and cut the leg warmers with the hole at the cut.  This isn't of top importance but when you go to fold it down and re-string it as pants you wont have a random hole on the inside giving you trouble.

Repeat with both leg warmers.


Step 3: Pin the two leg warmers together and sew!


Don't forget to turn your fabric inside out before pinning.  If you have a design that needs matched together, now is the time to carefully line those up.  If you look at photos later in this post you will see that I neglected to do that on the back of the pants (arg! so frustrating) and was able to correct it by the time I got to the front.


Use your judgement on whether or not your fabric needs more reinforcement.  I thought this would be the case for mine but one straight stitch at 1/2 inch held strong!


Step 4: Measure the top of the pants/Make a casing.


Once finished sewing, turn it right side out again.  Hey... they actually kind of look like pants now!

Next, bring in your previously owned pants and figure out where the waist needs to be in relation to the split at the legs.


Fold the fabric down into the inside of the pants.  Sew another straight stitch along the entire waist at roughly 1 inch below the fold (where the dotted white lines are above).  If you want to make it fancy with a double needle, that looks very professional but if you don't really care (like myself) one stitch will get the job done.

If you are folding down several inches, cut some off before sewing.  Just make sure you still have enough left for the stitching to "grab" both layers 1 inch down.  This is going to be the casing for your drawstring.


Step 5:  Cut a hole for the drawstring.

On each side of the center seam on the front side of the pants, cut a small hole for your drawstring to come through (1 on each side, 2 total).


Step 6: Insert the drawstring.

Depending on your fabric you might want to add some fabric fray to keep the holes from getting bigger after wearing/washing.


Yea, I forgot to do this before inserting my drawstring.  I could have just taken it out but the babe was awake and trying to "help" so I didn't have time to dawdle.  Learn from my mistakes.

Use a safety pin on the end of your drawstring to make running it through the casing easier.  I used the leftover string that I took out of the leg warmers but your local craft/fabric store will have some as well.  You may sew up the ends if you like or you can simply tie the ends in a knot.


That's it!  So easy and such a fast project.  I kind of wish I had kept more of my old legwarmers around (not like the kid needs any more clothes!)


Because leg warmers are made of a stretchy material, these pants can stretch over little one's bottom without having to angle your pieces at all!


...and since the bottoms of leg warmers are already finished, these pants have a crisp cuff at the ankle that we never even had to make!  Gotta love projects that practically do themselves.


I love them too buddy.  Thanks for helping me keep this adorable fabric around just a little longer.

Happy Crafting,
Kelsie Ann

Tuesday, February 2, 2016

Valentine's Hack + GIVEAWAY! {Freshly Picked + Chubby Bunny, Happy Home}

Today I want to take a break from the decorating series that we have been working on (Haven't been following along?  Catch up on tips from posts 1, 2,3 and 4!) to share a quick Valentine's tip for you.  If you're like me, you might want to do a little something for the kiddos in your life (be it your own, friend's kids or nieces and nephews) but you are JUST. SO. BUSY.


Seriously, is it possible that I spend an entire day making meals, cleaning up meals and going up and down the stairs (my son loves the stairs so we spend a lot of time there)?  I know that there is no way I'm going to get some adorable Valentine's craft made for all of my nieces and nephews.

... in steps Target's Dollar Bins.  Come on ladies- you know what I'm talking about here.  The mecca of adorable stuff priced at $1 (or sometimes just a dollar or two more).  This year it was my saving grace and I want to share with you how I put together really cute Valentines for $4 a kid.

{Paw Patrol?  Frozen?  For a DOLLAR? I seriously love this store.}

Step 1:  Check out your local Target store and see what goodies you can find.  If yours has these envelopes, get one for each child.  I can't get over how sweet they are and it makes such a neat presentation.  All of mine are getting mailed out so having something like this seems more fun that just having a bunch of random things shoved in a paper mailer (plus it keeps the items separate for each child if going to siblings!)


Step 2: Buy the stuff and GET OUT OF THE STORE before you spend 10 million dollars.  You know what I mean....

Step 3: Include a card (I made these in just a few minutes at home) and write a message for your little loved one.


Easy Peasy.  If you have magically found some free time and want to create a Valentine's gift, check out some of my other posts:

Personalized Valentine's Shirt
Heart Shaped Pincushion
"Love Note" Cup Cozie
Personalized Photo Map (my most popular post)


Want something even better?  How about a GIVEAWAY?
Buying is easier than making- sure, but winning is even better than buying!  Cut, Craft, Create has teamed up with Freshly Picked and Chubby Bunny, Happy Home to bring you some awesome goodies for your lovely little one!

Freshly Picked

Freshly Picked is this amazing little company that makes beautiful moccasins for your babe's feet.  (Okay, they actually have apparel, soft and hard sole shoes, women's shoes and "Bringing Home Baby Bundles") but they got started by making the soft sole moccs we all know and love.

You might have seen them on ABC's Shark Tank or have heard about them from one of their every-growing list of followers.  I've been obsessed with the company for several months now and I just can't get over how great these shoes are.

Here's why:
1. They are adorable.  Let's be fair, cute baby stuff is the best. Here are some of my favorites:

{Colors are as pictured L-R
Heirloom in Creme and Gold, Weathered Brown, Blush, 
Glacier, Born in the USA, Starry Night}

-Check out their website for more-


2. They stay ON BABE's FEET!  They are brilliant and have created a shoe that doesn't fall off.  My son even has trouble pulling them off his feet and he is Houdini when it comes to that.

{These sweet little moccs will always hold a special place in my heart.  Because of their soft sole they were the perfect "first shoe" for my bare-foot loving kid.  He took some of his first steps in these}

3. They last a long time.  Ask anyone who has owned a pair and they will tell you that these are some good quality shoes.  They are made with a thicker leather that supports rough play and day to day kid life.  Even when they start to look a little roughed up an easy "wipe clean" seems to magically restore them to new.  (I wasn't so sure about this after my son tore them all up over Thanksgiving but see for yourselves...)

{These are my son's FP moccs before and after.  I expected them to get cleaner but was surprised at how the "wrinkles" even cleared.  They are like new shoes again!}

This giveaway portion is for (1) pair of soft-soled moccasins in the design and size of your choice (a $60 value!) and is open to residents of the United States.


Chubby Bunny, Happy Home
CBHH is actually a small business that my mom and I started and own.  We create hand-crafted items for your home and baby.  We are big believers in supporting small business and in the quality of items created by hand.

{You could win one of these bandana bibs in the pattern of your choice!  Perfect for a teething baby to catch that drool, as a fashion statement or- in this case in the picture- as a bib for food!}

-See available patterns HERE-


We thought that your little one needed even more this Valentine's Day because... why not?  That's the fun of a giveaway!  We love sharing the items we make with little ones from all around.

{Machine washable, vinyl lined (for wet snacks such as grapes or apple slices!) and oh-so-cute this bag travels anywhere and stays closed with an easy to use velcro flap}

What?  One more item?  You lucky thing, you.

{Get this "I'm acute kid" design in any onesie sizes 0-3 month through 12 month or in children's T-shirt size of your choice.  Made with professional grade heat press, the design lasts wash after wash}


This portion of the giveaway is for (1) Reversable Bandana Bib in fabrics of your choice, (1) Vinyl-Lined Reusable Snack Bag and (1) "I'm acute kid" onesie or t-shirt in the size of your choice (a $25 value!) and is open to residents of the United States.

Enter to win the prize package of:
FP moccasins + CBHH bandana bib, reusable snack bag and onesie/t-shirt!


a Rafflecopter giveaway

Thanks for stopping by and good luck!

Happy Crafting,
Kelsie Ann

[Disclosure: I have received product to revue and/or products are from my own company.  All opinions are my own and in no way were shaped from receiving the product.]

Wednesday, January 6, 2016

Decorating Tip #1 {Personalized Pillow}

As promised, we are rolling forward with new posts and details about the nursery.  But don't start thinking that it won't do you any good to read on if you don't have a baby around.  On the contrary!  Each week design elements, tips and tricks will help you transform any room from "same old, same old" to something special made by you, for you!


This week, I'm showing you how to make a pillow in ANY design you wish... in minutes.  Not 1,465 minutes, like under 15 minutes.  Really. 


First, pick your fabric.  I wish I could tell you exactly what the fabric was that I used but it's just some scrap I have had for years.  Almost any fabric will work for this project unless it's got a lot of texture like a "fur".
Next, measure your pillow form or old pillow you wish to cover.  Add just a shade over 1/2 inch to each side.  Sew along 3 sides with 1/2 inch seam (leaving the fourth side open) and turn right side out.


Now is the fun part.  You can create any design you wish using one of two methods:
(1) Stenciling.  Using a premade stencil or by creating your own (for those of you much more artistic than myself) simply stencil your design onto the pillow with paint. 
--Note:  If you want to be able to wash the pillow- even spot clean, make sure to use fabric paint or acrylic that can be used on fabric!  I would personally recommend this even if you don't plan to ever wash it. 

(2) Heat Transfer Vinyl.  If you have a cutting machine like the Silhouette (or Cricut) simply cut your shape out in HTV and iron it on!  I am more familiar with the Silhouette program but I know that with it you can create ANY design you wish (not just pre-designed shapes).  To create a design that already exists but you don't own (like the Peter Rabbit image on the nursery pillow), in the Silhouette program you can save a photo from the internet and then trace it.  Always make sure to mirror your image if it has words or you want it to face the direction that it was originally.
--Note:  Don't forget to stick your HTV shiny side down on your cutting mat!


I love, Love, LOVE this Peter Rabbit design.  My son's nursery is Peter Rabbit themed and I wanted this pillow to match without being "too busy".  The crisp black lines look so lovely against the natural look of the fabric.  The sort of "broken sketch" design makes me swoon!

 
To finish it up, slide the pillow form into the case and sew the fourth side up!  I tucked the edges inside and sewed it with a  tight sort of whip stitch (I closed it up while riding in the car!) but you could hide the stitching better or even add a zipper or velcrow if you want to remove the pillow form in the future.


Your Turn!
I would love to see what designs you have in mind for your special home décor.  I'm thinking of making some for our living room with repeating shapes (like triangles) in a few coordinating colors!  I would love to see photos of your finished projects!

Happy Crafting,
Kelsie Ann


Saturday, June 28, 2014

My First Ever Quilting Experience

Okay, so here's the deal:  I don't quilt.  I sew.  I sew outfits, I sew decorative items, I sew burp cloths and other baby items, but... I do not quilt.  When I found out my cousin (who is practically a sister, let's admit) was going to have a baby, I knew I had to learn how to- you guessed it- quilt.


I had hoped that this baby quilt would be the start of my new found love for quilting.  After all, my husband loves those quilted comforters for the bed and I think all the ones in the store are u-g-l-y.  Maybe a new hobby could result in a win-win situation for us.  I will let you in on a secret- it didn't.  This quilt took me around a year to finish, not because it was difficult but because I did not focus on it and just GET IT DONE.  I'm proud to say that it is done now, in the hands of my little "nephew" Ethan and that he will know his aunt Kelsie must really love him because he owns the only quilt she will ever make.

Don't let me deter you from quilting, everyone has their "things".  Did you know I also have some amazing scrapbook pages but crash and fail when I try to make cards?  Funny, isn't it?  Oddly enough, the part I struggled with the most in making this quilt was not the actual top quilting but just sewing the pieces together.  This pattern is perfect for a beginner quilter because it only uses square and rectangle shapes and a very basic quilting design.  I even left off the binding and finished the edges myself.

Aaaanyways, let's get on to the pictures!


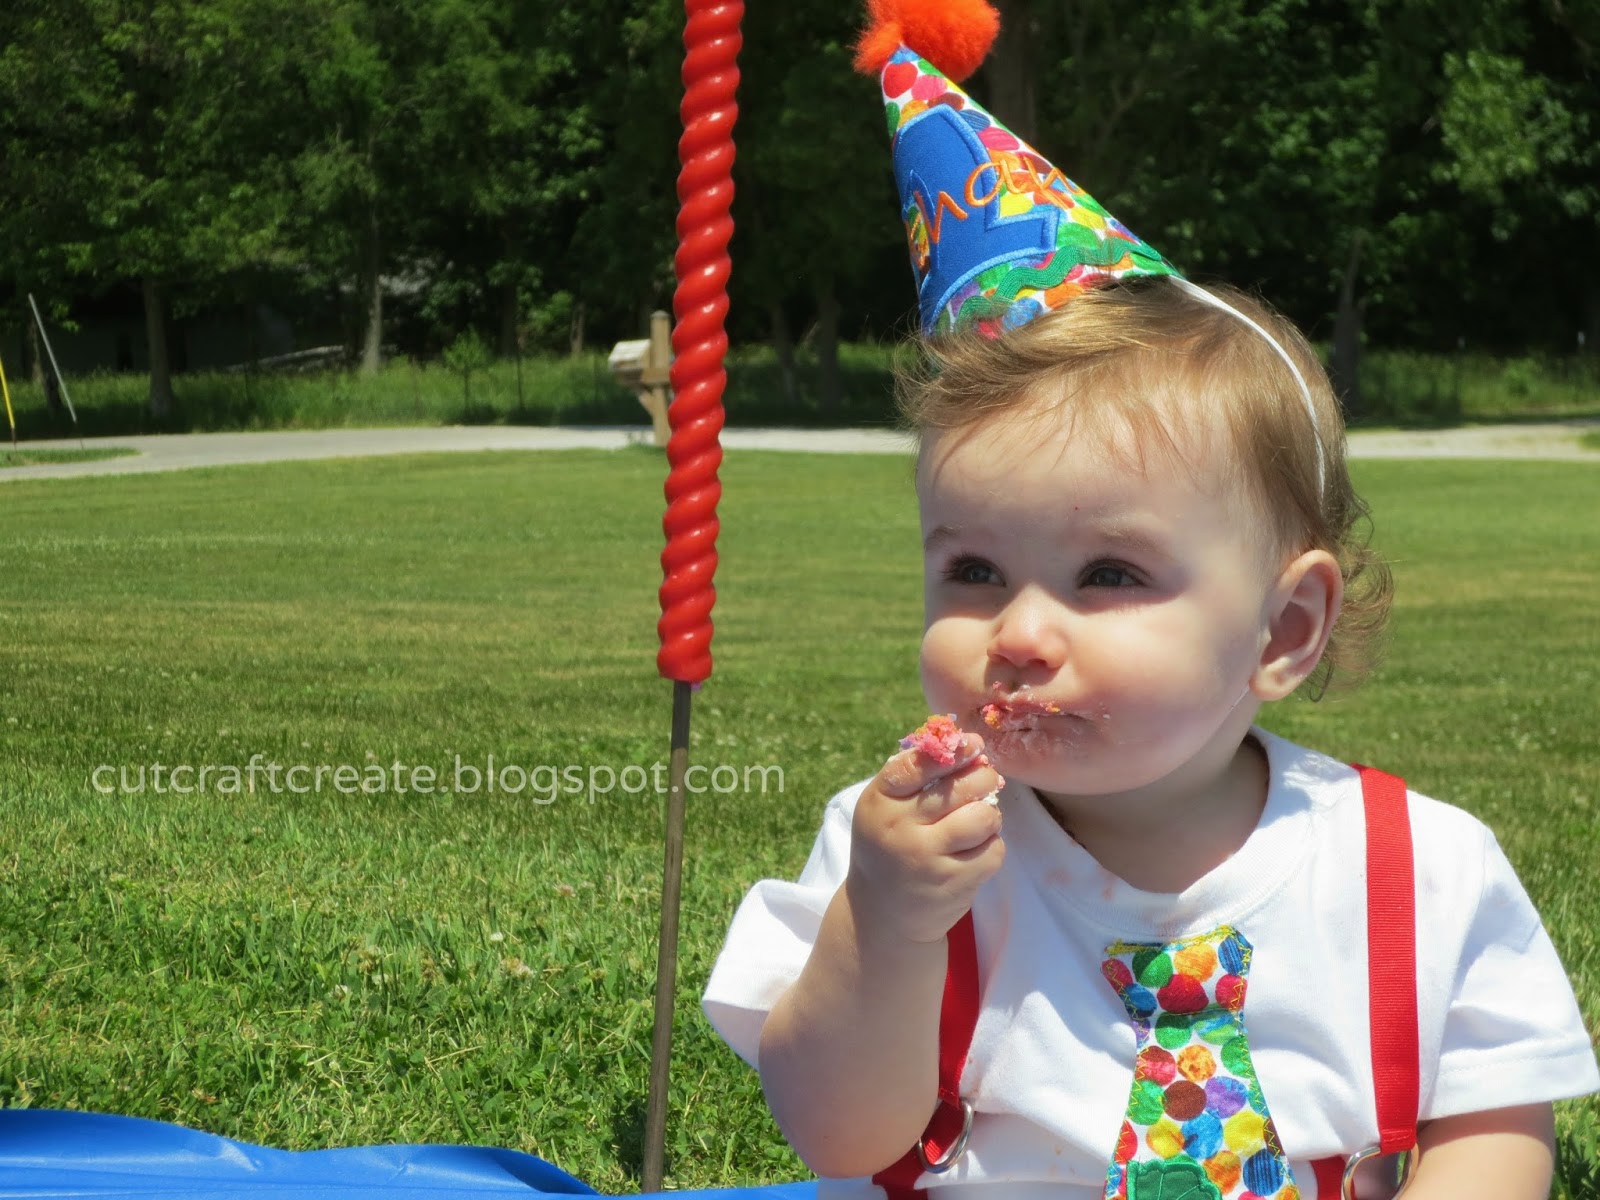
This is my nephew Ethan just a few weeks ago as he celebrated his first birthday.  Handsome little guy, isn't he?

As you can see, the quilt has basic square and rectangle shapes for the piecing.  The whole quilt was somewhere around 36-48 inches (sorry, forgot to measure again before giving it away).


Ethan's nursery is jungle themed so I went with browns, greens and jungle animal print.  The details are what really makes this quilt stand out.


Firstly, I found some blue gingham that matched the gingham on the elephant's ears perfectly!  I was so excited that I was able to work in this added little touch.


Secondly, I added his name to make it personalized.  Don't worry, this is entirely NO SEW.  I cut my shapes out from the same fabric used throughout the quilt.  The fabric was backed with an iron-on stabilizer (like Heat -n- Bond) and was cut using the Silhouette cutting machine.  It cut beautifully and all I had to do was iron each piece on the quilt!  Make sure to use a permanent hold iron-on so that you don't have to sew around each letter.

Instead of messing with quilt binding I simply ran a top stitch along the entire quilt edge.  It gives it that finished look and takes half the time!


For the "quilting" on top, I picked simple shapes again- going with squares and rectangles.  To do this use disappearing ink markers or make your own "pattern pieces" that you can stitch around.  I cut squares and rectangles out of tissue paper, pinned them on the quilt and sewed along the edges of the tissue paper before removing.


I also thought basic shapes might be fun for Ethan to recognize as he gets older.  The entire backing is made with a fabric used in the front that ties in every color.  Plus, more basic shapes to recognize... the fabric is covered in circles!


Randomly place shapes across the quilt space to help tack it down.  I machine stitched my quilting (because it already took me far too long!) but did so with a regular sewing machine.  No expensive quilting machine required.

{That's it!}
So folks, that's it- my first quilt.  It's not perfect and I didn't find a new "passion" in quilting but I love to think of my little nephew using something that was made just for him.  I also hope that this basic pattern inspires some of you to try quilting for the first time.  Maybe you will find a new passion for it- I sure hope so!

Here's a picture of Ethan's mom {Amanda}, Ethan and myself when he was around 6 months old.  Love that naked baby belly!

Happy Crafting,
Kelsie Ann