Saturday, January 25, 2014

DIY Cell Phone Case Tutorial {to fit any phone!}

Raise your hand if like myself, you have cracked the screen on your phone.  Okay, put your hands down.  Now, how many of you cracked your screen because you did not have a case on your phone to protect it?  Yep... that's me too.  I don't know about you, but I put off buying a case because I could not commit to a design.  I wanted to find one that I loved or, buy a dozen of them so I could change my mind!  We can change our clothes, our shoes, even our accessories... why not our phone cases?

I also have a smart phone that is not an "i-phone" which makes the case selection much smaller.  I have an HTC first, but with this tutorial you will be able to make a case for ANY phone that you have!


These are super easy to make and take minutes per case.  It took me longer to pick out the paper (really!)

Materials:
- Scrapbook paper (thin paper works best, textured is too thick)
- Clear phone case (I got mine for a few bucks here on Amazon- HTC first)
- Pencil
- Scissors

STEP 1: Pick out your paper.


Repeated prints work best.  I chose some designs with a more neutral pallet, others with bright colors.  It's entirely up to you.  I would like to have found one with large flowers (that take up the whole case) but apparently I need to buy more paper for that (my husband commented that I don't need more paper!)

STEP 2: Trace around the case backing.


When I first started, I also traced around the camera hole in the back (as you can see above).  However, after cutting it out, I found that it is better to wait on this part so that the holes line up.  Right now, just trace the outside of the case.  Don't forget to trace into the outside "holes" (like your power, volume, etc buttons)

 {It's important to trace and cut around the notches so that there is not paper in the way of your buttons and plug ins... plus it looks so finished this way!}

STEP 3: Cut it out.


STEP 4: Press it into the back piece of the clear case.  Try to center it as best you can and line up the notches on the paper with the notches on the case.  The paper should fill most of the case.  This is why the thick paper (like the brown pictured above) does not work for it takes up too much space for the case to latch together.


{The paper should reach about halfway on the phone}

Doing this gives the paper a rounded shape so that the design curves around the phone (instead of just laying flat on the back)


STEP 5: Slide your phone into the case so it is snug, then trace the camera hole.


I found that it was best to do this step with the phone in the case so that the hole lines up.  Trust me, it is much more precise this way.

STEP 6: Pop the paper back out, cut out the camera hole that you just traced.

That's it!  Easy peasy and super quick!  I made several "cases" so that I can change them out when I am "feeling" something new.


Here are my designs...

Floral:
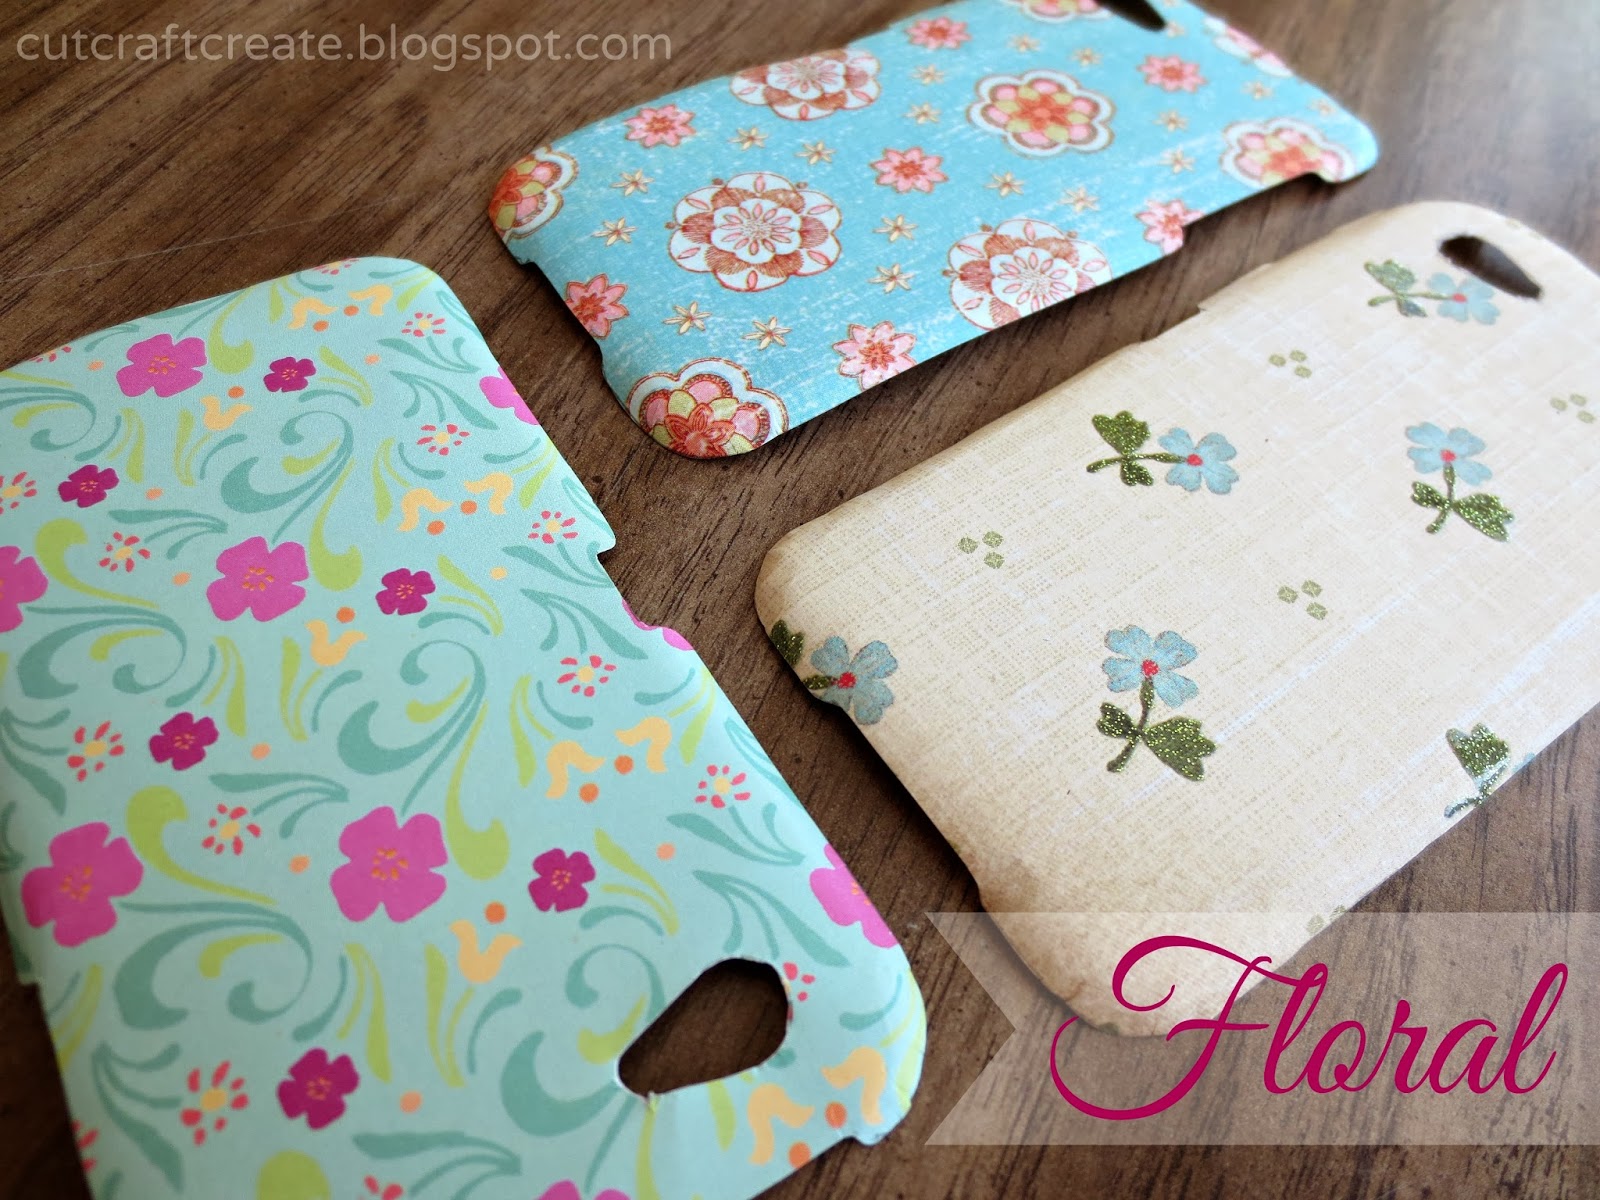
{I didn't think I would like the blue with pink flowers but it's one of my favorites!}

Text & Collage

{I have a LOT of these papers, they are my favorite for scrapbooking!}

Color Sets:

{These came together in a pack and I love the colors so much I made three cases!}

You can also include additional pieces by placing them inside the case before inserting the paper.  Instant (and non permanent) change!  If you love it, glue it on the paper and keep it that way.


I would also recommend picking papers that match the color of your phone, since the base color will show through in the "holes" and on the front.  My phone is a pale blue, so I picked designs with blue in them.

{Sorry about the "selfie" in the phone reflection!  See the cracked screen I was talking about?}

Hope you have enjoyed this tutorial and I apologize for the crazy amount of pictures!  If I get enough comments (here or on facebook) I will create phone cover printables in a variety of designs and post them next week.  Let me know what kind of design you would like to have!


Happy Crafting,
Kelsie Ann

Saturday, January 18, 2014

Valentine's Day String Globe {tutorial}

Well folks, we are halfway through January already; can you believe it?  Although I'm not as crazy about Valentine's Day as say, Christmas, Halloween or Independence Day... I always try to make a few crafts with love to celebrate the season and to inspire you to create as well!

I am crazy about those string/balloon globes that seem to be everywhere now.  I have been wanting to try them out for a while, so I added a little "love" and...


Love them?  Here's how to make them:

Materials:
- balloons
- string (I used thin jute twine)
- paper
- scissors or heart shaped punch
- Mod Podge


STEP 1: Blow up a few balloons to whatever size you want the finished globes to be.  Try to keep them "round" shaped instead of regular balloon shape.  Tie them closed and set aside.


STEP 2: Cut small hearts from the paper.  I chose to cut them out by hand (fold small pieces of paper in half and then cut the "half heart" shape and unfold!) but feel free to use a heart shaped punch if you have one.


Do this with multiple colors and sizes if you desire.  The amount of hearts varies on how full you want them to be on your final globe.  It is entirely up to you as it looks good either way.  I have between 5-10 hearts on each one of mine.


STEP 3: Wrap the string around the balloon to get an idea of how much you will need.  I ended up cutting a HUGE amount of string and then, because it kept getting tangled, ended up shortening it on the balloon.

I also wrapped it around my hand, thinking that this would prevent the string from getting tangled.  I. was. wrong.  It might still work if you can pull from around the loop instead of straight up but once it is covered in Mod Podge, it gets more difficult to untangle. 


STEP 4: Pour some Mod Podge into a shallow bowl and place the cut string inside of it, allowing the Mod Podge to cover all parts of the string.


This is about the time I realized that this craft was not going to be as fun as I had expected.  Given, I hate having anything goopy or sticky on my hands (I use a napkin to hold doughnuts and can't put hand sanitizer or lotion on my hands without washing it off... really) so I should have known better.

STEP 5: Set the balloons on a plastic bag or other surface where the balloons will be able to sit overnight when finished.  Next, slowly pull the string out of the bowl and wrap it around the balloon.  Try to tuck the ends of the string when you get to the end.


Looking back, I have a big piece of advice so listen up!  Try not to slop around the Mod Podge all over the balloon.  I thought that it would not make a difference but it made the finish product much more difficult to produce.  The more you keep on the string alone, the better.

Do you also see the Ernie (my dog) hair on the balloon?  Sneaky little guy got a few of those in while I was crafting.  Don't worry, they come right off when the balloon is popped!

Also try to keep your strings spaced out.  I ended up with a group of strings in one spot and although it doesn't hurt it, it looks a little sloppy.  That's probably because I had no clue what I was doing!


STEP 6: While the Mod Podge is still wet, place the paper hearts onto the string, pressing lightly.  If you need to add more Mod Podge to the back of the heart to make it stick, go right ahead.  Once finished, let it dry overnight.


I also found that the bottom of the balloon will still be wet the next morning.  Feel free to turn it over and let that last bit dry for a few hours or until it appears dry.

STEP 7:  Once dry, hold the balloon and pop it with a pin.  This could go very well or very badly (I did both) so pay attention:

{I asked my husband to pop the first one while I held it... I expected a loud POP!}

The WRONG way: When I popped the first one, I had not considered all the Mod Podge that was covering the balloon (here is why I said to try and avoid it!) It stuck to the sides and as the balloon deflated, it took the string with it:


...Yep, that's not good.  I managed to bend it back into a round (ish) shape but it would have been much easier if it had just worked the first time.

It also left large areas of Mod Podge in between the strings:


Not quite the look I was going for.  Learn from my mistakes please!

The RIGHT way:  If you have already covered your balloon in Mod Podge (mistake #1) there is still a way to prevent the above situation.  I give full credit to my amazing husband for suggesting that I try this on the next balloon.  Gently place your finger under the strings to release them from the balloon before popping it.  Be careful not to pop the balloon with your fingernail!  This also helps to break up the large sections of Mod Podge that would have filled the space between strings.


It's not perfect but it is much better.  Again, not making a mess of the Mod Podge in the first place should prevent this problem all together.

This time when I popped the balloon...


... it kept it's shape! Halleluiah!

Simply pull the balloon out from the top or wherever you are able.


{That's it!}
Add a string to the top if you want to hang it (sorry for the terrible picture- these are eventually going to hang in my office at work since I obviously have no good hanging spot for them in the house) or let them sit on a table or in a basket if small enough.

{Ignore the glare from the television... I just couldn't ask my husband to stop watching so that I could take a picture! He's been working hard all day.}


I like how they look lying down as well. Maybe I will make some mini ones for a table setting!


I still have some work ahead of me (especially on the first one) to remove all that left over Mod Podge. I repeat... learn from my mistakes!

I hope you have enjoyed this lovely addition to the string+balloons globe craft and have a very happy Valentine's Day!

 Happy Crafting,
Kelsie Ann

Sunday, January 12, 2014

DIY Infinity Scarf {in under 10 minutes!}

Hello and welcome!  If you are visiting from Pinterest or Facebook, please look around at our other posts on the blog.  Feel free to also follow us on Pinterest and "like" us on Facebook if you haven't already.  They are both easy ways to keep updated on the newest posts and projects in between!

I don't know about you, but we have had a TON of snow lately (17.5 inches in one sitting!)  that's a pretty good amount for Indiana.  Since it has been so chilly, I have accompanied most of my outfits with scarves.  While talking with a co-worker who said that she loved my infinity scarf but that she only owned one herself, I started to think about how easy it would be to whip up a few.

Turns out it is even easier than I expected.  It takes less than 10 minutes from start to finish (really!)


What you need:
-Fabric
-Thread that matches fabric
-Sewing Machine (or hand sew if you wish)
-Pins

Here's how to do it:
STEP 1: Find some fabric.  All of this fabric was already in my "stash".  The sizes are as follows:

Black: 59x12 inches
Coral: (roughly) 57x13 inches
Green: 57x13 inches
Gold: 59x27 inches


The green and black fabric was already cut to that length (scraps) and since the coral was such a dense fabric, I chose to make it thinner in width as well.  Since the gold was so light weight, I doubled the width to give it more volume.  As you can see, the fabric and width both make a significant difference in how the scarf will look.


STEP 2: Fold the fabric in half -lengthwise- with right sides together (right side= the side you want to see, usually the darker side)


STEP 3: Pin along the edges.  You will be sewing the long side and one short side, although you may not need to pin the short side at all.


STEP 4:  Once everything is in place, sew a straight stitch down the long side of the scarf and then turn and sew one short side (do NOT sew both short sides closed!)  Don't forget to back stitch when you stop and start to keep your threads in place. I sew at 5/8 inch but 1/2 inch is commonly used as well.


STEP 5: Pull the fabric through the opening in the un-sewn short end, turning it right side out.


STEP 6: Using your finger or a blunted item (like an un-clicked pen), pop the corners of the sewn short end out. This isn’t as important in a scarf as in other crafts, but it will help the fabric lay better. Do this by pushing the corners lightly from the inside.


STEP 7: On the open end, fold around an inch of the fabric to the inside and then slide the closed (short) end into the opening. This will make a nice edge and will close the scarf. Pin this in place.


STEP 8: Stitch along the edge as close as you can, making sure to catch the underside as well (if you pinned them together evenly it should be fine)


Ideally, you want to use a thread that blends in to the fabric. For the sake of this post, I used white threads against the green and black so that the stitching is visible. If you cannot find thread that matches, it will only show in the back. Below is how it will look when matched:


That’s it! Although there are 8 steps involved, that is just for detail. Sewing these scarves will take less than 10 minutes and are perfect for even the most beginners with sewing. I had time to make FOUR of them and I take forever to do anything!

Here’s how the width looks when they lay flat:


Wear them folded twice or only once, either way you will look great in your brand new infinity scarf! While you are at it, might as well make one for a friend too!


Most importantly, HAVE FUN! I particularly liked the “photo shoot” for this post (my husband took the pictures of me in the scarves). I was trying to keep all the pictures consistent in appearance and he just kept making me laugh. If you aren’t having fun then it’s not worth your time. Enjoy!


Happy Crafting,
Kelsie Ann

Saturday, January 4, 2014

Canning Lid Ornaments

Happy weekend everyone.  To quickly update you on my ever-changing life:  I have a new job that is still in the field of social work but is Monday-Friday 8-5 (you know... a normal job!)  That being said, I am- for the first time since being married- really getting to enjoy my evenings and weekends with my husband and extended family.  This also means that I am going to start adding new blog posts on Saturdays, since it is a consistent day that I have off.  I also have an injured puppy right now (he tore the bottom layer of his paw pad off- ouch!) that is going stir crazy being stuck in the house with me.  I am hoping that this post makes sense, because my mind is on him right now.  So, if something sounds a little off, have mercy on me today.  Thanks!

Now, on to the post...

A few weeks ago I was invited to attend an Ornament Exchange Party.  I've never been to one before but I would totally recommend having one- it was so much fun!  My old college roommate (of 3 years) was hosting it.  The only requirement was to bring an ornament.  At the party, we played a sort of "white elephant" gift exchange so that everyone wound up with a different ornament than they came with.  Being a crafty person (you all understand) I couldn't just go buy one... I needed to make one.  Here is what I came up with:


If you've been here before, you might recall that I use mason jars for EVERYTHING.  Seriously, I have enough for a small army yet keep acquiring more.  I can't complain though, they are so useful! 


Making ornaments from canning lids is not an original idea, I do hope however that you can draw some inspiration from my three very different designs:  Classic Christmas, Pretty in Pink and Rustic Treasure.

{Classic Christmas}
Since I had no idea who these ornaments would be going to, I didn't want to make a set of rustic ornaments (my personal favorite style in about everything) and them be a die-hard classic Christmas person. So, I made both.


All I did was attach some blue paper to the flat part of the lid with glue.  The snowman is a sticker and the snow balls at the bottom are sticky "lumpy bumpys".  I finished off the design by hot gluing sparkly gems around the snowman.  Looking back, I would have used a finer point glue applicator because the hot glue made a mess!

Meanwhile, I painted the rim of the lid with white paint.  For that snowy affect, take a sponge brush and dab it onto the surface of the rim.  Don't worry if a little bit of the metal color shows through, that is what helps it achieve that look!


Once everything was dry, I stuck the flat part of the lid as far into the rim as I could, flipped it over and glued around the edges to keep it in place.  Sorry I don't have a picture of this.  I wrote "Ornament Exchange 2013" with a Sharpie on the lid but you can cover it with another piece of paper or leave it blank as well.  It's the back, so no one will see it when it is hanging.

Tie a piece of ribbon around the rim of the lid and allow room to make a loop so that it can hang on a tree.  All done!  Now you have a classic Christmas ornament.


{Pretty in Pink}
Since my friend Christine was hosting the party, I wanted to give her an ornament to help her remember her first ornament party. She loves pink, pearls and all things dainty and pretty. It's no wonder we are friends. I stuck with the canning lid theme but made hers a little more... girly!


This was basically made the same way as the last ornament with paper at the base.  However, here I added a chipboard flower (outlined in colored pencil) a "C" tag (for Christine) with a heart shaped brad and a piece of lace across it all.  Just as I have many mason jars left over from my wedding, that lace was a part of it as well- it was on our invitations! 

Please note:
If you use a brad, attach it to the paper prior to gluing it to the lid.  It can be done afterwards, but it will be more difficult to puncture a hole in the metal.

The rim was pained the same way as the snowman ornament and it was finished off with a sparkly pink ribbon.  Perfect for my lovely friend.


{Rustic Treasure}
Now on to my favorite one. I love the rustic feel of this ornament and am thrilled to have been able to tie the "Christmas" theme into it!


Just like the others, it was started with a base paper and embellishments were added on top of it.  I LOVE paper that has words written all over it and this musical themed one fit perfectly into my idea of Christmas.  How many of you imagine singing classic Christmas songs from an old hymnal or from a yellowed piece of sheet music as a critical part of your Christmas celebrations?  I know I do.

After this, I added some thicker kraft paper and covered it with glitter.  I find this is easiest to do with spray adhesive and a sealant (after the glitter is on).  I thought the glitter would dress up the ornament a bit.

It was finished off with a "2" and a "5" (December 25... get it?) from the same punched letter set that I used for Christine's "C".  Lastly, I added some of my special wedding lace and the design was done.


I did not paint the rim because I thought it fit the look better without it.  Attach it the same way as the others and finish this one off with some thin jute twine.


{That's it!}
Ornaments are not one of my craft specialties but I had a blast making these! I had even more fun attending the party and getting to spend that time with some people that mean the world to me.

I took my mom along...

...and got to catch up with one of my best friends in the world...


I couldn't have asked for more!

{Your Turn!}
Which design is your favorite? Do you have any tips or tricks for those of us just dabbling into ornament making? For those of you who can create amazing ornaments without a second thought, I am in awe of you. I think I lucked out this time!

Happy Crafting,
Kelsie Ann