

[Disclaimer: This post contains affiliate links. Purchasing items through the links gives me a small commission with no extra charge to you. I only link up products I personally use and trust. Thank you for supporting my blog.]
I first made these several months back in the painted style and then today decided to try it with felt! My toddler LOVES this shape book that he has and is super into "colors" and "shapes" right now so I wanted something new for him to play with that would allow him to practice those areas.

He loves telling me what the shapes and colors are and I love hearing him tell me. I also love when such as easy project is "a winner" for my kiddo.
Here's how to make your own. It only takes a few materials and 3 steps (okay, really 2!)
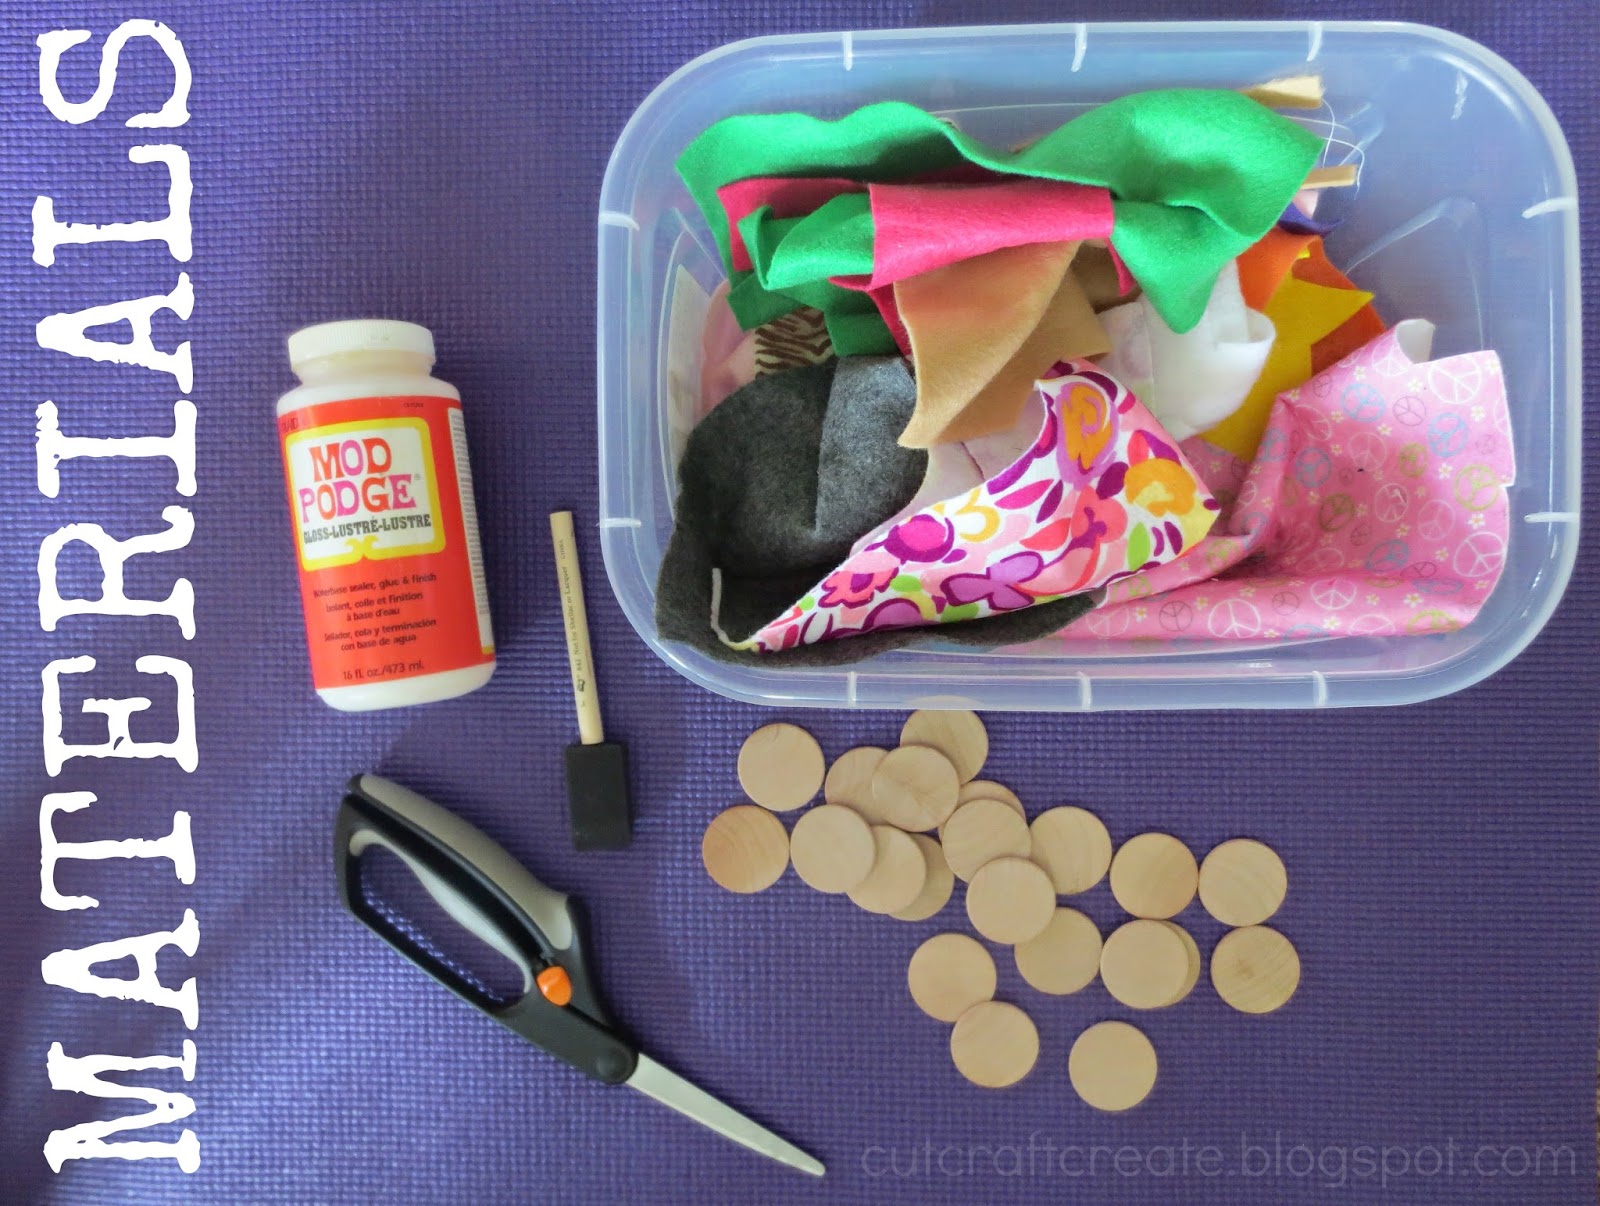
All you need to have is:
- Felt (Joann Fabrics has tons of solid colors and cool prints in 8.5x11 size for cheap)
- Mod Podge
- Paint brush
- Scissors (If you are planning on working with fabric in the future, I recommend buying Fabric Scissors to use strictly for cutting fabrics. This is my favorite kind.)
- Wood "disks"

{Here's how big the 1.5 inch disks look in my *on the pretty small side* almost 2 year old's hands}
Step 1: Cut out shapes

Using different colors, cut basic shapes small enough to fit on top of your wood disks. [Hint: Don't use marker to draw your design before cutting. I didn't think it would show through the backside but it did! My toddler doesn't care but if you want it to look nicer- just freehand it or using something lighter!]

See what I mean about the marker showing through?
Step 2: Glue felt to wood disks
Using Mod Podge, lightly brush the back of the felt with Mod Podge and stick to the wood disks. Press down the edges to make sure it sticks. Set aside until dry.

Don't worry if the Mod Podge shows through your felt. It disappears once it dries! Still, you only need a small amount to get it to stick.
Step 3: Play!
I felt like I couldn't stop at two steps, but that's it! Once everything is dry, let the play begin!

If you've got a little bit more time, consider painting some of the wood disks for more detailed designs. Instead of making a matching game like the felt one above, I made double sided disks that teach colors and numbers as well.

Using a stencil (I made my own from vinyl using my Silhouette CAMEO
I finished off the wood with a mineral oil, which is why it appears darker than the felt game pieces. I did this to better seal the design and prevent chips in the paint (and it just looks nice). Make sure that you use non-toxic paints and natural sealers if giving this toy to a little one that might stick them in their mouth! Be smart, be safe & have fun!

You can also make the reversible disks to help your little ones learn to count. I again used paint and vinyl stencils that I created but wish I was better at free hand drawing because that would have been a lot easier! Put numbers on one side and then that amount of whatever design you want on the other. I also sealed these disks with mineral oil.
You can get as simple or as detailed as you want...

Best of all- you can make these in any size, design, game (matching pieces, flip over to learn, etc) and topic you want. They don't take up much room at all and travel great. Just toss them in your bag and go! I also sewed up some muslin bags that close with Velcro for easy storage. They measure around 6x4 (add an inch to each side when sewing) and can fit up to 20 of these pieces in them (although that's just about the most it'll fit). I added the words out of heat transfer vinyl.

I love how these all turned out- I can't pick a favorite!

Your Turn!
What game would you make? How fun would these be to have in a large classroom setting? I love to see your finished projects so feel free to share on our facebook page as well (and give us a "like" if you haven't already).

ReplyDeleteI really like your blog.. very nice colors & theme. Did you design scr888 pc download link this website yourself or did you hire someone to do it for you? Plz respond as I'm looking to create my own blog and would like to find out where u got this from. many thanks