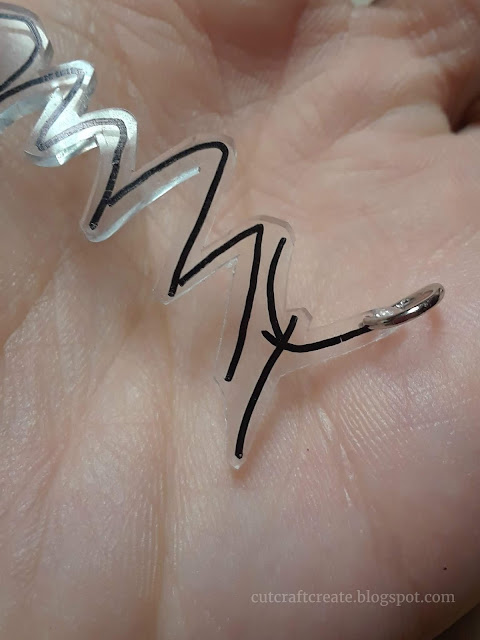
For mother's day, my son gave me a card and of course, wrote "MOMMY" on the envelope. I've seen this a hundred times but I just remember looking at it, feeling like someday he won't call me that anymore, someday his letters will be a little more organized & grown up looking. I want to keep this sweet handwritten "mommy" forever. So I created this...
I'm going to go ahead and apologize for the low-quality photos. Pictures in my house are never great, especially on selfie-mode at 10 pm! But you get the idea. The others are better!
[Disclaimer: This post contains affiliate links to the products you can use to make this project. Purchasing through these links earns me a small commission at no extra charge to you. Thank you for supporting my blog!]
If you follow me on Instagram you might have seen in my stories that I am *obsessed* with Shrinky Dinks right now. Especially for jewelry. I can't stop myself! First I made these amazing motherhood earrings (pictured below) and then I had my kids each draw me pictures which I turned into more earrings for myself. I think I've got enough Shrinky Dink earrings for now...
But back to the necklace. Here's what you'll need to make this easy DIY:
[Materials]
- Crystal Clear Shrinky Dink Paper
- Black Sharpie Marker
- Open Jump Rings
- Necklace Chain of your choice
[How to Make It]
Simply follow the directions on the packaging. As for the design, since the shrink paper is clear you can place it directly on top of their sweet handwriting and trace! Remember that it will shrink to about 1/3 of it's original size so if you need to enlarge your child's drawing before tracing it, don't forget! I copied his lettering exactly but moved over the shrink paper in between letters so that they were almost touching on my necklace trace. (just the look I wanted). You can see how large it was before and after baking in the photo below:
After it's traced, carefully cut around your letters as best as you can, leaving a small amount around the edge. If you did not put the letters against each other like I did, make sure you leave some clear shrink paper in between them so it all stays once piece. Don't forget to punch holes on the top edges for the jump rings. Remember they shrink too! (I had to re-do mine)
^^^There's how it looked before...
...and after
Attach the jump rings and hang on your necklace chain!
We love Mouse and he would totally make a necklace like this too- don't you think?
I am feeling all the emotions over this necklace and I think I'll be wearing this for many years to come. I mean, look at that sweet little "Y". #ohmyheart
What would you put on yours? Your name, their name or maybe a sweet drawing? Share yours below or tag me @cutcraftcreate on Instagram and I'd love to share it in my stories!


Great tips shared here along with a number of useful and informative links. I visited few and will check more later.I found some useful information about auto clicker apps for android which automate tapping in phone
ReplyDeleteThanks for sharing excellent informations. Your web-site is so cool.
ReplyDeleteI am impressed by the details that you have on this web site. Write more
ReplyDeleteBookmarked this website page, will come back for extra articles. What an ideal site.
ReplyDelete
ReplyDeleteI appreciate your work for creating this blog and I hope these site help me for
ReplyDeleteWow, that’s what I was exploring for, what a stuff!
ReplyDeleteexisting here at this weblog, thanks admin of this web page.