Showing posts with label Love. Show all posts

Wednesday, February 5, 2014

"Love Note" Cup Cozie

As you may or may not know, I am not one of those girls who loves Valentine's Day.  I'm also not one of those girls who hates it and sets out to make it an "anything but love" day.  I just sort of let it be another day.  I do, however love red and pink together and of course, hearts!  I also know that many other people go all out on this special day and want to inspire you to create something unique that shows your special someone how truly special they are.

Have you seen all the beautiful handmade cup cozies all over Pinterest?  Although my husband doesn't drink coffee or hot tea, I am a big fan of both and I bet that someone in your life is too!  Your special someone needs more than just any cup cozy... they need a "love note" cup cozy!


The envelope sits at the end of a hand stitched message: "Just thought you should know..."
It's hard to get it all in one picture, hope this helps:


With this cozy, you can tell your loved one how you feel- in a new way, each day!  I love the idea of saying encouraging words ("that you are so talented!") words of wisdom ("it gets better and you will get through this") or simply "I love you!"

It's easy to make here's how:

MATERIALS:
- Two (2) fabrics- one plain, one printed
- Thin batting
- Thread in matching color to sew & opposing color to stitch message
- Two (2) buttons
- Ribbon or (2) elastic hair ties


STEP ONE: Trace & cut the fabric. 
 
Using another cup cozy, trace the shape onto the fabric.  If you have a paper one, rip it apart so that it will lay flat.  If you have a reusable one like me (It came with a cup that I have), lay it as flat as possible, trace, line it up and then trace again.
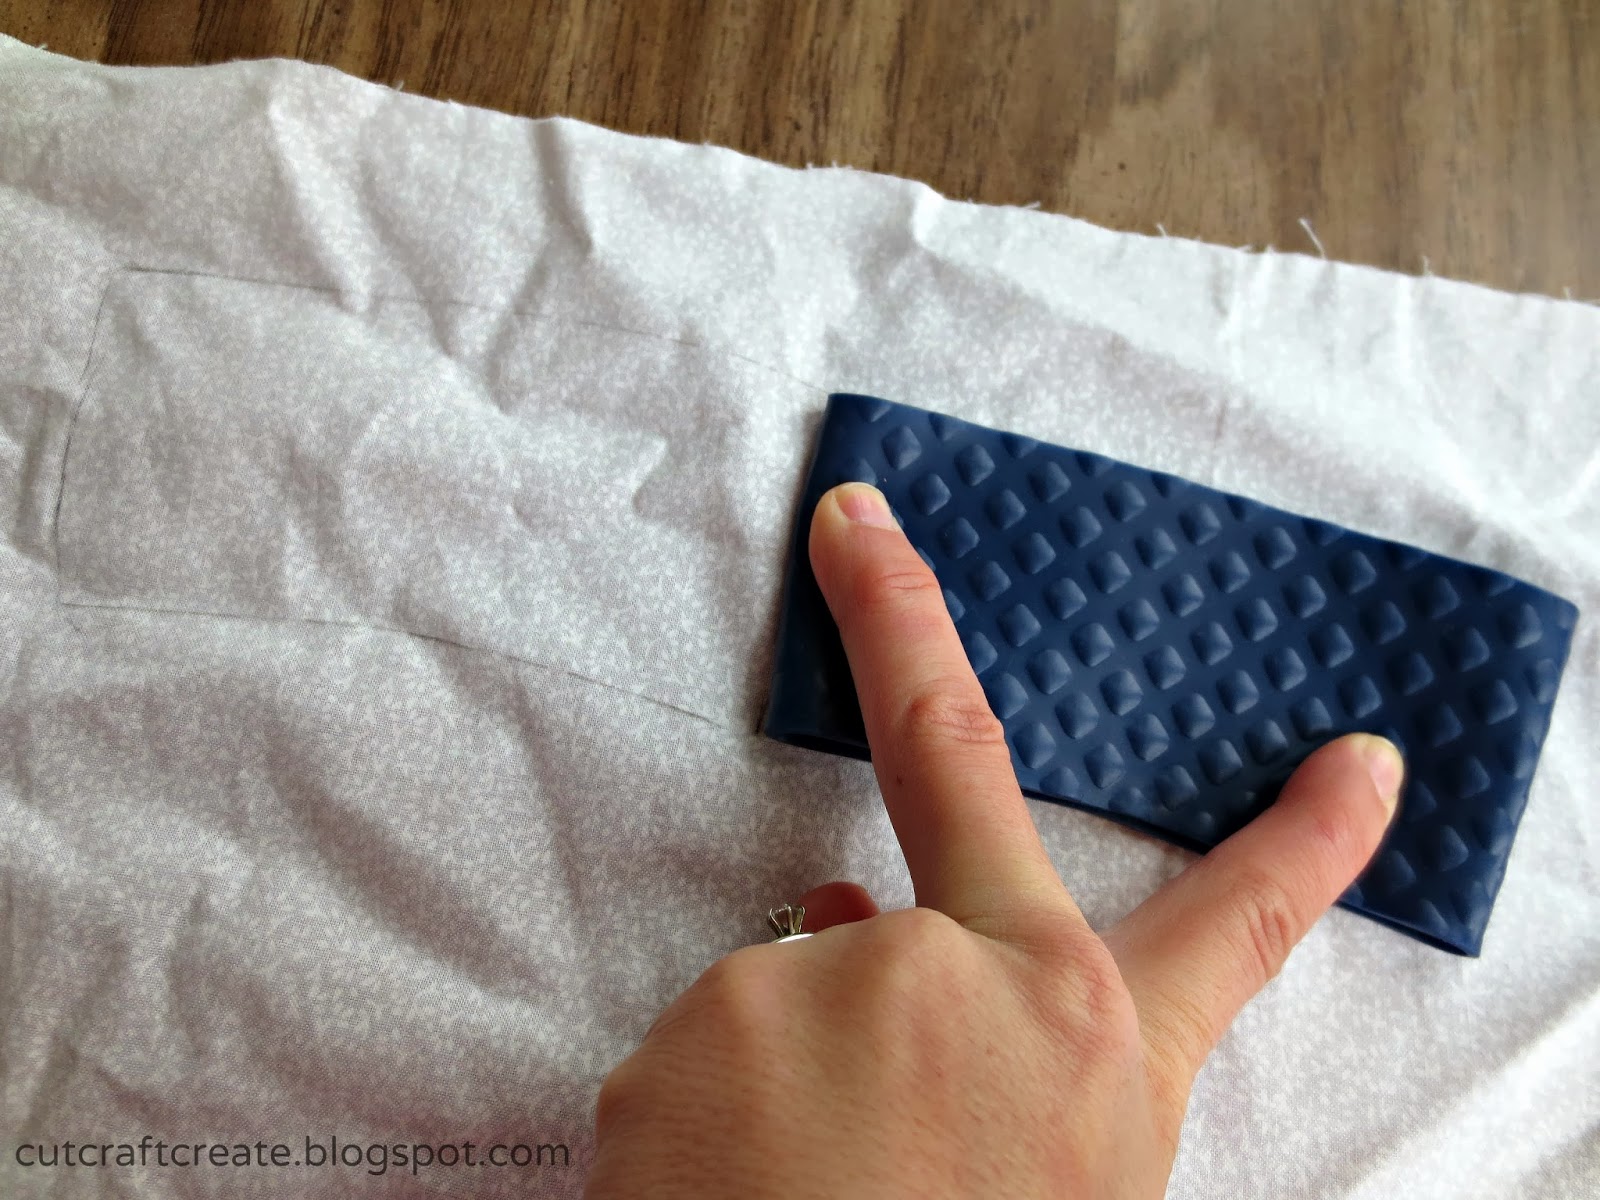
 {Disappearing Ink pens work great, but if you don't have one with you, then a pencil works fine!}

Cut this piece out, giving yourself about 1/2 inch outside of the line to allow for the seam.

Use the (now 1/2 inch larger all around) piece to trace the shape onto the second fabric.


Do the same with a piece of thin batting.  I recommend cutting that shorter (about where the original line was drawn) so that you don't have to worry about it bulking up when you sew the seams.


STEP TWO: Stitch your message.

Using a pencil (or disappearing ink pen), write out your message onto the solid fabric.  Next, hand stitch over the pencil with the contrasting color.  I said "Just thought you should know..."


STEP THREE: Make an envelope.  I had to play around with the fabric to get the right shape but if you make it look like this one, you should be fine.


Sew the sides and bottom down next.  Start with one side, then the other, finishing with the bottom.  I suggest tacking it down at the corner edge and sewing a stitch where it folds for a crisper line and a more "envelope" look!


To finish it up, I ran some stitching across the top (just for looks).  I also folded the top down (like a closed envelope) and ironed it so that the flap would stay down when it was finished (not pictured).


STEP FOUR: Attach the envelope.

Pin your lovely new envelope to your solid fabric immediately following your embroidered message.  With a sewing machine (it's much faster!) run a stitch across the sides and bottom to secure it onto the cozy piece.

{I used red thread to stitch it together & white thread to secure it, just for fun.  It looks lovely!}


STEP FIVE: Pin all your pieces together & sew!

Face your two main fabrics, right sides together.  That means the embroidered message and envelope will be facing the heart print on the other piece of fabric.  Next, lay the batting onto either side, creating a three fabric pile.


Pin it all together and sew THREE sides (both long sides and only one short side).  Don't forget to leave one short side open!

This will attach everything together.  It will probably have this "pillow" look if you batting is a little thicker like mine:


If you sew at 1/2 inch, your stitching should line up about exactly with your original pencil lines.  It's not important that they do, but it will make you feel like it is turning out to be the right size!


Once it is all sewn up, pull the fabric right side out through the short end that you left open.


Don't freak out if it looks really small.  Instead, go iron it flat.  Because of all the batting and being reversed, it doesn't look very wide, but I promise, it's the same as your pattern cozy once it lays flat!


STEP SIX: Attach the loops.

Using ribbon or thin hair bands, create two loops that will stick out of your open end.  I used ribbon because I thought it would look nicer, but I think hair bands would be better for fitting a variety of different sized cups.  If I do this again, I will use something elastic.


It might help to get some of your favorite cups to get an idea of how big your loops need to be.  If you make them too long, they wont hold tightly against your mug.  Wrap the cozy around the cup and see how far they need to go to "close" the gap.

Don't forget to fold in the edges of your fabric pieces for a nice finished look.  Pin it all together.


Sew it closed.  I made two lines of stitches for looks, but try to get yours as close to the edge as possible to make sure that it catches everything.  You can do as many lines as you want!


STEP SEVEN: Add buttons and enjoy!

Sew two buttons onto the other end of the cozy.  These will be used to wrap the loops around to secure the cozy onto the cup.

That's it!
Seven steps but super easy!  I love the hand stitched message and that adorable envelope.  If you want to add a snap or Velcro to close the envelope you can, but ironing it down will do the trick!

Plus... it can go on ALL your favorite mugs- with or without handles!


AND... it's reversible too!


This might be the best thing ever.  I love cup cozies and this one is extra sweet.  Don't forget to add your message with love!

Happy Crafting,
Kelsie Ann

Monday, January 28, 2013

Advice Needed From Card Connoisseurs!

As Valentine's Day draws nearer, I am sure many of you are trying to decide what to do for your loved ones.  Although my husband and I do not really celebrate Valentine's Day (I don't care much for it... lucky for my husband, huh?) we will usually share a card or a little note just to say that on this day (and every day) how much we love each other.  This year, I thought of making a spinning wheel card with different things that "I promise to" on it.  The problem is, I am not a card maker!  Really.  I can do many different areas of crafting but I really struggle with card making.  However, I know a LOT of you out there specialize in it, so I want your opinion on today's post.  Will you help me out?


As you can see, the wheel itself looks pretty good.  I absolutely LOVE that paper, don't you?  I also used a heart shaped brad for the middle- perfect for the occasion.

I made eight different things that "I promise to" do.  Everything from "kiss you goodnight" to "encourage you".  I even threw in a few fun ones like "make you supper" and "warm your spot" (like on the bed or couch)... two little things that mean a LOT to my husband.

{Of course, I had to include "love you" and make it stand out from the rest}


{Here's where I need your help!}
I need to attach this to a card somehow so that I can include the part that says "I promise to"... otherwise we just have a wheel that says "kiss you goodnight"- which doesn't make much sense.

Here was my first idea:


 A vertical card with the wheel under it.  I didn't like the way it looked- too crowded at the bottom.

So then I tried a horizontal card:

{I think I would print out the writing, I just wrote it to get an idea of how it would look}

Something about this seems wrong too.

As I was preparing to write this post, I thought of one last solution:  Taking a small tag on a string and letting it hang from the heart brad.  Then, have the "I promise to" written on the tag  That way I don't have to have a card backing but I can still get the message across.  What do you think?

{What do you think?}
Any suggestions on how to make this look better?  I know there are card connoisseurs out there!  I really appreciate your help on this one because I am STUCK!  I am sure my husband would love it either way but it would make me happy if it looked good!

Happy Crafting,
Kelsie Ann


LINK LOVE! Linked up to: Every Day is an Occasion
  

Thursday, January 17, 2013

How To Make Resin Jewelry

I told you all that I was addicted to jewelry making.  My plan was to make a different project using resin (which I will do in a later post!) and then before I knew it, I was gathering supplies for a necklace.  I guess it is time for me to accept that I have a problem- but until then, let me share my adventures with you!  Check out these resin necklaces that I made.  They were super easy to do and hardly take any time at all (except for letting the resin dry)... take a look:

{let me tell you, the pictures do not do justice to how awesome these are!}

{It's easy to do}
For each necklace, you only need three materials: (plus a chain if you don't already have on)

  {I was just going to do the vinyl "love" at first, but when I mixed up extra resin, I decided to break out my Martha Stewart Tinsel Glitter that I won at a link party on Every Day is an Occasion.  Thanks Jill for the awesome glitter!}


Next, add your vinyl to the pendant piece.  Mix up your resin (follow the instructions listed on the packaging) and let dry.  That's it!

{this shape is from a set of 4 called "decorative circles" by Karla Dudley and can be found in the Silhouette store.  I cut this at 1/2 inch from vinyl and it cut beautifully!}


If you choose to do glitter, here is what I learned:  When you drip the resin on top of the glitter it will just form a bubble on top of it.  You must mix it around together if you want the resin to smooth out over the whole piece.  I mixed it all together inside the pendant and it turned out just fine.


{Your Turn}
What would you put inside your necklace?  Or... would you make something else?  A charm bracelet, earrings or something non-jewelry?  I am excited to experiment with resin more and see what all I can create!

Also, don't forget to check out my co-worker Shana's blog, Crafts Queen!  I had no idea I was working with another craft blogger!  She is so creative and loves to take her own spin on craft projects, so don't miss the opportunity to check her out. I can't wait to see what she works on next, so give her some blog love and support our crafty sister!

Happy Crafting,
Kelsie Ann

LINK LOVE!  Linked up to: Every Day is an Occasion

Monday, January 14, 2013

Free "I promise to" Printables (Blank copy included!)

How was everyone's weekend?  I was lucky enough to have Saturday night off of work so me and my husband went on a date.  Then Sunday we spent the day cleaning the house and enjoying each others company.  It sounds funny, but it is beautiful weekends like this that make me fall more in love with him.  I got to thinking about our wedding vows, which led me to thinking about all the little promises that most of us don't actually recite at our wedding ceremony but do in fact practice in the day to day.  That is why I created a short set of "I promise to" printables for you all to have.  Some are funny, some are sweet and I bet at least some of them apply to you!

All of these printables will have the same background image, so that if you choose, several can be placed together as a set.  I will also include a BLANK copy so that you can write whatever you want inside!

I got the background paper from designhousedigital.com (it's in the "Celeste Knight" bundle in the freebies section) and did the rest myself.  Feel free to print or share any images but please link back to this website if you do!  All images should print 5x7.

{Funny Ones}
 
{okay ladies, we all know men looooove to have the remote for some reason}


 {this one is a promise made by the guys.  luckily my husband has always been good about this}


 {keep your loved ones warm!}


{my husband loves to drive and I love to be driven.  we're a perfect match}


{Sweet Ones}
 {it's the little things}


 {...and never go to sleep without saying "I love you"}


{this one is easy because my husband is hilarious!}
{get it here}


{Some More...}

 {doing this with a brownie is maybe the highest proof of my love}


 {actually, my husband is a chocolate milk guy- he does this for me though!}


{tyler does this for me every single day.  chivalry at it's finest}


{this one is sort of in our vows... this is just more laid back wording}


{Make Your Own!}
{what special thing do you and yours share?  make your own with this blank template!}


I love these little reminders on how special the "little things" are.  I am feeling really blessed to have a husband whom I get to experience all of these things with and who sticks with me... even though I occasionally steal the covers in my sleep.

Happy Crafting,
Kelsie Ann 

LINK LOVE!  Linked up to: Every Day is an Occasion

Thursday, January 10, 2013

Hand Stitched Love & Burlap {DIY Shirt}

It's not even the middle of January yet and everywhere I look there are signs of Valentine's Day.  Colors of red, pink and white are flooding retail stores and images of hearts are stamped across Pinterest.  I have never been much of a Valentine's Day person.  I have no real problem with the day but I don't get excited about it either (crazy, right?)  I do however love the colors; and I am always a fan of hearts!  The problem is, because I don't care for it in the sense of the holiday, I don't want to cover my home in Valentine's decorations.  Halloween- okay, Christmas- of course, Valentine's- probably not.  I can however, satisfy my need for this look with clothing that I could wear any time of year!


I LOVE this shirt (pun most definitely intended!) It is easy to make and uses only TWO extra materials:

You will need:
- 1 shirt
- Burlap, cut into a heart
- DMC thread

I attached the burlap to the shirt using heat n bond and reinforced it with a few simple stitches along the edge.  For the "Love", I hand sewed using a needle and a full string batch of DMC thread (I kept it thick so it would show up better).  The more "hand written" the love looks, the better!


{Your Turn}
We all know that I LOVE burlap, but what about you?  Are you a fan of the "rustic" look of the burlap heart and handwritten love or would you have chosen a different pattern?  I have a new favorite shirt right now and because it simply says "love", I can wear it year round!

Happy Crafting,
Kelsie Ann

LINK LOVE!  Linked up to: Every Day is an Occasion

Monday, November 5, 2012

A Message For All Girls (and Women)

Good Morning my friends.  My plan today was to bring you a new cold-weather craft.  However, I have been noticing lately that there is an issue that needs to be addressed.  No, this is not political.  It has nothing to do with social security, taxes or war.  It has to do with the way people (women especially) are viewing themselves in the world today.  With social media being so easy and accessible, girls are making their feelings more and more known.  Wouldn't you agree?  A status update or a new "tweet" only take a moment to make.  Similarly, it is easier than ever to bring people down.  It seems that people think of virtual words as less harmful than face-to-face words.  Just to clear things up:  They are NOT less harmful.

It breaks my heart to see these girls (of all ages) feeling insecure with who they are.  I know that my blog isn't the most popular one out there, but if my message gets across to just one person, I will feel that it was worth my time.  I want each and every woman to know that they are truly special, that they are loved and that they do have a purpose that nobody else can fulfill.

That being said, I wanted to also make a few printables on this subject that I am happy to share with you.  If you or somebody you know would benefit from seeing these words, please do not hesitate to print them out, hang them up, or make them your computer wallpaper.  Use them in any way that will encourage you or those you love.


{Please enjoy & share these free printables}
Image of God 
Keep Being You 
You Are Beautiful 
You are NOT insignificant 
You Are... {You} 

Girls, Women, Everyone listening:
YOU ARE BEAUTIFUL.  Inside and Out.  YOU ARE NEEDED.  Even when you think that no one notices you.  YOU HAVE A PURPOSE.  God has a plan and I promise you, that in time you will see it too.

I know that it is hard sometimes to see yourself as special.  I know that sometimes life is really really hard and it seems that nothing is going your way.  I know that people are mean and that words really do hurt.  I know that sometimes it is not so easy to figure out who you are.  Yet, I know that you (yes YOU) are so capable and wonderful and specially made to be exactly who you are.  Please don't ever give up on yourself, because I promise you:  There are people out there who have never even met you, who love you and can't wait to see you succeed.  Really.  It sounds crazy but it's true.

Similarly, girls be nice to each other.  Love yourself and don't try to make yourself feel better by bringing others down.  There is enough room in this world for everyone to be happy.  Being mean wont make you happier anyways, not in the long run.  You might be surprised who you can find a friend in, so give them a chance.

Now that I've got that all off my chest, I hope it has made a difference for someone- anyone.  I will see you all again on Thursday.  You are beautiful and you are loved.

Kelsie Ann

Monday, October 8, 2012

Free Fall and Halloween Printables

Happy Monday!  Is everyone excited for the week ahead?  I know I am- I have some very exciting stuff happening on Thursday (oh the suspense).  Until that point I am working to learn some really neat new blog techniques.  They may be old hat to you or maybe it is brand spankin' new... either way, everyone loves a free printable right?

I have been wondering for quite some time how to make and link my own printables to this blog.  Then I found I Am Momma- Hear Me Roar and she told me everything I needed to know.  She told me all about PicMonkey and Design House Digital: my two new best friends.

Using those websites, I created a few Fall and Halloween printables for you.  Please enjoy them and share with me in the excitement of a new technique!  Here's to learning more everyday, right?!


{Favorite Fall Things}

{I think this one is my favorite.  The colors, the fonts.. it just makes me excited for FALL!}

Do you love it too?  Get it here!


{Cheesy Fall Lines}
{Okay, I am a major cheese when it comes to play on words.  I may or may not have something else already titled "FALLing in Love"... I can't help myself}

Are you a big cheese too?  Get this printable here!
(This one is sized smaller to fit a 5 x 7 frame.  Good things come in small packages, right?)


{The Definition of Halloween}
{I am also a bit of a sucker for definitions.  I don't know why but it seems to add a cuteness to everything it touches.  I would suggest bookmarking dictionary.reference.com right now for future craft use}

Are you a bit of a word nerd too?  Brighten your day with this free printable, found here!

{Your Turn!}
I am so excited to have learned how to make my own printables and I hope that someone has been inspired from this post as well!  Let me know what you like, what you don't, or anything else on your mind!  This is a learning process after all and we are all in this together.
Note: You no longer have to do the word verification to comment on this blog (yay!) If that was holding you back before, then you're free to comment now!  Thank you for your patience. 

Happy Crafting,
Kelsie Ann


Link Love!  Linked up to: Every Day is an Occasion and D.L Art 

Monday, October 1, 2012

Homemade Cards for Any Occasion

Receiving a card in the mail is one of those special moments that can really brighten someone's day.  Receiving a handcrafted card pushes the envelope even further (pun intended) by showing someone that you really care.  Taking time to make and send a homemade card is a timeless treasure made especially valuable during this instant message/texting/tweeting world we live in today.

That being said, here are some cards that my mom and I made for a local fundraiser.  Feel free to grab some inspiration from them.  Each set comes with a card and matching envelope:


Christmas/Winter
{That reindeer stamp is one of my very favorites- isn't it beautiful?!}


Halloween

{The spider was made sort of 3-D looking so it jumps right off the card.  Spooky!}


Love/Valentine's Day
{Loving the "lumpy bumpy" stuff on the card?  Learn how to make them in any design HERE}


Mother's Day
{You can make 3-D flowers like this yourself too!  Just check out this post for the how-to}


Father's Day
{I love how the "BEST" pops out from the card}


Birthday

{This was my first craft to use bakers twine and I loved it!  It looks like a little gift wrapped up, doesn't it?}


{MY FAVORITE} Good Luck
{I love the colors, the brackets, the birdcage on the envelope... I love it all!  Plus, "good luck" cards can be used for almost anything}


Your Turn!
Next time you want to show someone how special they are to you, forgo the tweet stating that #momrocks and get crafting!  I can promise that the gesture will be appreciated (and it's fun for you too!)

Happy Crafting,
Kelsie Ann

Link Love!  Linking up to the Craftaholics Anonymous Fall Frenzy Link Party and Every Day is an Occasion!