Showing posts with label rustic. Show all posts

Saturday, January 4, 2014

Canning Lid Ornaments

Happy weekend everyone.  To quickly update you on my ever-changing life:  I have a new job that is still in the field of social work but is Monday-Friday 8-5 (you know... a normal job!)  That being said, I am- for the first time since being married- really getting to enjoy my evenings and weekends with my husband and extended family.  This also means that I am going to start adding new blog posts on Saturdays, since it is a consistent day that I have off.  I also have an injured puppy right now (he tore the bottom layer of his paw pad off- ouch!) that is going stir crazy being stuck in the house with me.  I am hoping that this post makes sense, because my mind is on him right now.  So, if something sounds a little off, have mercy on me today.  Thanks!

Now, on to the post...

A few weeks ago I was invited to attend an Ornament Exchange Party.  I've never been to one before but I would totally recommend having one- it was so much fun!  My old college roommate (of 3 years) was hosting it.  The only requirement was to bring an ornament.  At the party, we played a sort of "white elephant" gift exchange so that everyone wound up with a different ornament than they came with.  Being a crafty person (you all understand) I couldn't just go buy one... I needed to make one.  Here is what I came up with:


If you've been here before, you might recall that I use mason jars for EVERYTHING.  Seriously, I have enough for a small army yet keep acquiring more.  I can't complain though, they are so useful! 


Making ornaments from canning lids is not an original idea, I do hope however that you can draw some inspiration from my three very different designs:  Classic Christmas, Pretty in Pink and Rustic Treasure.

{Classic Christmas}
Since I had no idea who these ornaments would be going to, I didn't want to make a set of rustic ornaments (my personal favorite style in about everything) and them be a die-hard classic Christmas person. So, I made both.


All I did was attach some blue paper to the flat part of the lid with glue.  The snowman is a sticker and the snow balls at the bottom are sticky "lumpy bumpys".  I finished off the design by hot gluing sparkly gems around the snowman.  Looking back, I would have used a finer point glue applicator because the hot glue made a mess!

Meanwhile, I painted the rim of the lid with white paint.  For that snowy affect, take a sponge brush and dab it onto the surface of the rim.  Don't worry if a little bit of the metal color shows through, that is what helps it achieve that look!


Once everything was dry, I stuck the flat part of the lid as far into the rim as I could, flipped it over and glued around the edges to keep it in place.  Sorry I don't have a picture of this.  I wrote "Ornament Exchange 2013" with a Sharpie on the lid but you can cover it with another piece of paper or leave it blank as well.  It's the back, so no one will see it when it is hanging.

Tie a piece of ribbon around the rim of the lid and allow room to make a loop so that it can hang on a tree.  All done!  Now you have a classic Christmas ornament.


{Pretty in Pink}
Since my friend Christine was hosting the party, I wanted to give her an ornament to help her remember her first ornament party. She loves pink, pearls and all things dainty and pretty. It's no wonder we are friends. I stuck with the canning lid theme but made hers a little more... girly!


This was basically made the same way as the last ornament with paper at the base.  However, here I added a chipboard flower (outlined in colored pencil) a "C" tag (for Christine) with a heart shaped brad and a piece of lace across it all.  Just as I have many mason jars left over from my wedding, that lace was a part of it as well- it was on our invitations! 

Please note:
If you use a brad, attach it to the paper prior to gluing it to the lid.  It can be done afterwards, but it will be more difficult to puncture a hole in the metal.

The rim was pained the same way as the snowman ornament and it was finished off with a sparkly pink ribbon.  Perfect for my lovely friend.


{Rustic Treasure}
Now on to my favorite one. I love the rustic feel of this ornament and am thrilled to have been able to tie the "Christmas" theme into it!


Just like the others, it was started with a base paper and embellishments were added on top of it.  I LOVE paper that has words written all over it and this musical themed one fit perfectly into my idea of Christmas.  How many of you imagine singing classic Christmas songs from an old hymnal or from a yellowed piece of sheet music as a critical part of your Christmas celebrations?  I know I do.

After this, I added some thicker kraft paper and covered it with glitter.  I find this is easiest to do with spray adhesive and a sealant (after the glitter is on).  I thought the glitter would dress up the ornament a bit.

It was finished off with a "2" and a "5" (December 25... get it?) from the same punched letter set that I used for Christine's "C".  Lastly, I added some of my special wedding lace and the design was done.


I did not paint the rim because I thought it fit the look better without it.  Attach it the same way as the others and finish this one off with some thin jute twine.


{That's it!}
Ornaments are not one of my craft specialties but I had a blast making these! I had even more fun attending the party and getting to spend that time with some people that mean the world to me.

I took my mom along...

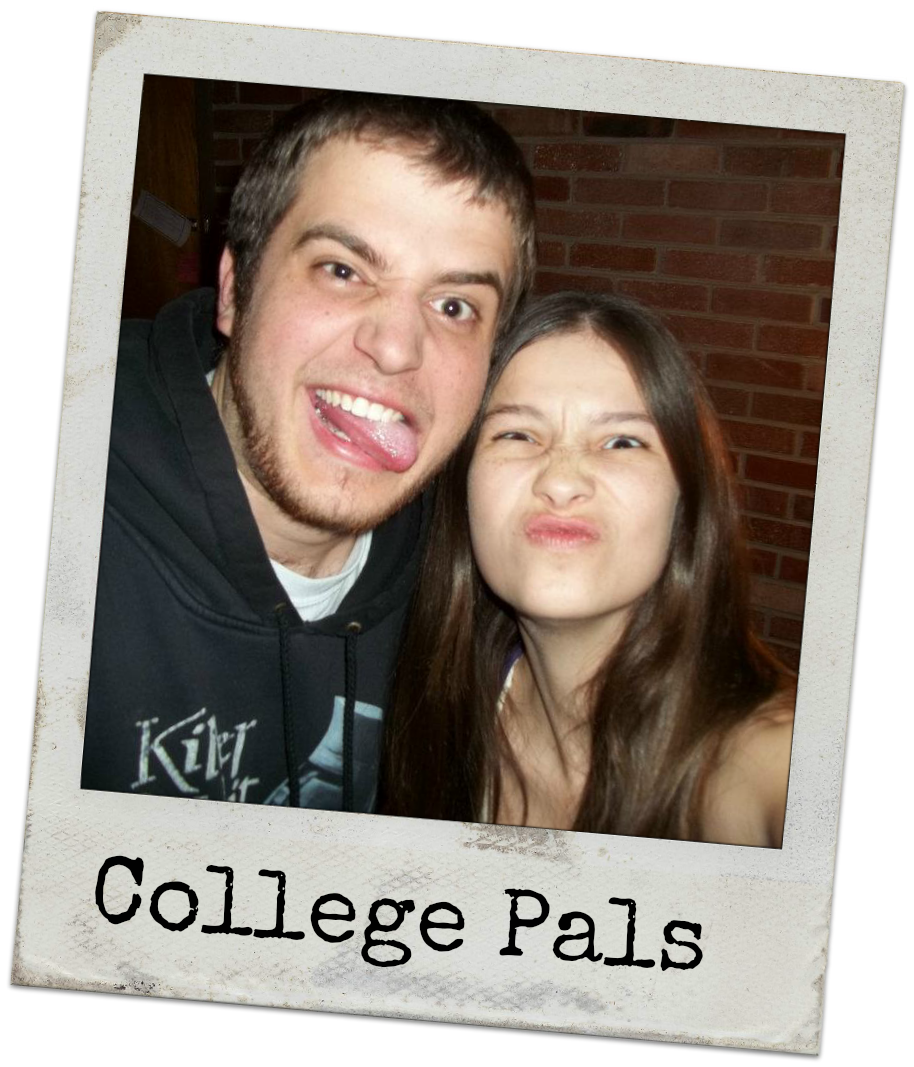
...and got to catch up with one of my best friends in the world...


I couldn't have asked for more!

{Your Turn!}
Which design is your favorite? Do you have any tips or tricks for those of us just dabbling into ornament making? For those of you who can create amazing ornaments without a second thought, I am in awe of you. I think I lucked out this time!

Happy Crafting,
Kelsie Ann 

Friday, October 25, 2013

Rustic Wedding & Old Friends

Last weekend my husband and I had the privilege of attending a wedding for one of my dearest friends.  This guy not only is one of the best people I know, but was responsible for me staying at my college (I had a rough time freshman year) and possibly from gaining the freshman 15 (he rarely let me skip our racquetball sessions!)  All joking aside, he was one of my first real friends on campus and will forever be one of my best friends.  Watching him get married to his beautiful bride was the perfect end to my week.


His name is Dustin and he's a total dork, but so am I... that's why we're friends!

I knew that his wedding was going to be rustic themed but I was blown away with how darling it all was!  The venue was a mix of outdoor and barn, there were mason jars hanging from shepherd hooks as you walked between the two, there were signs pointing to the different areas (like "restroom" "barn", etc.)  It was so lovely.

Although I did not take pictures of everything, I wanted to share their favors with you (there were two!)...


After the ceremony, while the happy couple took pictures the rest of the guests had time to catch up with each other, snack on some food and drink from... you guessed it- mason jars!

If you've been following this blog long, you know that I am addicted to mason jars.  I use them for everything and almost every day.  Each jar had some twine wrapped around it with a blank tag on it to write our names.  What a darling way to keep track of our drinks.  I wrote out K. Saus and T. Saus (our last name is Sausaman) for myself and my husband.  I am pretty proud to be his wife as is, but there is something about weddings that makes me want to shout from the hilltops "this one's mine!"  Boy, would that embarrass him.


At the end of the night, we got to take home our mason jars!

Our other favor was sitting at the table when we arrived.  Adorable small burlap sacks tied with twine and finished with a personalized tag.  Think it can't get any better?  They were filled with candy!  Chocolate is a girl's best friend they say...


When they get back from the honeymoon I will have to ask if they made the tags or ordered them from somewhere.  I love the font used in the "Thank You" and love that it is personalized with their names and wedding date.


Although I can never get enough burlap or have too many mason jars, the best part of the night was being able to catch up with old friends.  Two of these guys I haven't seen since my wedding and the other since we graduated!  It's funny to think that we are all grown up now (each of us is married except for one who just proposed to his girlfriend a few days ago... she said yes!) and not just a bunch of college kids.  Anyone else with me on this?


It was a beautiful day and a beautiful wedding.  I still feel enormously blessed to have been a part of it and hope that it's not so long until we can all catch up again.

 {That's me and my husband with Dustin and his beautiful wife Brittani}

What is your favorite thing about rustic weddings?  I've mentioned that I am a sucker for burlap and mason jars (both in our wedding as well.) Or... are you not quite convinced that rustic is the way to go?  I'd love to hear your thoughts.

Happy Crafting,
Kelsie Ann

Tuesday, October 8, 2013

Painted Acorns {Fall Decor}

I am a little behind on my fall decorations and now I am running the risk of being behind on the Halloween ones too!  Where does the time go?  To help catch me up a little, I made a quick and easy (but totally cute) fall craft:


These are easy to make and only take a few minutes (plus dry time.)

1. Pick out a few of your favorite colors and an accent color for the tops.
2. Paint!

You can either paint it all together or pop the top of the acorn off and glue it back on when everything is dried.  The latter option makes for a crisper line between the colors but the former option is a little faster.


I love these colors together!  The tops are all painted with metallic gold.

You can display these acorns in a variety of ways.  I chose to put them inside of a glass goblet filled with thick jute twine.  I love the mix of detailed glass with rustic jute!


What colors would you choose? I hope that this has helped you get started on that fall decorating if you are anything like me!


Happy Crafting,
Kelsie Ann

Wednesday, September 25, 2013

My Slow Return to Blogging

Hello there!  Remember me?  Boy it has been a long time since I have posted something new on this blog and let me tell you... I have missed it!  To quickly fill you in: I got a new job as a family consultant (social work) and I am figuring everything out for the first time.  I also celebrated my first year of marriage to my wonderful husband.  Oh, and did I mention that the wonderful husband of mine is building up my craft room?  Yea, it's been a good year.  The only part I am missing is this blog!

That being said, I am yearning to get back into the "swing of things."  I don't think I will be able to do my bi-weekly posts like I used to (at least until I get my schedule figured out with this new job) but I would like to start crafting and blogging again.

Okay, enough of my talking.  I wanted to share with you some pictures from our vacation this summer.  One of the stops was the home of President Eisenhower and his wife.  The property was AMAZING and so inspiring.  Allow me to share a few things that inspire me:


Surprise, Surprise, I love the rustic stuff!  I have never been a fan of anything "blue" but I LOVE these vibrant, funky shades of blue/green.  They have popped up in popularity the last couple of years but they can be found in real vintage items from the past! This color inspires me!  Plus... this lovely piece looks like something that would fit perfectly in my Route 66 room.


What I love about this is the stone wall/wooden door together.  It mixes two of my favorite materials into one beautiful, real surface.  I can only imagine a hard working man or woman (ladies, we can do the job just the same!) laying each stone piece by piece on the wall or swinging open that stunning door to explore the wonders that lie behind it.

Maybe that is more cheesy than realistic but I love the concepts of hard work and preserving the past that this one picture exemplifies for me.  I am inspired!


This was the outside of the Eisenhower home.  Most of the house had to be changed but one small end of it was able to be preserved...and it is stunning.  Look at those colors!  Pink, Green, Blue, Brown, Grey and more!  I would have never imaged mixing these colors but I love it here.  These colors inspire me.  This idea will not only transfer into my decorating scheme but even into jewelry that I make!


How much do you love this?  I will admit: I much prefer my washing machine when it comes to doing several loads of laundry.  That being said, when I look at this it means so much more than doing laundry.  It means hard work, it means time with family.  Today, I throw a load into the washer, walk away and move onto something else.  From what I understand (or maybe I am just being nostalgic) washing laundry this way involved a little more elbow grease and a lot more chatter with friends, family or anyone who was around while you washed!

Okay... maybe that is not the case but it does make me happy.  I am sticking with my washing machine but I do love what it stands for! It inspires me to get more out of my tasks than just "checking" something off of my list.


I never had any animals of my own (any that stay in stables at least) so of course, I find this endearing.  I also enjoy this because it is so simple.  I love things that were not made to be beautiful, lovely or inspiring and then... they just are!  It actually makes me want to get our metal tins out and throw together that summer BBQ that I was planning.  What is that you say?  It's fall now?  Oh well, better start planning for next year.


Last but certainly not least are these personalized equipments!  On the left is a close up of their car... yes, their CAR!  I asked my husband if we could put our names together on the side of one of our vehicles.  He said no.
On the right side is a cart found in their stables that had the "We Like Ike" slogan on it.  If I had a slogan (We're Crazy for Kelsie?) I would be putting it on everything too!

Both of these things inspire me to get more personalized with my stuff!  For example, Christmas is coming up... maybe I will make a wreath with an "S" on it.  In the meantime, I will be trying to convince my husband to add our names to the car.

See you again soon
I am so sorry to everyone that so lovingly stopped by this blog and has waited patiently for me to return.  I am grateful for you and hope that you will return and join me in all of our future crafting adventures.  Let's made a deal:  Starting next week, every Friday at 5:00 pm, expect to see a new post.  Deal?

...Now is your part of the deal.  Tell me what inspires you about the pictures from this post!  Do you love them or think they are just a bunch of old lame junk?  OR... tell me what kinds of crafts you would like to see in the upcoming weeks.  I might just pick one to do!

Happy Crafting,
Kelsie Ann

Monday, December 17, 2012

DIY Rustic Gift Wrapping

One of my favorite things about Christmas is wrapping Christmas presents.  The shopping itself sort of stresses me out, but the wrapping is like a mini vacation where my creativity is allowed to roam free as I load up each box with ribbons, bows and other assorted goodies.  As you may have been able to guess, I am loving all the rustic themed gift bags this year.  My mama, being the creative genius that she is, came up with the idea for this adorable wrapping paper.  I made my first batch of it today and got some wrapping done for my husband:


All you need to make this wrapping paper is:
{1} Packaging paper.  This can be found at stores like Big Lots or the Dollar General.
{2} A Christmas stamp & ink.  The idea for this wrapping paper actually formed because we bought this stamp.  Michael's had a BIG sale going on and we got this huge stamp for a little over a dollar!
{3} Versa Mark, embossing powder & an embossing gun.

{How to Make it}

All you do is stamp your image all over the paper.  Make sure to leave a spot or two for your embossed image.

{stamp, stamp, stamp}

Next, emboss your image into it's spot:
 
{I LOVE embossing, it looks so neat!  For those of you who don't know how: simply stamp as you normally would but use Versa Mark instead of an ink pad.  Then cover in embossing powder, remove the excess powder & emboss with your heat gun}

To finish up, wrap your package in your new paper and complete with some fun and rustic toppers.

...Like twine and baker's twine!

{love this}

...for a little extra something, add a small bird or other adornment to the top of your gift.

{I love having this little bird on here, but my husband hates glitter (and the bird is covered in it), so I figured I should probably save it for another time}

{More of a gift bag type?}
The same tecnique can be done to make your own gift bags:

{Check out the red & green mixed embossing.  Pretty neat huh?}

{Your Turn!}
Whether you love the rustic look or know someone who does, these gift wrapping ideas are sure to be a hit!  I can't wait to make more and I can't wait to hear about any that you have made as well.

Happy Crafting,
Kelsie Ann

LINK LOVE!  Linked up to: Every Day is an Occasion

Thursday, August 16, 2012

Rustic Clay Pot

Good Morning!  Well, it's morning here and I've been up since 6 am so I am pumped and ready for the day!  Don't let that fool you though, it took me an hour of dragging myself around and a cup of coffee to get here.

Are you alert and ready for today's craft?  It is a decorative (and useful!) clay pot:


This is actually "leftover" from our wedding in June.  We sat these pots on the tables in between the centerpieces and filled them with kisses candy.  They were a bit hit... or at least the candy was!

The best part?  They're easy to make!  Here's how:


{1} Buy a small clay pot at any hardware of craft store (we got ours at Hobby Lobby).

{2}Take a medium thick piece of twine and wrap it from the back to the front, tying it into a bow.  Do the same thing again for the opposite side.  This way each side of the table can see a bow and it gives it the "double stringed" look you see here.

{I don't mind the twine being sort of "undone", it gives it a rustic look.  If you don't want that however, just trim the excess strings after you tie it}

{3} Next cut 2 small squares of burlap fabric.  Choose a favorite stamp design and simply stamp it onto the burlap. HINT: Solid designs work best as does black ink.


{4} Attach one square to each "side"of the pot using spray adhesive.  If you do not own a can of spray adhesive, I would highly recommend buying some.  It works wonders for attaching bulkier materials like fabric, lace trim or twine.

All Finished!  How easy was that?


I keep one on my dining room table for decoration.  Right now it is filled with rocks (used in our wedding centerpieces) and dried Billy Balls (from my bridal bouquet).  It is a little piece of our wedding that we get to see everyday in our home.


Did I mention that we have over a dozen of these left over?

Does anyone have an idea for how I could use all of them?  What would YOU put in yours?  Flowers, candy, something else?

I would love to hear your thoughts and ideas so please let me know!

With Love,
Kelsie Ann

LINK LOVE!  This project is linked to:  Every Day is an Occasion

Tuesday, May 22, 2012

Wedding Invitation Revealed!

As I've said before, when I find time to craft nowadays it is mostly dedicated to making all the wedding creations I have committed myself to do.  The first "biggies" on my list were the wedding invitations.  Remember my last post with the tiny square numbered carstock pieces?  You guessed it- they were part of the invitation:


I took 2 square pieces of cardstock and sandwiched a piece of twine (LOVE twine!) in between them, putting simple knots in between each set.  The hearts on the end were a thicker cardstock that we bought in bulk on ebay.  I attached the end of the string inside of the envelope so that it could not pull entirely out. 
That envelope was made using the Silhouette, but I changed the front to a point instead of a rounded shape like the original had.  The "True Love Lasts Forever" was a stamp.


Want to see the whole invitation now?The theme for the wedding is a sort of mix between rustic and vintage.  That's why you can find both styles incorporated into these invitations:


The front is made of that rustic carstock that I love so much.  We printed out the saying with a regular printer then cut out the shape with the Silhouette.  In the square, we took a sandspeck paper and attached a vinyl (yep, that's vinyl) tree shape to it.  Then the smaller square was just attached to the back of the rustic paper.  We took twine (told you I loved it) and wrapped it around that section before attaching it to the whole invitation.

The inside has two parts:  The left side has a piece of lace running across the top.  If you plan to attach thick lace like this to a paper, I highly suggest using spray adhesive.  It works better than anything out there and will save you hours of frustration.  Below that is my envelope with the pull out dates.  This is one of my FAVORITE parts and I've had so many friends and family say how cute and fun it was to pull that out!  Time well spent.
On the right side is our information.  Excuse all the whited out lines, I am extra paranoid about people being able to access our information, so besides my own name, I've covered it all.  Anyways, the wording is printed on the same sandspeck paper we used for the front square and then is covered with a swirled design velum (easier to see in the above picture).  Again, I would suggest using spray adhesive.  We found that other glues (especially if only done around the edges) made the wording more difficult to read because it was not pressed firmly against the other.


My other FAVORITE part was the envelope.  We took pictures of me and Tyler, put them together, and printed them out on regular paper.  We then cut it to our desired shape and glued them inside of our envelopes.  This idea also works for the triangular shaped envelopes, we just used this shape because they could be ordered in the same sandspeck material that we used in the invitaiton.  This was also a big crowd pleaser!

Our RSVP card is made of the same carstock as the front of the invitation and was simply printed out on a regular printer.  Hint: Ask your local post office for the dimensions and weight of a "postcard".  Attaching a postcard stamp to the back of this card makes for a quick and easy way for your guests to respond.

The last little card was just for information; such as registry info and a link to our wedding website which has further details on alternative rain locations, hotels, and directions.  This was just printed normally onto the sandspeck paper.


And that, my friends is what our wedding invitations looked like.  It was a lot of hard work getting all the "little things" ready and put together, but I am really pleased with the end product.  With a little time and a lot of love, handmade wedding invitations can be something that your guests will appreciate and will let them know how special they are to you (and it's fun for you to make too!)

MATERIALS:

I hope you have enjoyed this post and have gotten a few ideas for your own projects (wedding or not).  Have any of you handmade your own wedding invitations?  What about similar items, like birthday or anniversary cards?  If so, I'd love to see them, feel more than welcome to share!

Sending my Love,
Kelsie Ann