Showing posts with label jewelry. Show all posts

Thursday, June 20, 2019

Lace Earrings DIY

I am so into easy-peasy DIYs right now.  As I try to balance my time with kids, housework, my business, socializing... life in general (!) I find that crafts or really anything creative gets pushed to the side.  I enjoy crafting with my kiddos but it feels good to make something that I want to make.  That's why the fast and easy projects are my jam.  I only need a handful of minutes and I get that sense of accomplishment that carries me into the next craft time.

Earrings have been a favorite of mine lately; maybe because my kids are finally at the age where they aren't tugging on my earrings all the time in fascination.  I've created several super cool earrings lately like these motherhood earrings (from shrinky dinks) and I even let my son make these rainbow earrings (instagram).  I received a bag full of lace scraps from a church friend and as I sifted through them the ideas rushed into my head.  The first of course-earrings.


[I was unable to edit any photos for this post so please be respectful and make sure you link back to my blog or social media if you share my content.  Thank you!]


These were my 3 favorites (I think I'll turn the others into bracelets!


[Disclaimer: This post contains affiliate links to products I used in making this project. Purchasing through these links earns me a small commission at no extra charge to you. Thank you for supporting my blog.]

All you need to make this project is:

- small pieces of lace
Mod Podge
earring hooks


How to make it (in minutes!)

Step 1: Lay out your lace. 

Step 2: Cover your lace with Mod Podge.


Step 3: If the Mod Podge is filling any holes in the lace, use a pin or other small object to open the space back up.  Do this while the Mod Podge is still wet.


Step 4: When it's dried, take your jewelry hook and attach them together!  It's so easy. Don't you love it?


Don't you just love the delicate lace look?  And it's more durable with the Mod Podge. Win- Win!


It even dresses up a solid tee!


And here's something really cool:  This would be an AMAZING little DIY for your wedding.  Find a lace that matches the feel of your dress or if you have to alter your dress, save a spare piece and whip up identical matching earrings!  I made these earrings in 2019 and this is my wedding dress from 2012 and I swear that flower looks almost the same!  Isn't that fun?

(For those wondering, I try my wedding dress on again every year on our anniversary so that's how I have a photo of me in my dress!  It was a happy coincidence with these earrings.)


Imagine the possibilities! Costing only pennies to make and only a few minutes of your time- what's holding you back from making these now?  I'd love to see your creations, so please comment or tag me on Instagram @CutCraftCreate.


Thursday, March 14, 2019

DIY Motherhood Earrings

Oooh boy oh boy you guys, I am SO excited to have actually gotten a craft for myself done.  Not to mention- It. Is. Spectacular.  So here's how this came about: a woman from my church started selling handcrafted earrings (check her items out HERE). I love her pieces and asked about custom designs.  She's not currently doing that but I just kept longing for the design I had in mind. The motherhood symbol.  The problem is, I don't have a machine that cuts wood and I wanted something sturdy. So I came up with this solution that only took me about 15 minutes!


[Disclaimer: This post contains affiliate links to products I used to create these earrings. Purchasing through these links earns me a small commission at no extra charge to you. Thank you for supporting my blog.]


Y'all. This is made from Shrinky Dinks.  The process is simple and fast.  Here's how:

Materials:
-'Crystal Clear' Shrinky Dink paper
Sharpie Marker
Dangle Earring Hooks (jewelry making supply)
-(optional) Printoff of your design to trace *I do not own this design.*


STEP 1:
If you are tracing a design, print off your photo. Make sure that it is 3x larger than you want the finished earrings to be. Mine was about 4.75 inches tall to start. If you are blessed with more of an artistic skill than I am, free hand your design! When finished, cut around your shape.  I suggest using the clear Shrinky Dinks so that your design can look detailed without having to cut a bunch of small pieces. Lastly and very importantly: Using a hole punch, make sure to put a hole at the top to hang the earring pieces from. (remember it gets smaller, so use an actual hole punch!)


STEP 2: 
Bake your pieces! Following the instructions on the Shrinky Dinks, bake your design.  It only takes a minute or two so keep an eye on it. This is the exciting part!


[you can see how large the pre-baked pieces are on a baking sheet vs how small they are in my hands after being in the oven!]


When shrink paper bakes, it not only get smaller but much thicker as well.  So the flimsy pieces become thick and sturdy- perfect for a pair of lightweight but strong earrings!


STEP 3:
Attach your new shrunk pieces to the earring hooks using pliers or a small tool (I used tweezers!) and enjoy!


These turned out exactly how I was hoping and that rarely ever happens so perfectly.  You can do any design you want in any color. Just remember that the marker color does darken when you bake it. I am so in love with these earrings and I love being able to wear a piece that is such a beautiful reminder of this crazy amazing journey of motherhood that I've been blessed to be a part of.


[although my eyes look tired, it's actually allergies.  But I thought tired mom eyes made a good photo too! ha!]


What design would you make?  The opportunities are endless! Join me on Instagram & tag me in your own creations. I'd love to see what you make!


Thursday, August 2, 2018

Super Easy Pressed Flower Pendant

Last week on my facebook page I shared a photo of a quick DIY that I was experimenting with and I had a request to blog about how I did it. I wasn't originally planning on posting a tutorial so I am missing some photos but it's so easy you won't need them anyways.


Here is the photo I shared of my DIY pressed flower necklace:


[Disclosure: This post contains affiliate links to products you can use for this project. Purchasing through these links gives me a small commission at no extra charge to you. Thank you for supporting my blog.]


What you'll need:

- fresh flowers (teeny tiny ones or small leaves/petals)
- a heavy book
ICE Resin Plunger
Blank Bezel Pendants (these are similar to the ones I use)


How to do it:

First you need to find the perfect flowers, pick them and press them. HERE is a really good basic guide on the different ways to dry/preserve a flower.


These were my little wildflowers that I picked. I did not need to cut the stems, water them, etc because they were already so tiny. I just "popped" the head off of about half a dozen of them.


First I tried the pressing between a book technique... (here's how they looked before being pressed flat) A bible with some other books stacked on top of it works great for this if you aren't afraid of accidentally getting it wet/messy. Mine stayed dry.


After about 2 days I was getting impatient so I decided to try the "ironing" technique. I picked a few more flowers and gave it a shot.

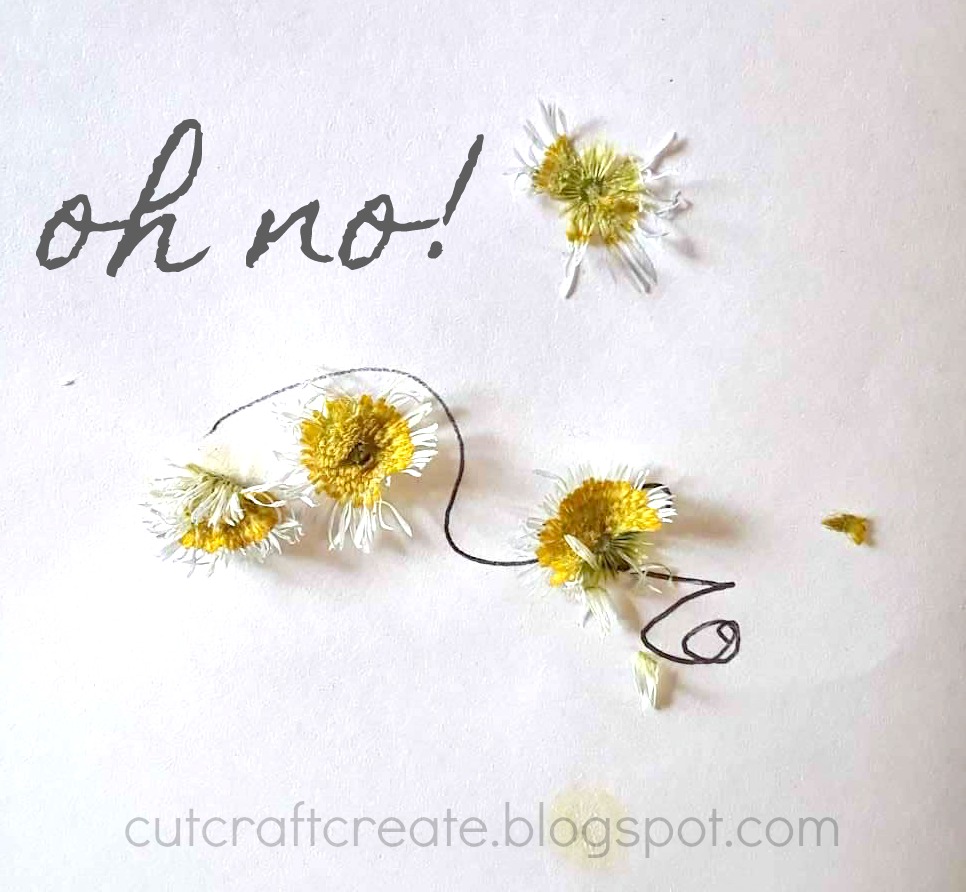
It did not turn out well..


So because I'm impatient, I checked on my book pressed flowers and to my surprise they were completely dried already! I'm guessing the week+ time frame was for much thicker flowers.


Next you mix your ice resin per the instructions (roughly 2 minutes of mixing, let sit 5 minutes). After it's ready put a thin layer of resin inside of your bezel piece and very gently place your dried flower on top of it. Press down so that it's flat against the bottom of the bezel.  After the flower is in place, carefully fill the rest of it with resin so that it surrounds the flower on all sides and on top.  Pop any air bubbles you might have and wipe off any excess that may be on the edge (it should "dome" by itself pretty easily just don't overfill it)


Let dry overnight or per the resin instructions.  I actually put two flowers in mine (one on top of another) in an effort to make the white petals show up a little better. You can tell if you are looking for it but its unnoticeable to anyone quickly glancing at it.


I chose these flowers because 1- they are just so tiny and cute and 2- while playing outside the other day I made my kids these "wildflower crowns" and it just made my heart so happy that I wanted a piece of that memory with me to stay.


That's it. After the resin is fully set up, string your pendant over a chain and enjoy!


Want to share your DIY with others? Just join my facebook page and every Saturday I drop a post where you can share pictures, tutorials and even your own blog posts from the week for everyone to see!  I'd love to see some of your flower jewelry creations on there soon too!


Monday, January 22, 2018

PicturesOnGold.com Review & Valentine's Day Giveaway!

Just the other day I was talking with a friend about Valentine's Day.  The topic came around to whether or not we celebrate with our spouses.  My husband and I do not but I love celebrating it with my little loves- my kiddos. It's fun creating valentines and sending them to grandparents and I especially love the perfect excuse to simply tell my kids all the reasons I love them and have fun celebrating that.  So with Valentine's Day coming up, I want to share with you a very special piece of jewelry I had made to remind me always of my little loves. Oh... and we're giving one away too, so make sure you stick around to enter!


[Disclaimer: I have received free product from PicturesOnGold.com in exchange for an honest review of the products.  All opinions are my own and I only review products that I have personally tried and recommend.]


Here's the thing: I'm obsessed with pictures. I take hundreds of photos a month and I can lose hours of my life looking through old photos on facebook. I love them. Every photo has a memory attached to it and looking at those photos makes my heart so full. That's reason #1 why I love this bracelet. I can literally look down at my wrist whenever I want and be flooded with the beautiful memory behind the photo.


Before I get into what I love and don't love about this product, let me quickly tell you what it's all about:


> The company is called PicturesOnGold.com and it's exactly what it sounds like.

> This company makes a variety of products including lockets, sports jewelry and medical IDs. Today however, I want to focus on the product I have, the Sterling Silver Women's Adjustable Round Photo Engraved Bracelet:

> Items can be engraved with a message, names, dates or even a monogram! (Engraving doesn't delay your shipment either!)

> Picture Engraving is scratch and water resistant and included in the price. 

> These bracelets are adjustable and "one size fits all"

> All Sterling Silver is protected with a tarnish resistance to help it last for years without tarnishing.


My thoughts on it:

Now let me continue my thoughts. I already said that I love that it's a wearable photo. However, I'm also very impressed by what they do with the photo. I sent them a picture taken with my cell phone (and not a good cell phone at that!) and they had no problem using it.  They also remove any background from your photo free of charge! Even though I had seen that on their website I didn't think about it until mine came in and I'm so happy to see the focus being on me and my children and not all the hospital stuff in the background. The image is also color laser engraved so it's not just a picture on top of the charm but actually a part of it.

Here's the original photo that I sent:


And here's how it looks on my bracelet:


Cool, right?  They can also remove marks on your photos and other objects that you don't want in your photo (all free of charge.) That's very cool customer service.

Reason #2 why I love this is because it's adjustable!  I have the smallest wrists known to man kind and every single bracelet I own is terribly loose on me. Seriously, I have to punch new holes in my watches, they're that small. This is adjustable by pulling the rounded box chain through the larger ball piece.  This means that you can stop it at just the right size- no jumping up or down a notch and having to settle.


I tried to get a photo to show what the inside of the larger ball bead looks like. There is a piece of clear plastic or rubber (I can't tell) inside of it that keeps the chains from scratching each other. I can actual feel how "smooth" it pulls through as I adjust it.  I personally like this because I feel more confident that it's going to hold up after repeated use.


Reason #3 why I love it? It's dainty but sturdy. I'm not a fan of bulky chains on jewelry that I wear frequently, especially jewelry that I want to wear when going out somewhere nice. However, I have a 3 year old and a 1 year old so my delicate stuff is always in danger.  Although the chain is very thin in appearance, it's a box chain so it's definitely more durable that many of my others and I love this!


[Here's a peek at the customized engraving on the back too.]


The disk charm with my photo and engraving on it is also very thin but sturdy. I actually tried bending it in the middle with my thumb because I thought it looked thin enough to bend but it didn't budge!  And I pushed really hard! I'm very impressed with the durability in this product.


There's only one small problem that I have with it. On the website it says that the bracelet fits a 6-9 inch wrist. Honestly, it can adjust small enough to fit around a sharpie marker but mine only adjusts to about 7.5 inches at it's largest. This is plenty big for me but if you feel like you would be pushing the limits- message them and ask that they make it just right for you. I've read a multitude of reviews from others that sing their praises about customer service so I am sure they would be more than happy to oblige if you are concerned. I know... a complaint that they would easily fix for you isn't much of a complaint is it? That's all I've got!


Enough talk, here's a giveaway widget so you can enter to win one just like mine (with your own photo and back engraving of course). And if you want to do some additional shopping, make sure you use the code: val10 (that's like Victor, Alpha, Love then the number 10) and get 10% off your purchase! Boo-ya!


This giveaway is for a Sterling Silver Women's Adjustable Round Photo Engraved Bracelet from PicturesOnGold.com. This bracelet includes a photo of your choice on the front and an engraved message of your choice on the back (valued at $79.95)

a Rafflecopter giveaway


Thursday, November 21, 2013

100th Post Giveaway! {Origami Owl}

Today is the day... this is Cut, Craft, Create's 100th post!  How exciting!  Some of you might have noticed that I did not post last Friday.  I had my first Origami Owl jewelry bar on Saturday and was driving myself crazy trying to get everything just right.  It went very well and I am more excited than ever to share these beautiful living lockets.  That why (drum roll please...)

We're having a GIVEAWAY!


 This giveaway is for (1) Plain Silver Mini Living Locket or (1) Plain Silver Medium Living Locket.  If the winner however, would prefer a different color, one with crystals, or a larger size, the giveaway prize is equal to the value of the listed lockets (US $20) to be used towards the purchase of different locket.

Did you know that Origami Owl was started by a fourteen year old?  With $350 of her own babysitting money and a matching fund from her parents, she started the small company in hopes of earning enough money to buy a car at age sixteen.  Are you impressed?  At fourteen I was doing much less impressive things (we won't get into that!)


Living lockets are a unique way to personalize jewelry for yourself or others (psst... they make GREAT Christmas gifts!)  The locket opens and the charms can be changed out as often as you like.

The quality of these lockets are also spectacular!  I had never seen one in person when I first decided to join the team (I loved the concept so much I just jumped right in) and when I got my started kit in the mail I was pleasantly surprised.  The lockets are dainty yet heavy duty and even the charms are a better quality than anything else I have found before.


Living Lockets are a perfect way to tell your story.  What are you passionate about?  Who is most important to you?  What makes your heart beat faster and your face light up each day?  Tell the world through your living locket!


There are so many different colors, styles and sizes to choose from and that's in the locket alone!  Add in a slew of charms (in about anything you could imagine!) plate options and beautiful chains and you've got yourself the perfect necklace.

Did I mention that we make bracelets now too?  Check them out on my Origami Owl page!  They are just like the necklaces in that they are completely 100% personalized by you!


Ignore my "spring" picture, I just wanted to show a few "made up" options for you to see!

Enough Talking!  Where do I enter the giveaway?
Please enter using the Rafflecopter gadget below.  Don't forget to enter under each category, earning yourself more entries!  You may also earn more entries for each new day you participate.  Good luck!  The contest ends November 27, 2013 at 12:00am EST.


  a Rafflecopter giveaway

Happy Crafting,
Kelsie Ann 

Friday, October 4, 2013

{Tutorial} I upcycled my shoes into a bracelet!

This weekend I am finally getting around to having a garage sale at my house.  I have way too much stuff and absolutely no reason to keep it.  Anyone else like that?  It was hard to let a few things go (like my Beatles Posters) but I have decided that it is time to move forward with my life and get rid of everything I don't use.  One thing that I was planning on selling were these darling shoes that sort of looked like moccasins... with heels!  They hurt my feet anymore to wear them but I just couldn't let go of the fabric that was on them.

I had a choice to make: sell these shoes for 50 cents or...

Make a bracelet out of them!


I know, I know... but I love jewelry and I couldn't bear the thought of getting rid of these shoes entirely.

Here's what they looked like before:


They were super easy to make and took just a few minutes...

 The shape of the fabric was perfect for this project.

First, I cut all the brown straps off of the shoe and pulled them out of the eyelets.  Then I cut the two pieces on each shoe apart from each other.


To make the fabric piece fit comfortable around my wrist, I got it wet and placed it around a gift wrapping tube that was roughly the size of my wrist. To hold it down, use a rubber band or a piece of ribbon.  Let dry before removing.


Next, I took the wider piece and hot glued (that's right, you don't have to sew it if you don't want to!) Braiding Cord onto each end.  I chose to put two cords on each side, but that is personal preference.  Make sure to allow room to go around your wrist and to tie.

I finished it with a small piece of spandex fabric so that it was smooth against my wrist and was less likely to come apart.

To tie the ends, I made a slip knot.  I don't think I have ever made them the proper way, but it seems to always work out!  


Trim off any excess cording and voila!  I can't believe how cute this bracelet turned out.  I am so happy that I did not sell these shoes at the garage sale.


Your Turn!
Is there anything lying around your house that could use a new look?  Consider turning it into a new piece of jewelry in just a few minutes.  What do you think about this sort of upcycling?

Happy Crafting,
Kelsie Ann