Showing posts with label Tote. Show all posts

Monday, April 1, 2013

Vintage Wedding Tote Bag

This last week my husband took a group of kids down to Louisiana to build houses for Habitat for Humanity.  He does it every year and I am so proud of him.  This also means that I had a week at home, by myself.  My mom came over to visit and got snowed in for a few days, but other than that I cleaned!  Oh yes, spring cleaning has officially happened, plus spring organizing and spring finally-hanging-those-curtains-we-never-got-around-to-doing.  During my mad-woman cleaning spree I stumbled across an item of mine that is very dear to me- I wonder why I never shared it before:  my wedding tote.  Around two years ago, when I first got engaged, my mother made this tote for me so that I could keep all my binders, folders, papers, etc together in one spot.  It is beautiful...

{I should have emptied it before taking the picture, it is mighty full!}


Isn't that darling?  Our wedding was a rustic/vintage theme, so my mom was spot on with this vintage bride image.  She actually ordered the fabric piece online, cut it down to size and attached it to the bag.

{She knows me so well}


We added a small fabric flower to the corner of the image with a small flower button inside of it.


The border of the image was finished in this beautiful white trim.  Mom liked it because the little loops sort of look like hearts.  Perfect for wedding planning, don't you think?


She finished it off by adding our wedding date to a back pocket.


This adorable tote must have done it's job, because the wedding got planned and now I am married to my best friend.

{I wanted to add her website to the photo so that the picture wasn't taken without credit (please don't do that anyways).  See her website for more awesome photography}


{Your Turn}
Are you like me and just swoon over anything vintage looking? Did you (or someone you know) make something that was cute and helped you plan your wedding, shower or event? I love useful gifts and would love to see what you come up with so please share and comment below.


Happy Crafting,
Kelsie Ann

Tuesday, December 4, 2012

My Winter Gift Exchange Experience

Have any of you ever participated in an online gift exchange before?  Well, Linda from Craftaholics Anonymous plans out two of them every year!  I wanted to participate in the last one but because it was so close to our wedding, I figured I better not try to cram one more thing in!  That being said, I was really excited to participate in my first one this winter.  Linda used Elfster.com to help organize and match people together.  This website can also be used to post your holiday, birthday, anytime wishlists for friends and family.


Even though I went into this entirely clueless, I was really happy with the way things turned out.  The woman I got paired up with is really sweet and seems like such a nice person.  Although I still wasn't sure what I was doing by the time I mailed her gift, I have learned a lot about what to expect and how to go about doing the exchange in the future.

I wanted to show my exchange partner off a little bit because oh my goodness she is crafty!  Here is what she made for me (keep scrolling, there are several things!)


How darling is this bag?  I LOVE the big bow on the front and see the picture on the left?  Those are matching pockets on the inside of the bag!  I was so impressed with her craftsmanship on this, it was so well done.  I immediately switched out the contents from my previous bag to this one.


This gift was actually a perfect gift and she didn't even know it.  Since I've been working in retail, I have seen a lot of people using coin purses and I have been thinking "I should get one of those".  Little did I know, that I was being made one!  What I especially love is how the inside has a different pattern.  So cute!


This is awesome.  It's soft but sturdy and is the perfect size for holding a variety of small crafting goods.  Did you notice that it is made from the same pretty fabric as the bag?  I have been trying to figure out how she made this and I am sure it's easier than it looks but I am impressed to boot!


This one might be my favorite of them all.  I saw that my partner had made a ton of cute pin cushions that she posted online and I almost asked if she could make me one- even if I just bought it from her!  I have been needing one but had not decided what pattern to have put on it.  She made this so perfectly fit for me (I don't know how she did it!)  My favorite colors are green and yellow, I love summertime and I love daisies (which is what that flower looks like, don't you think?)  I am still so tickled impressed by this and by her.


{I would recommend it!}
It's a little tricky your first time into the exchange world, but now that I have experienced it I can't wait to participate in my next one! I am so grateful to my partner for her hard work and brilliant crafting and I hope that she enjoyed her gifts from me as well.

Please note that although these pictures belong to me, the items pictured were not my creation and I do not take credit for them. I am going to talk to my partner and see if she wants her name/info mentioned to link ownership to them. However, I have included this blog name on the pictures so that her work is not floating around the internet without having a source. If she says yes to posting her links, you all should check out her work- she is very creative!

Happy Crafting,
Kelsie Ann

Monday, February 20, 2012

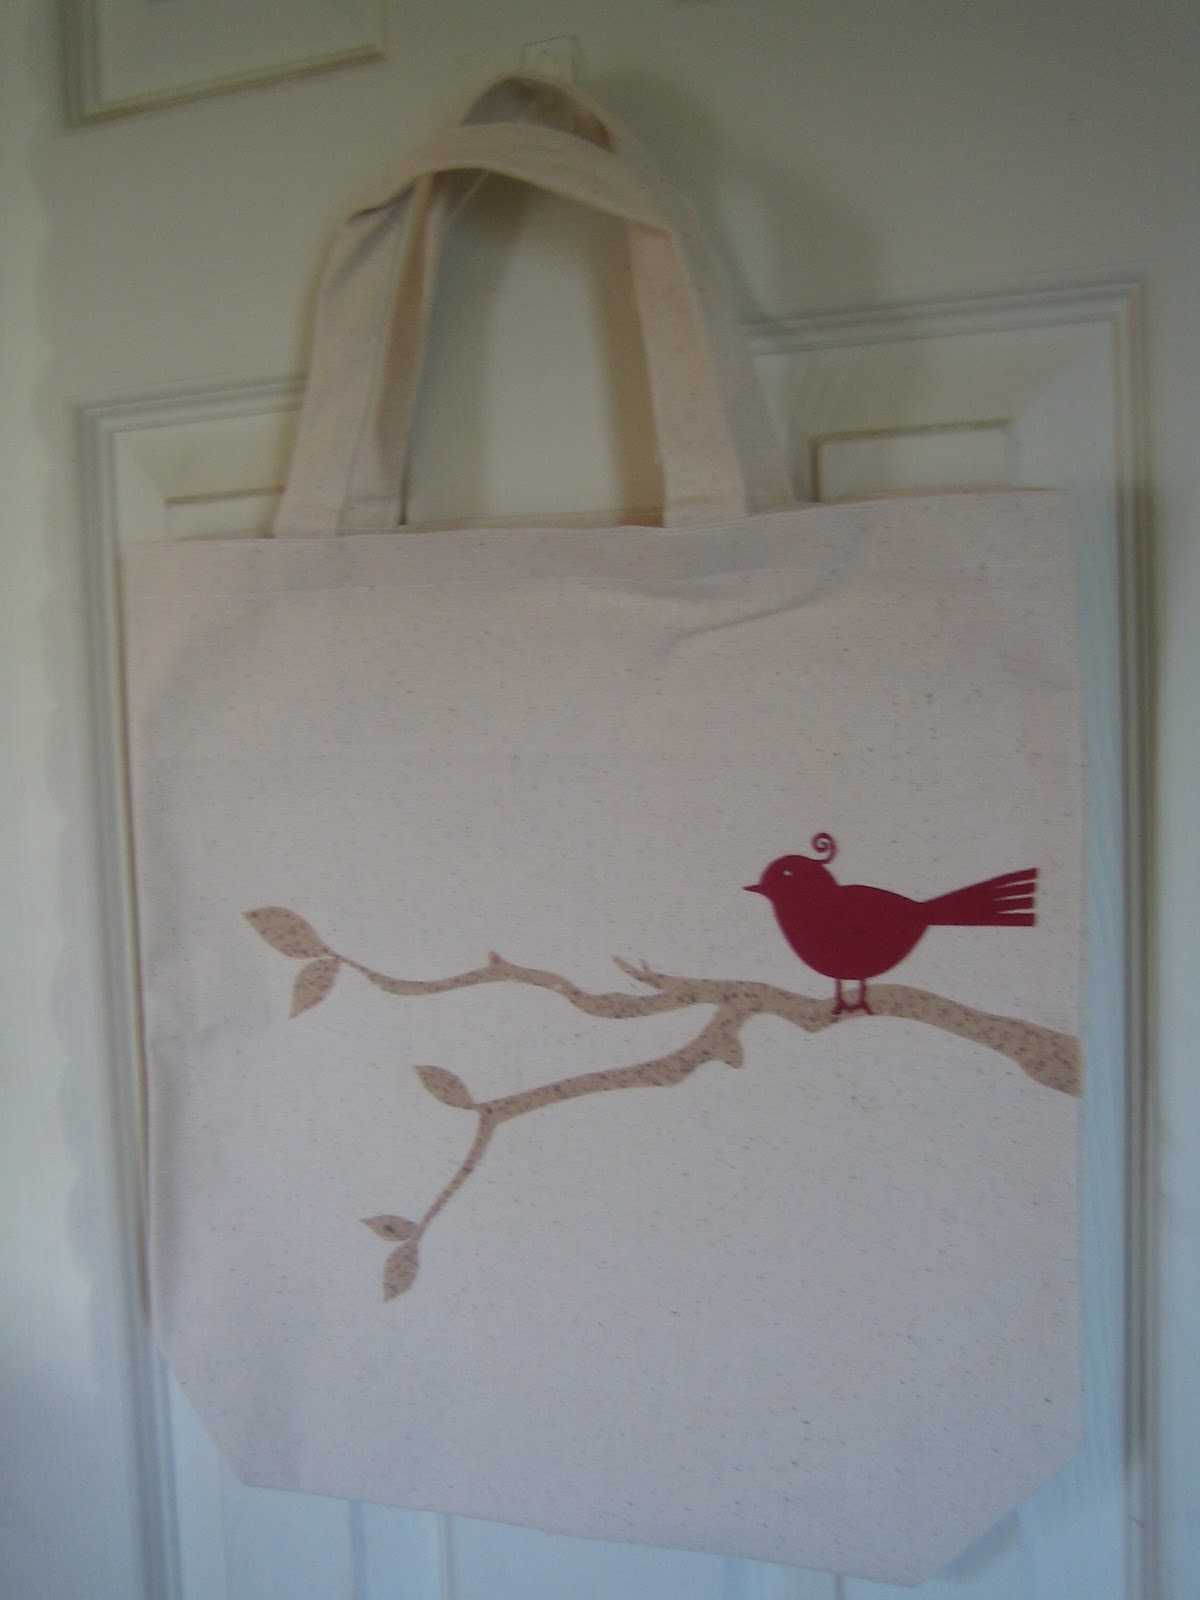
Tote-ally Cute Bird on Branch

Welcome crafters!  I am excited to debut my FIRST EVER blog post for you today.  As I pondered what craft would amaze enough to stand as the FIRST post I could hear the gears turn in my head.  Sticky vinyl?  Iron-on vinyl?  Magnet sheets?  Paper?  I decided on my oldest and dearest material: fabric.  My mama loves the new bird trend (who doesn’t?) so I figured I would make a cute tote bag for her.  No worries for those of you who are non-sewers, I’ll show you how to do a fabric iron-on.  Alright, are you ready?  Let’s make a tote-ally cute bird on branch tote bag! (Play on words are fun aren’t they?)

You will need:
-Fabric of your choice
-Heat n Bond (adhesive backing)
-Blank tote-bag

As well as an iron & ironing board, and of course, your SILHOUETTE!


STEP ONE:

Iron the  backing to the fabric by placing the glue side of the Heat n Bond to the wrong side of the fabric (side you do NOT want showing.) If you are only using a partial sheet you may cut it down before ironing to save materials.


STEP TWO:
Plan your design (choose from the Silhouette Store or make your own) and cut it out.
*If you do not own a Silhouette, cutting out a shape will work about the same.


We’re almost finished.  Don’t you love how quickly this goes?  


STEP THREE:

Set the pieces where you would like them positioned on your tote bag, peel off the paper backing and iron for about 10 seconds.  If you feel it needs a few more seconds, go ahead.


 My design was layered so my ironing was done in 2 steps.


Finished Product:


Voila!  Now I’ve got a finished tote bag for my mama that she can use to hold books, a beach towel or all that yarn for her new crocheting addiction!

Hope you enjoyed this post and have gotten excited to make your very own tote-ally cute tote bag!  Happy Crafting!