Showing posts with label frame. Show all posts

Sunday, November 20, 2016

Custom Frame DIY in 5 minutes!

There is something so satisfying about completing a project that you have been working on for what seems like forever.  I feeling of accomplishment; a feeling that all the little pieces are finally put together; a feeling like you've really created something with your own hands.  There is also something extremely satisfying about being able to complete a project that you love in 5 minutes.  Now THAT'S what I'm talking about. 

[Disclaimer:  This post contains affiliate links.  Purchasing items through the links gives me a small commission with no extra charge to you.  I only link up products I personally use and trust.  Thank you for supporting my blog.]

I love to craft and I have so many projects in mind (most of them being those "large" time consuming ones) that I sometimes feel like I don't accomplish anything because of my limited schedule.  That's why quick and easy 5 minute projects like this one are always my favorites.  They are the little projects that keep me going in between the big ones.  And hello- how cute is this?

(psst: you've seen it before in this post but here is the tutorial)


Make your own frame in any design or pattern you wish!  I made this frame to use during my son's 2nd birthday party but love the design so much I plan to use it around the house for other decoration or to hold family photos.


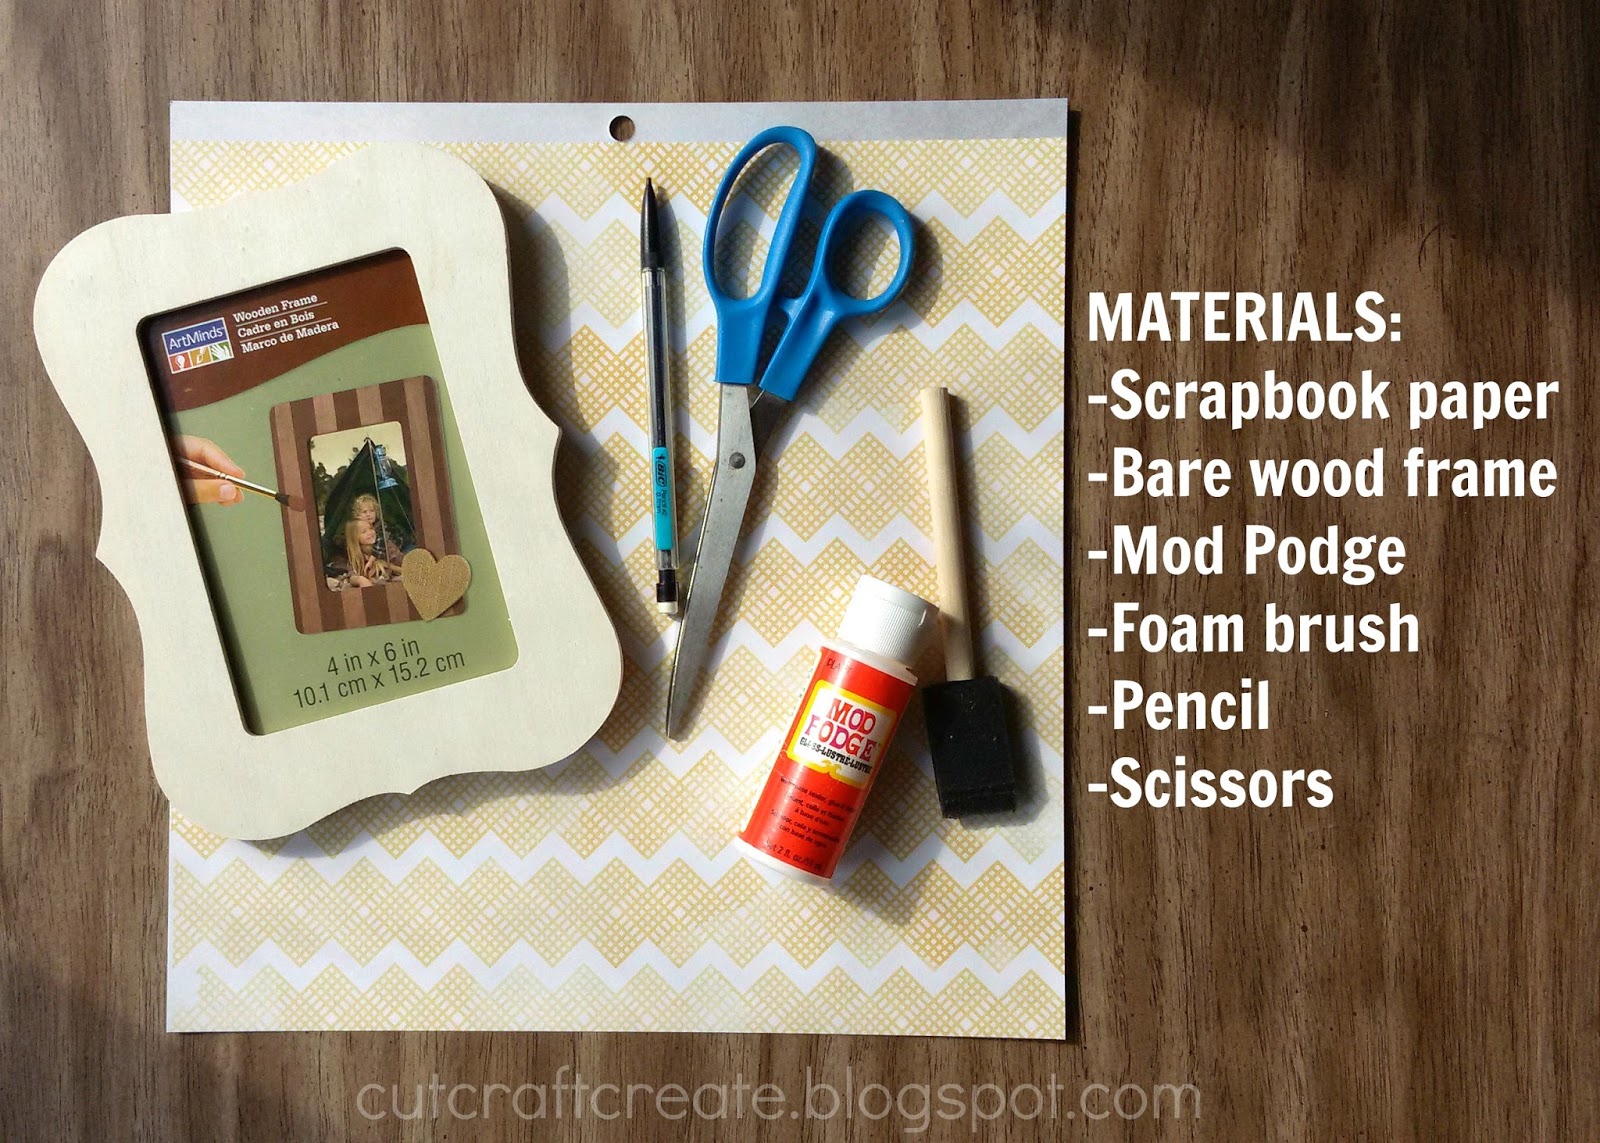
Here's what you'll need:


I purchased the frame at Michaels Craft Store (I got several of them in different border shapes for only a dollar or so) and like these because they are made for craft projects.  The wood is actually bare (no paint, stain or sealer) so it takes to these DIY projects much better than an old finished frame.


Ready to start?
It really does take around 5 minutes start to finish to make this frame and only a few simple steps.  I took lots of photos but it will only take you about as long to complete them as it does to read them.


Step 1:
Flip your frame front side down on the scrapbook paper and trace the outline of the frame (the outside and inside both).


Step 2:
Cut out the piece you just traced.  It should look exactly like the wood portion of your frame.


Step 3:
Cover wood frame with Mod Podge using a foam brush.  Make sure to get it all the way to the edges.  You only need enough for the paper to stick so don't go nuts or it will just ooze out the sides.


Step 4:
Place your paper on top of the wet Mod Podge, pressing firmly along the edges.  Finish by covering the top of the paper with another light layer of Mod Podge.  This will give it a more finished look and help protect it from wear.


{That's it!}
There you have it folks.  I told you it would take just as long to read the instructions as it does to make it.  Love this easy way to decorate around the house and how cute would these be as gifts for Christmas or to your kid's school teacher?  Buy a frame with glass in it and make your own dry erase board (tutorial here) which may make an even cooler gift.  (Psst... see how else I used the DIY dry erase board for a party activity!)


Tuesday, May 24, 2016

DIY Reminder Board {Dry Erase} in minutes!

Show of hands- how many of you have things going on during the day that differs from the person living in the same house as you?  I'm guessing about everyone is raising their hand right now.  In our home we have events that everyone goes to (like small group or family gatherings) but we also have times when one of us is doing something without the other (my husband is a track coach and in the spring he often has meets that run past dinner time or even bedtime).  Being a busy mom- or just a busy human being in general- has scattered my brain and even if my husband says "I won't be home for supper" before leaving for work, I still have to send him an e-mail at 2 PM asking if I need to make supper.


Please tell me I'm not the only one here?  If you're scatterbrained like me, first- know that's it's okay and that I understand you.  We're in this together.  Second- I have a solution for you.  Better yet?  It's super fast, easy and cheap to make!


Here's what you need:


- Frame with glass (I opted for a larger frame because I wanted room to write extra "notes" but any size will do)  Check out the dollar store or Goodwill for cheap frames!

- Scrapbook paper

- (optional) stickers for titles, days or anything you want to always be on the board.

- Dry erase marker


It's so easy to make...


Remove any papers or photos that are inside of your frame.  Cut your scrapbook paper down to size so that it will fit inside the frame.

Add any stickers that you might have wanted to include.  If you have a cutting machine, you can also cut letters out "mirrored" so that they can stick directly to the inside of the glass instead of the paper.  To do this, simply type your text and then flip horizontally" before cutting.  I chose to do this for one reason only- I can swap out the paper quickly and easily whenever I want a fresh look!


{Font used here is bromello - one of my favorites!}


That's it!  
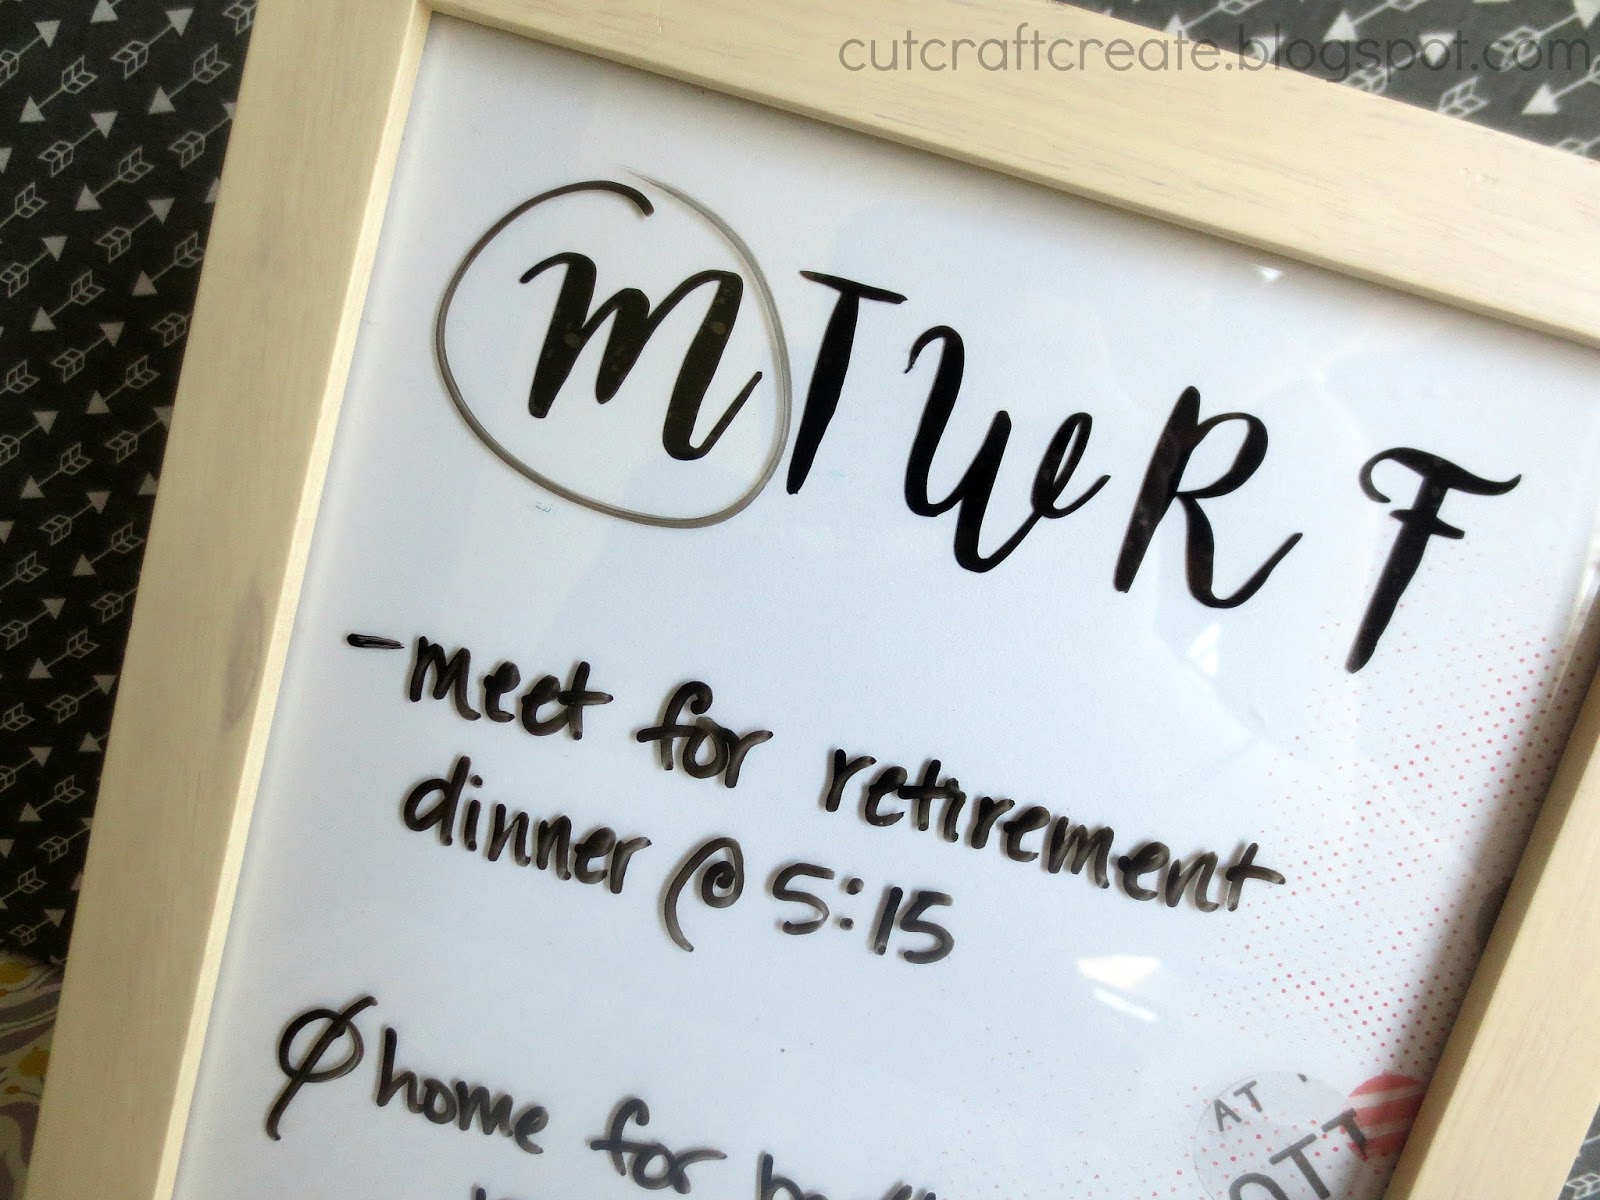
Put it together and write on it with your dry erase marker.  I made ours so that we can circle the day and then write our notes on it.  I don't really need to know what is going on, I just need to know if I'm responsible for family supper, if I need to be somewhere and if I need to hold off bedtime a few minutes so that my husband can say goodnight to our son.


The possibilities are endless!
Don't need a reminder board?  Use it to write quick notes to yourself or each other...


...or use it to plan out your meals for the day (I wish I was this organized.  More like "uhh what do we have in the refrigerator?"


Do you need one of these for your home?  It only takes a few minutes so don't wait- go make one now!

Happy Crafting,
Kelsie Ann

Wednesday, February 10, 2016

Decorating Tip #5 {Vintage Clothesline Frame}

Welcome back friends!  For those of you who are new to Cut, Craft, Create- thanks for joining me!  Besides a few breaks for giveaways (because, how fun is giving away awesome stuff?!), I have spent each week of 2016 thus far showing off details from my son's nursery.  I hope these tips and tricks have inspired you not only to create a precious nursery but to use the ideas throughout your home.

If you have missed it so far, catch up on tips 12,3 and 4 by clicking the links.

This week I wanted to show off one of my favorite elements from the nursery.  It is so simple to do but makes a huge statement!


Seriously, you need 4 items (and they are so easy to get!)
- Large Frame
- Twine
- Clothespins
- Romper/Onesie/ Dress, etc.

Funny story about the frame.  My husband was cleaning out one of our buildings that is full of junk from the previous owners.  I happened to walk past the truck and see this BEAUTIFUL frame tossed into the truck bed.  Not only was it a big frame but it is such a pretty off white/ivory color (it's hard to see in these photos because the lighting in the nursery is poor) and is naturally distressed.  My husband thought it looked like it needed cleaned up, I thought it was perfect.


All I had to do was grab some twine, tie it to the frame (nothing fancy, look closely, you can see it wrapped around the frame!) and voila!

When I first hung this up, I wasn't sure what outfit was going to hang in it.  I thought maybe the hospital outfit or one of his first little onesies.  However, at the baby shower my mom hosted, I met this handmade Peter Rabbit romper and it was love at first sight!  My mom purchased it from etsy for my son to wear and never thought it would become a staple in the nursery decor. (Because it's a non stretchy material and my son has one giant head, he never actually fit into it. *boo hoo hoo*  By the time he was tall enough his head was too big.  I think it would probably  have fit a more "average" sized baby.  The seller offered to return it but I love it hanging!)  I'm just glad we were able to display it this way so that such a beautiful piece was used in one way or another.

{Photo from my baby shower.  My mom made that personalized onesie and bib!}


Finish by hanging your outfit up using a couple clothespins.  You can buy a whole pack of them for $1 at the dollar store.  I painted these green to match the nursery decor.

{Loving this romper?  Head over to Cornflower Creations on etsy to see all of her designs for purchase.}

Want to make some super cute decorative clothespins out of the blank dollar store ones?  Check out this post from our wedding!


I positioned this lovely piece of artwork above the changing station (check back in future weeks for a tutorial on how to make your own!) and it's perfect!  Because of it's large frame it draws your attention and takes up a good amount of wall space.  However, because it doesn't weigh much, I feel comfortable hanging it above something that my baby is laying on!


There you have it.  Told you it was simple... and oh so lovely.  I only wish the photos did that old frame justice!

This would be a great decorating idea for another child's room or a "man-cave" (think favorite player's jersey!) as well as any other themed nursery.


Happy Crafting,
Kelsie Ann

Tuesday, January 26, 2016

Decorating Tip #4 {Wall Collage with SIX fun ideas!}

If you've been following along with us over the last couple of weeks you know that I have been sharing design elements that I used in decorating my son's nursery.  If you are new to Cut, Craft, Create, don't forget to catch up on the first and second posts.  Don't worry if you aren't decorating a baby's room- these tips can be used in all rooms of your home or even in your office!


Today's decorating tip is a wall art collage that takes common design elements and fills it with some unexpected details.


There are 6 parts to this design.  You can replace each of these details to fit your room/theme in particular to make it your own.


#1- Word Art (With AMAZING frame!)


I typed up words that I think of when imagining my sweet little boy growing up and experiencing life.  Some of these words were: run, play, dirt, curious, joy, adventure, and explore (my favorite word on there).  I want my child to experience life in all it's messiness.  I want him to explore his world and play in the dirt.  I also included his name to be positioned in the very center of the word collage (For the sake of not having his full name plastered across the internet, I changed it above to "Baby Thumper!"  Thanks photo editing!)

After typing up several of each word in different fonts and sizes, I printed it out on regular paper and cut into strips.  I chose to then tea-stain the paper strips (make unsweetened tea or coffee and then "blot" the paper with a sponge).  This is optional, I just like the look.  Let the paper dry before continuing.


To put it all together I made a backing that fit just inside the frame from a heavier cardstock.  Then using a basic glue stick (found in the scrapbooking or adhesive sections of any store) I stuck all those tiny little paper strips on to the backing.  Put it all together, hang and enjoy!

(Note:  Check out your local thrift stores, flea markets, antique shops, etc for inexpensive but beautiful frames such as this one!)


#2- Detail Memorabilia


For my son's Peter Rabbit nursery I opted to hang a "vintage" copy of the Peter Rabbit story with a crisp black frame around it.  The two pieces are not connected in any way.  The frame was hung as usual and the book was hung with a nail just inside the front cover.  I then stuck the front cover to the first page with a few Zots (glue dots) so that the cover didn't swing open but the nail is still "hidden".

For another room, you could use this idea to hang up your grandmother's necklace, a family crest, special ribbons, etc. The possibilities are endless!


#3- Large Focal Picture


I'm not going to say much about this because there are so many examples of this photo on Pinterest- such as this one, this one, and this one (which is a little different but I love just the same).  I wish I would have had my letter blocks to spell out his name across the bottom but ended up using large chipboard letters from my scrapbooking supply (again, I covered his name in this photo)

For a room other than a nursery, make a large print of a favorite family photo, an aerial photo of your home or even just something you like (think: stunning photo of the Grand Canyon, etc).  I recommend Shutterfly for photo prints and they have deals all the time where you can get a 16x20 print for free (just pay shipping).


#4- Inspirational Quote


I made this out of extra foam board I had from my anniversary map (never throw anything away- ha!), cut it to the shape I wanted, painted it with acrylic paint and put vinyl lettering on top.  We actually made this as a prop for one of our maternity photos and loved it so much it became a part of the nursery.

{Photo via J. Hendon Photography}

You could make your favorite quote, phrase or just something fun (like "whip it good" in the kitchen!) in the same way I did, or by creating a wood sign, painting a canvas or even printing on paper!   This one is so easy to personalize and if you find a sign in a store you like, even easier!


#5- Monogram Piece


We've all seen the different ways that these craft letters can be decorated and used.  Many times they are displayed in a nursery to spell out baby's name.  I suggest using only the first letter in a larger collage like this.  It's personalized and sweet without having their name everywhere (especially since his name was already present in a few other design elements shown already).

For another room, simply use the initial of your family's last name.  The year that you got married or some other significant date could be used as well.

{Love the engraved button with our last name? My mom ordered these for me from Pick Your Plum.  It's a company that features a few different items on super sale each day.  They probably wont have these buttons again *maybe!*, but it's definitely worth checking them out!}


#6- Smaller Photo Frame Set


Using some extra 4x6 frames I had on hand, I hung them in a horizontal-vertical-horizontal-vertical pattern along the right side of the collage.  These were all photos from the first few days of our son's life while still in the hospital.  One of just him, one each of him with mommy/daddy and our first family photo (which I looooove!)

It's easy to use this idea in any layout to make a "line" along an edge and bring together all the separate pieces a little better.


{Your Turn!}
Which design element is your favorite?  My son loves looking at the photos of him (#3 and #6) and touching all of the different textures on the wall.  This would be a great project for a large open space in a living room- personalize with family initials, special photos and important family mementos!

Happy Crafting,
Kelsie Ann

Monday, April 8, 2013

Frame Your Memories & Mementos

Let me start off by saying that I LOVE this project.  I haven't had the chance to hang it up yet but I seriously pick it up every time I walk past it.  Maybe I am crazy, maybe it's just that good.  You be the judge.

My husband and I got married last summer and like many people do, we saved his boutonniere (I took apart my bouquet but use the billy balls in decoration around the house) and let it dry.  There it sat, on top of a bookcase for around 10 months.  I wasn't sure what to do with it but I knew it wanted to keep it.  Then one day it hit me- frame it! 


Depending on the size of your memento, find a frame that will fit around it with room to spare (so it doesn't look too crowded).  I found the perfect sized frame but had to make a few changes to it.  I ripped off the backing, took out the staples and removed the mat and picture that was already in there- leaving only the glass and frame.  Check out Goodwill or the Salvation Army for some cheap frames that you don't mind altering a bit!


I used vinyl for the wording and hot glued the boutonniere on.  Easy peasy. 

{Because of the font, the silhouette made cut marks between some of the letters.  At first I thought I would re-do it but once it was up I loved the chipped look of it!}


A final look at the finished product:

{I love that it's see through.  No mat, no extras drawing the eye away from the good stuff.  Just lovely}


If you are wondering how I picked "our big adventure" here's the story:  I wont give away all the details of my husband's marriage proposal because that's our thing that only we know but I will say that it involved a theme of "our big adventure".  We were getting ready to hike the Grand Canyon (an adventure for sure) and we were looking ahead to our lives together (an even bigger adventure).  Putting these few beautiful words next to his boutonniere just seemed right.


{Your Turn}
What special memories and mementos would you frame? As soon as I get the tools to do it, I am hanging this beauty right in our living room where we can see it everyday. It is not just lovely to look at, but a constant reminder that we are in this big adventure together.


Happy Crafting,
Kelsie Ann