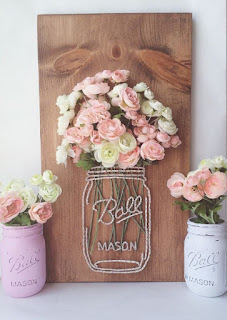
{Via Blossoming Burlap}
{Via Ladams Lane}
{Via Unpolished and Pretty}
*Seriously though, how amazing are those designs? I love all things personalized (they make great wedding gifts) and those actual flowers sticking out of the jar? Adorable!
Well, I could and if I can do it so can you! I created a sign with one of my favorite quotes and planned to use it at my son's birthday party and to hang in his room as well. It's an inexpensive craft and fairly easy to do. Honestly, the hardest part is deciding how to run the string (maybe I'm just too indecisive?) but I think with a little practice these projects could be a breeze!
{I can't believe his first birthday was almost a year ago already! This sign uses the blue/orange color scheme that looks oh-so-lovely.}
[Disclosure: This post contains affiliate links. Purchasing items from those links pays me a small commission at no extra charge to you. All items are included because I use them and personally recommend them.]
Here's what you'll need:
- a piece of wood in size of your choosing
- Wire Nails (I got mine at Lowe's in size 1/2 x 19)
- Acrylic Paints
- Foam Brushes
- String (pictured is jute twine but I ended up using DMC thread
Sorry I don't have step by step photos for you but it's so easy you wont need them!
Step 1: Paint your wood and let dry.
Step 2: Using a pencil, draw out dots to "sketch" your design so that you will know where to put the nail holes.
Step 3: Using a stencil or free hand, add any message or picture you want to show up in paint. let dry.
{Love those colors}
Step 4: Insert the nails, leaving them stick up enough to catch the string.
Step 5: Tie the string onto your starter nail (I suggest a middle point) and start running your string around the nails. Nothing is set in stone so feel free to play around until you get the desired look you want. Straight lines are easy because you don't have to weave them but make sure you wrap your string whenever making a turn. This makes more sense as you are doing it, I promise. When you are satisfied with the look, tie another knot at the end and trim any extra.
That's it! Imagine the possibilities! I thought this arrow design was pretty simple but I'm excited to try some more advanced designs. What design do you think you would make?


No comments:
Post a Comment